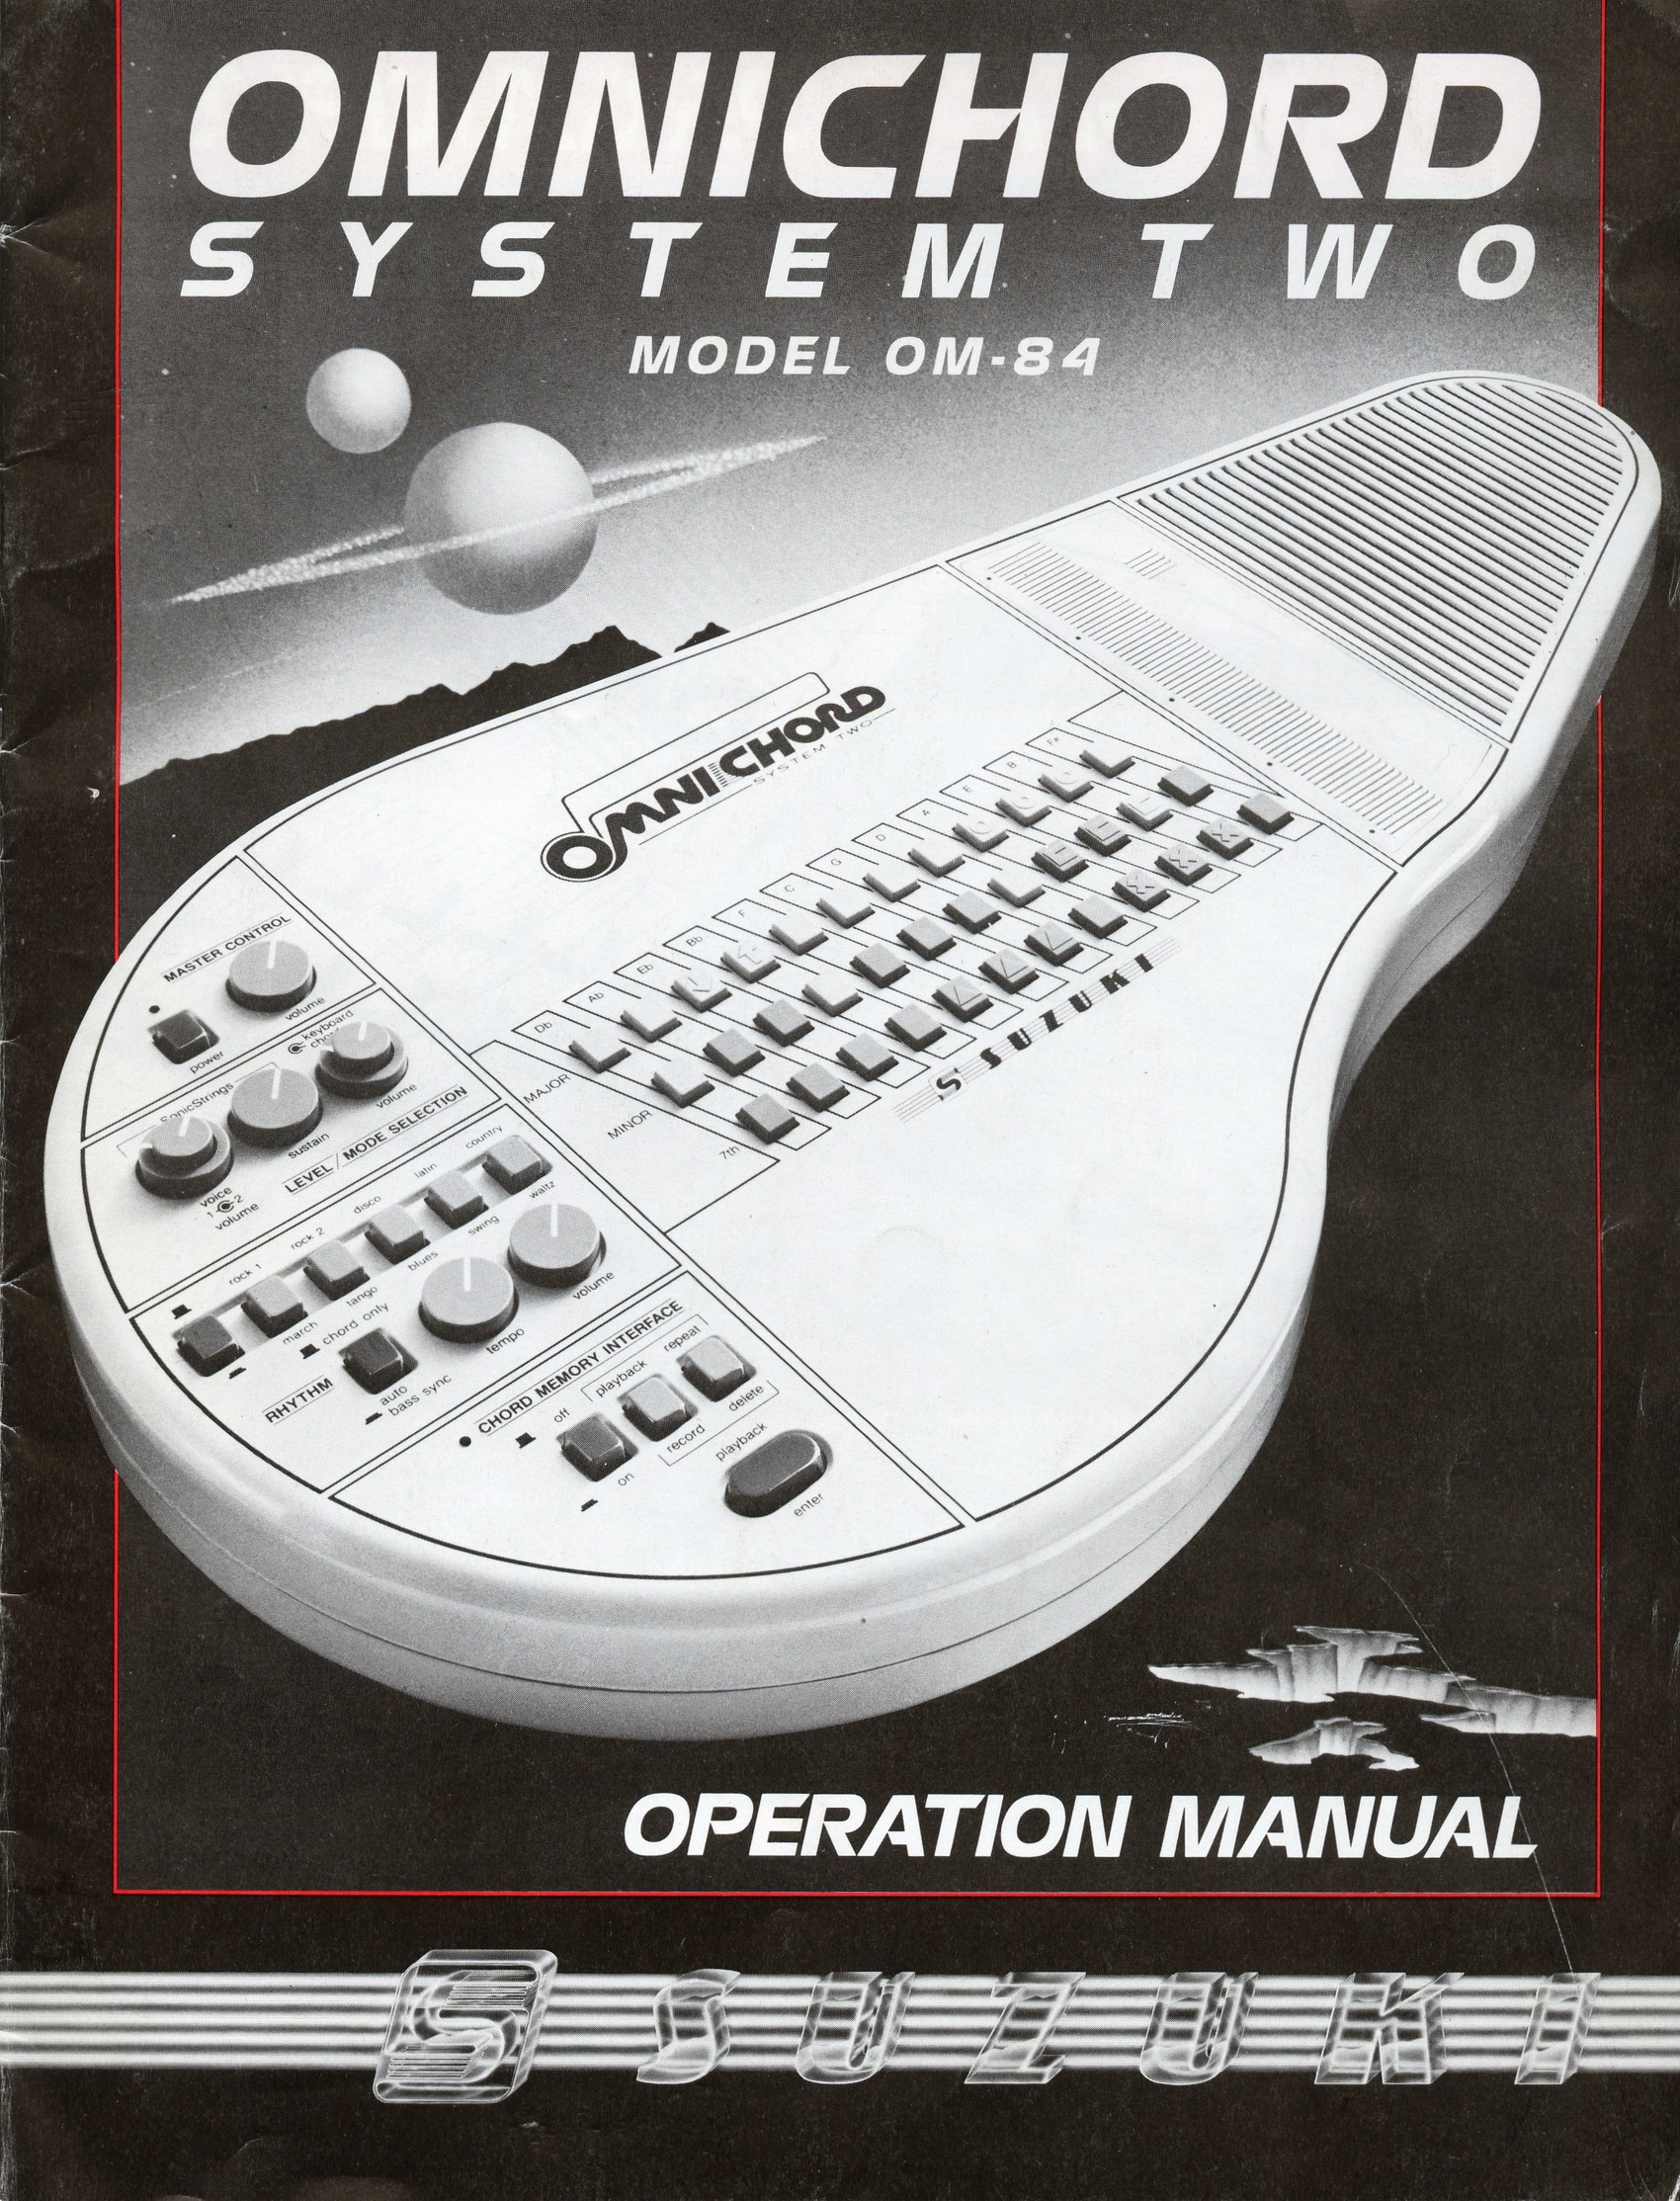
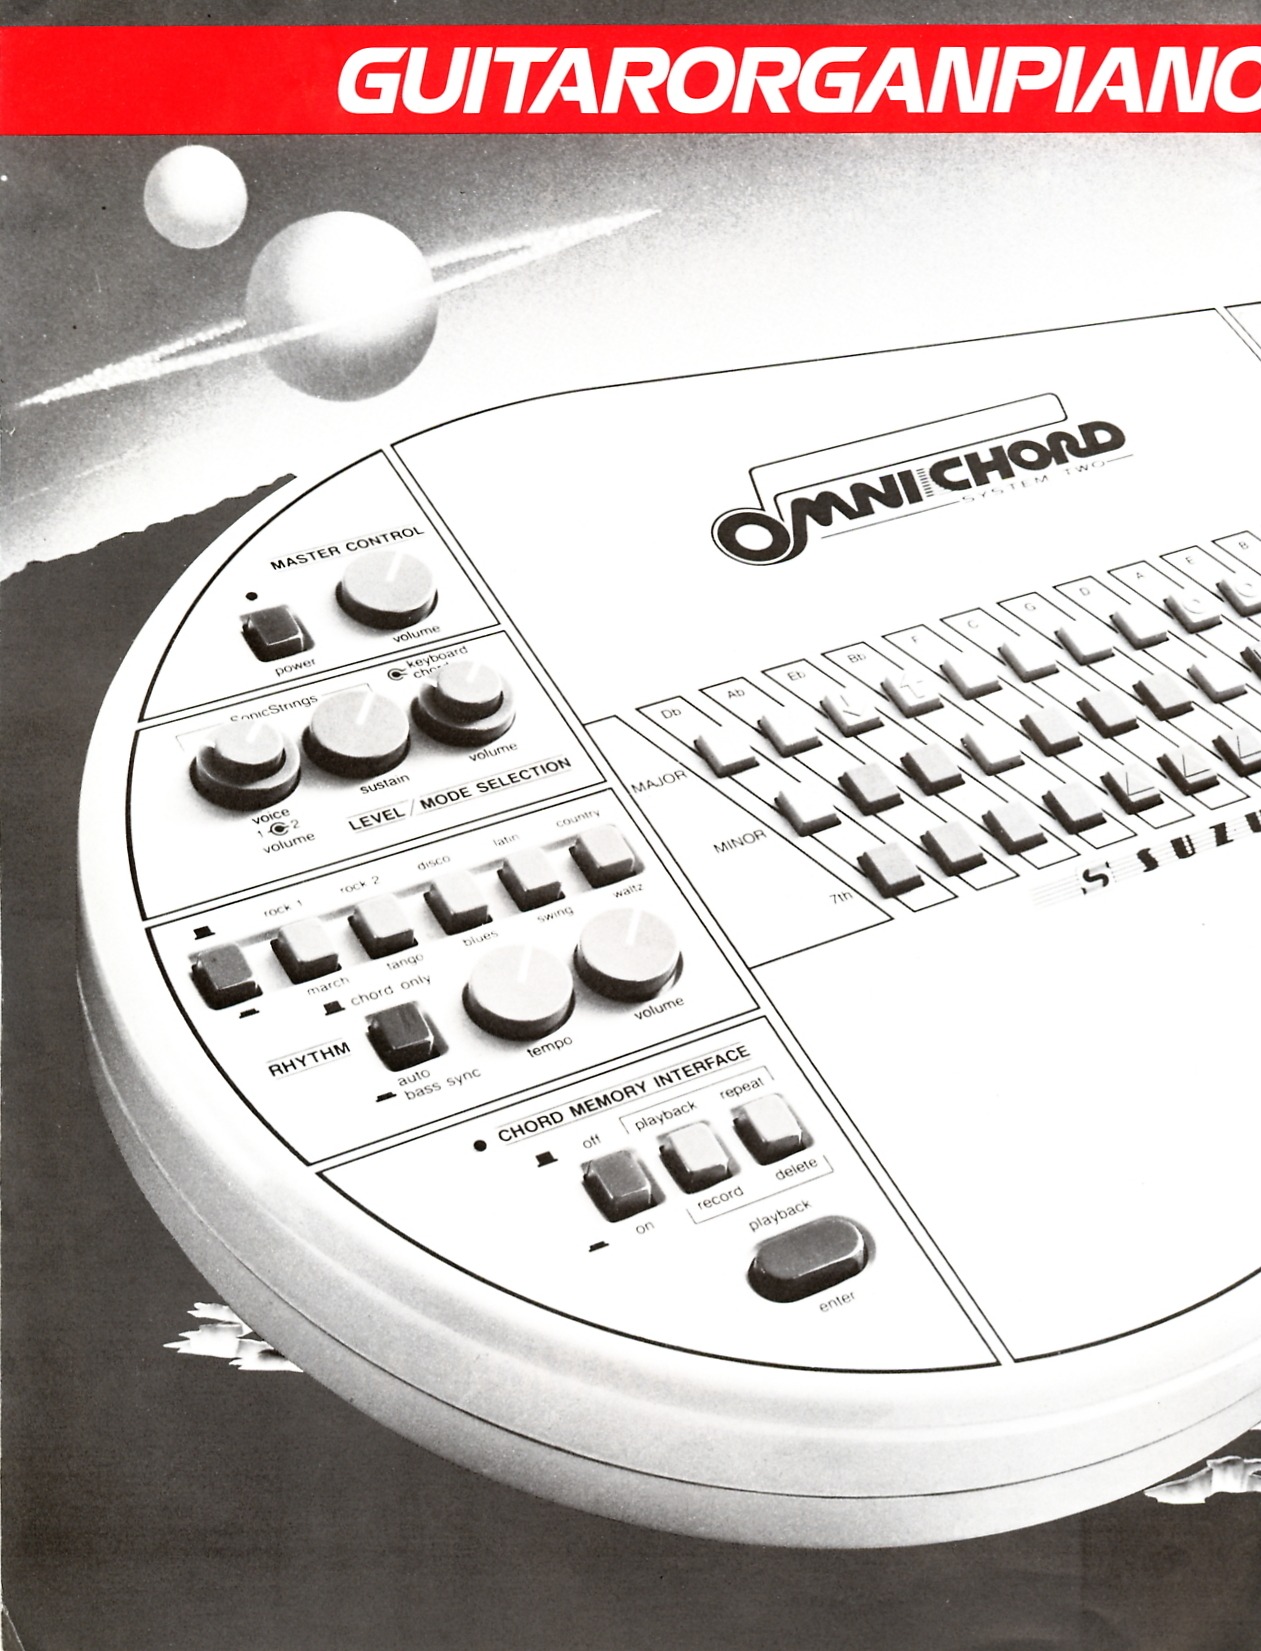
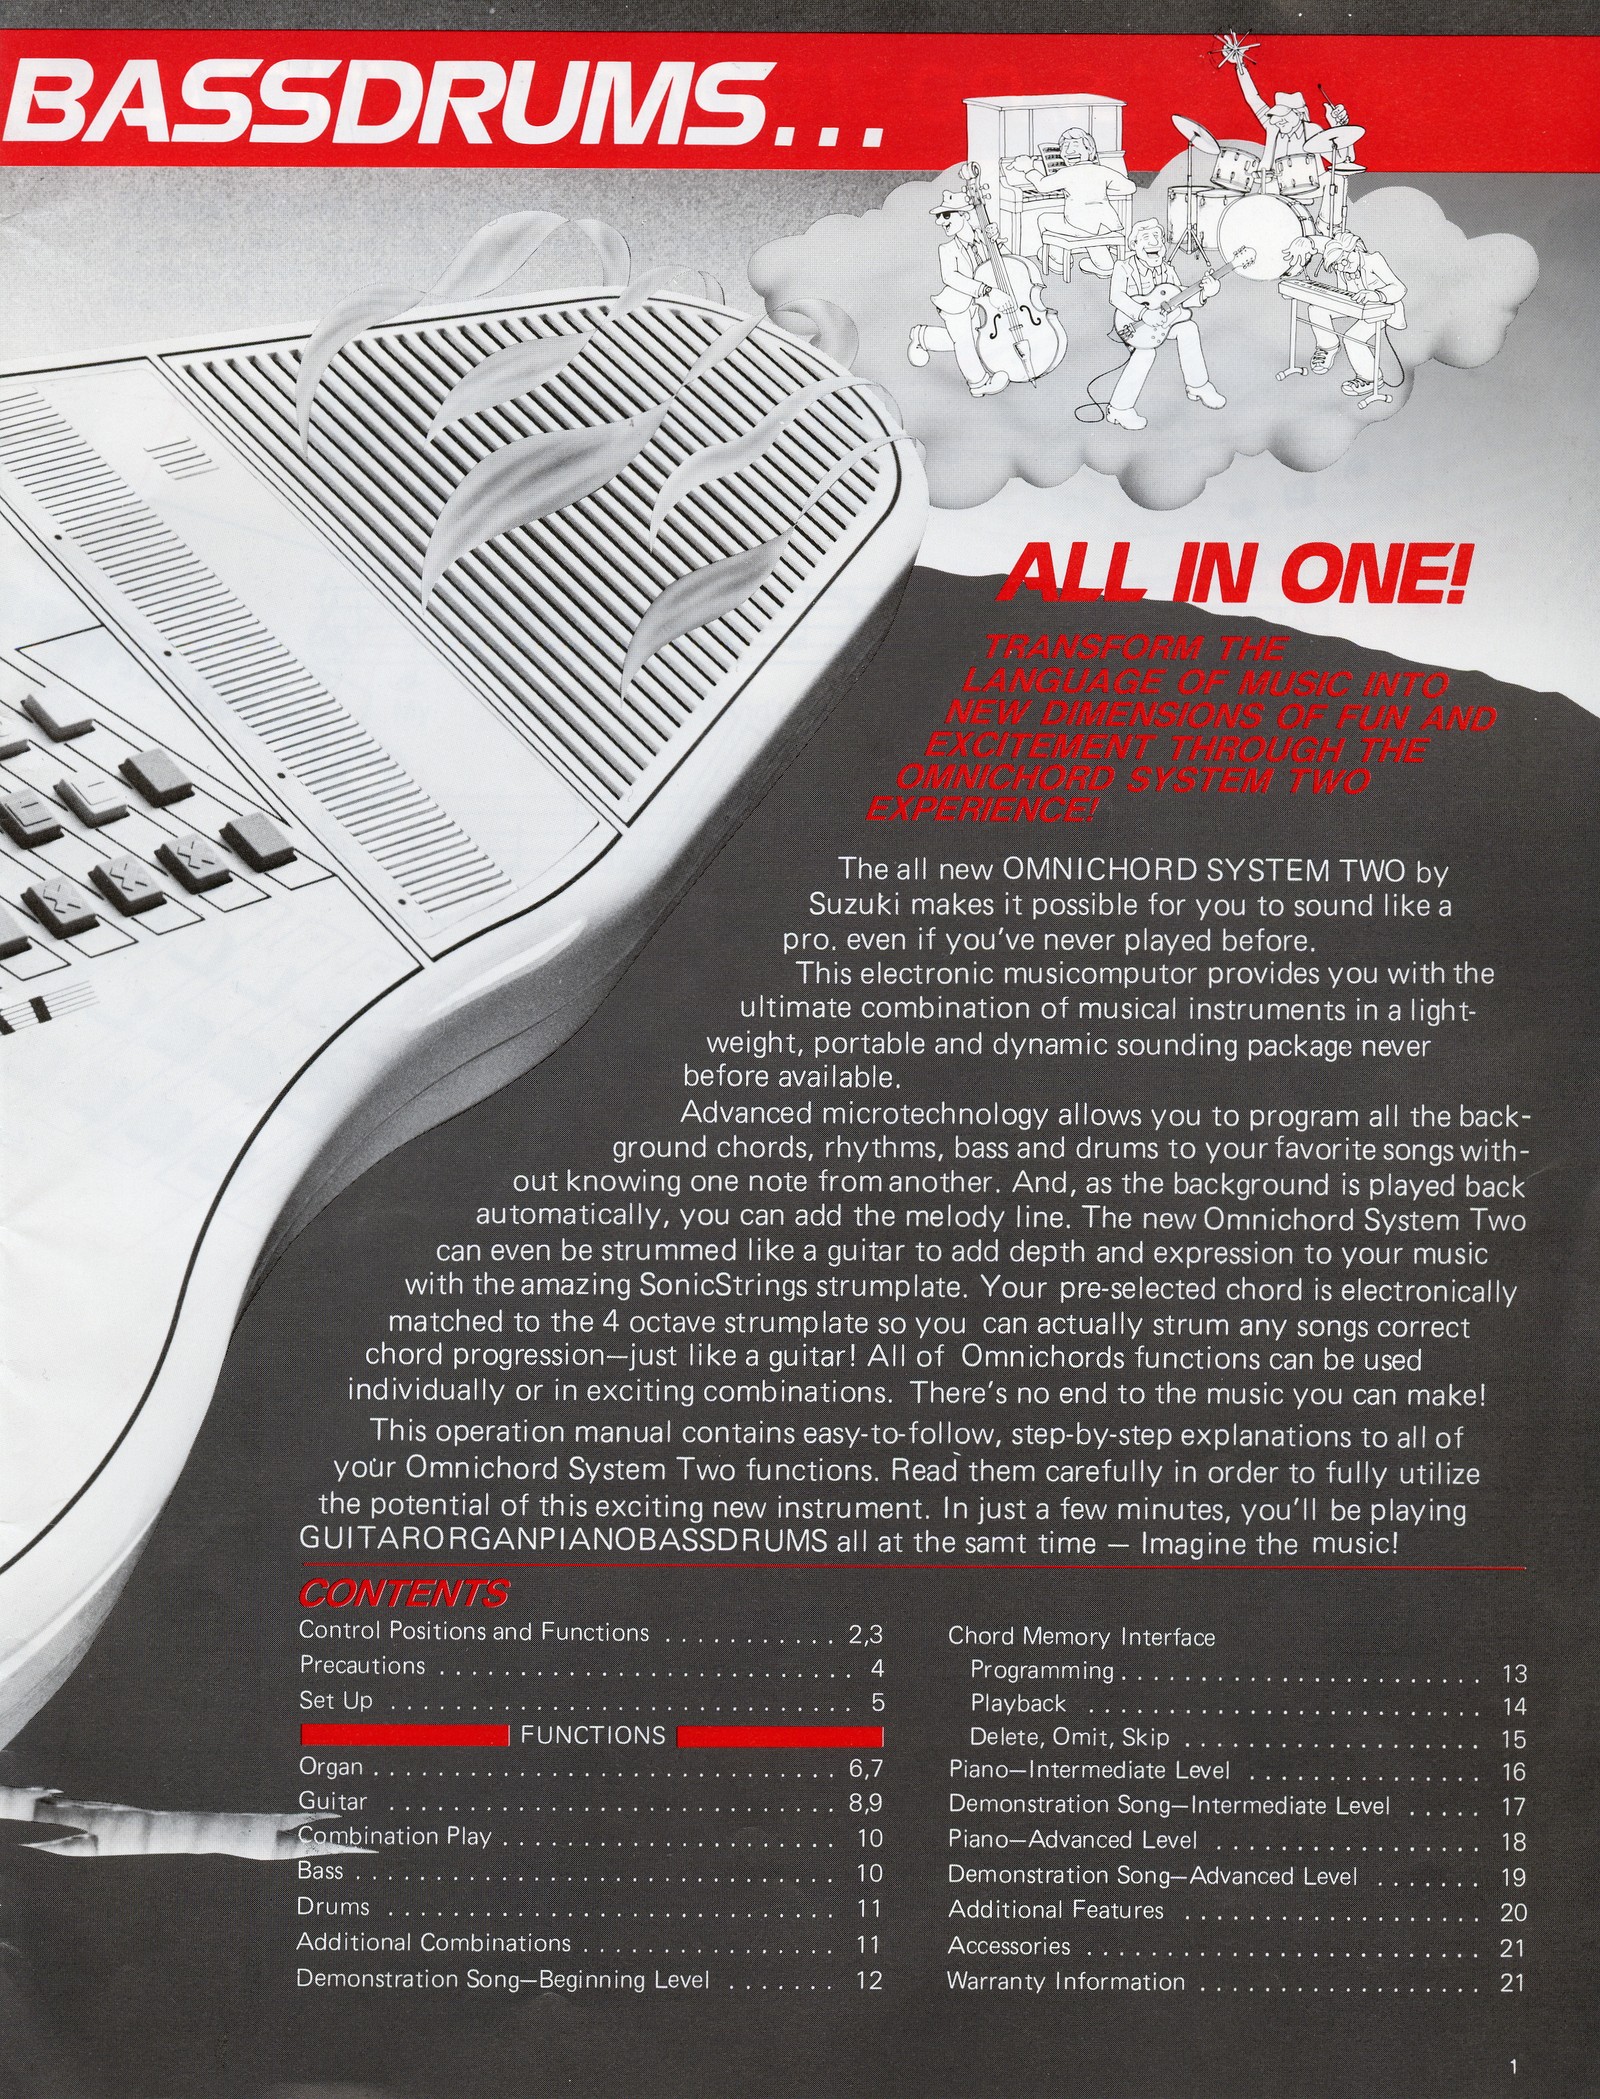
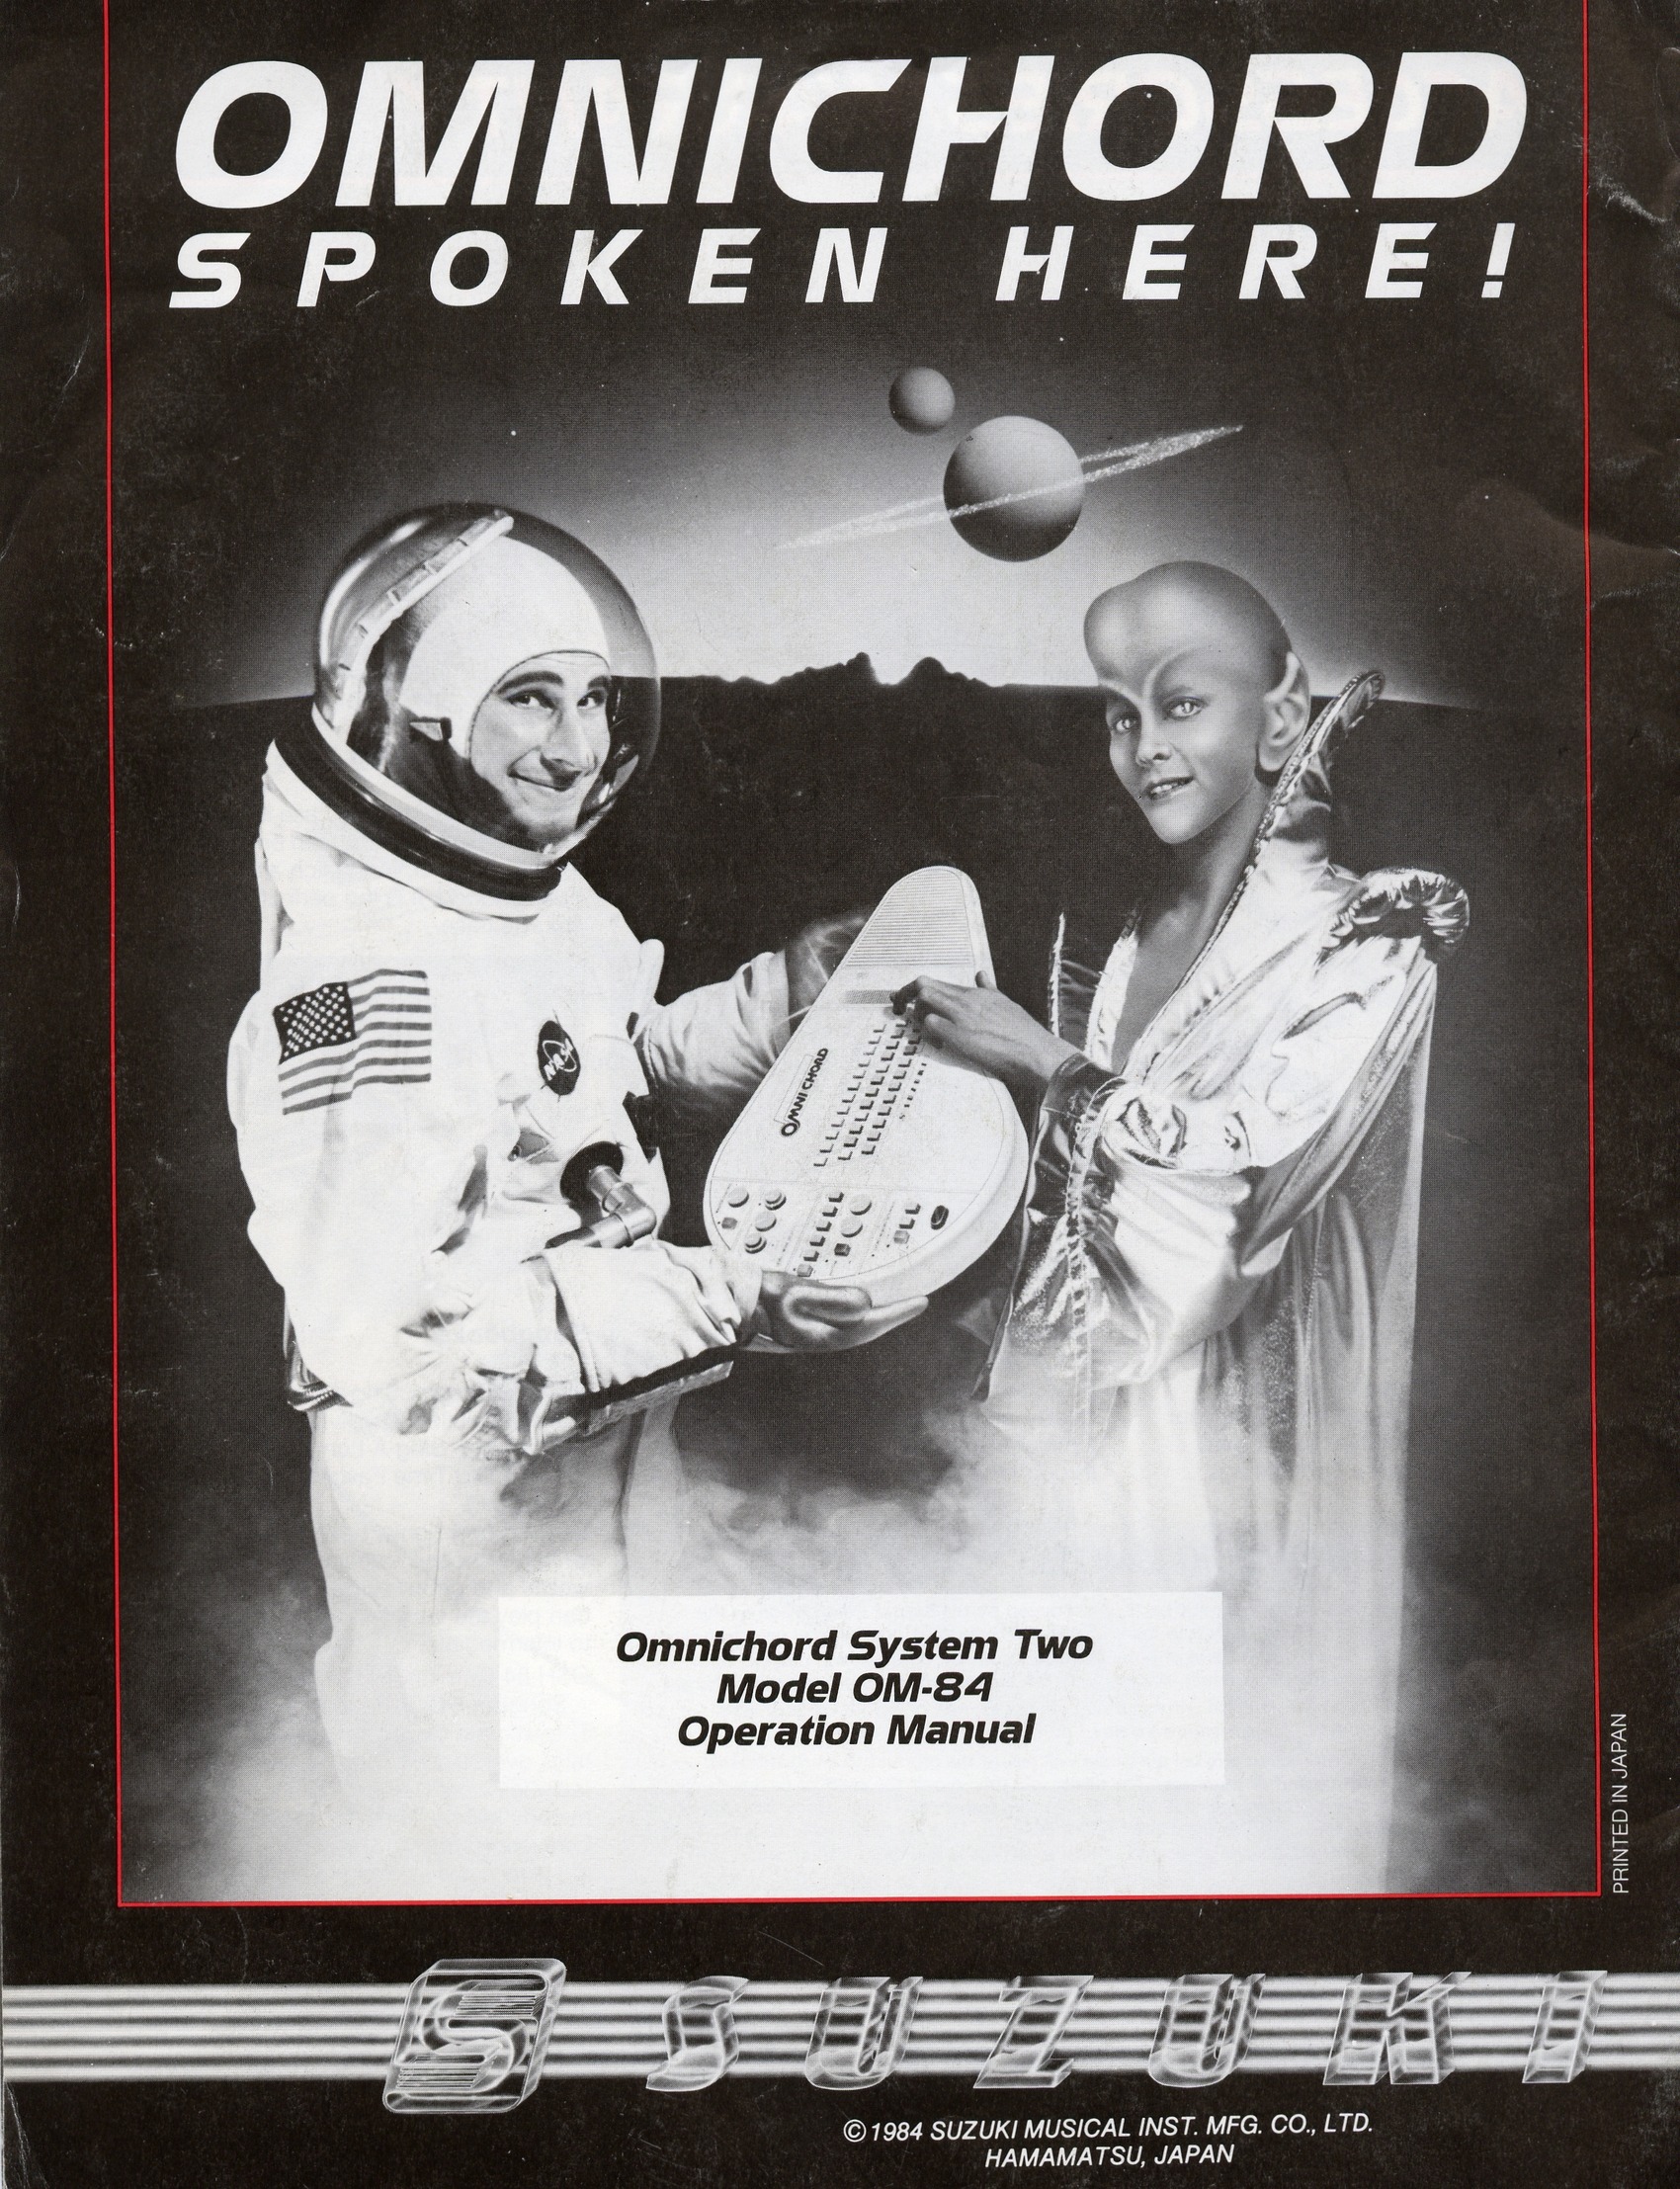
The Omnichord System Two makes it possible to sound like a pro even if you have never played before. This electronic musicomputer combines several musical instruments in a lightweight, portable and dynamic-sounding package.
Advanced microtechnology lets you program the background chords, rhythms, bass and drums for favourite songs without knowing one note from another. While the background plays automatically, you can add the melody line. The Omnichord can also be strummed like a guitar with the SonicStrings Strumplate. A selected chord is electronically matched to the four-octave strumplate, and every function can be used alone or in combination.
This operation manual gives step-by-step explanations of the Omnichord System Two functions. Read it carefully to make full use of the instrument.
Control Positions and Functions
Precautions
Set-Up
Organ - One Finger and Multiple Finger Chord Play
Guitar - SonicStrings Strumplate
Combination Play
Bass - Walking Bass Line
Drums
Additional Combinations
Demonstration Song - Beginning Level
Chord Memory Interface - Programming
Chord Memory Interface - Playback
Delete, Omit and Skip
Piano - Intermediate Level
Demonstration Song - Intermediate Level
Piano - Advanced Level
Demonstration Song - Advanced Level
Additional Features
Accessories and Warranty
View original scanned page 1Original page 2
Printed pages 2-3 form one continuous spread
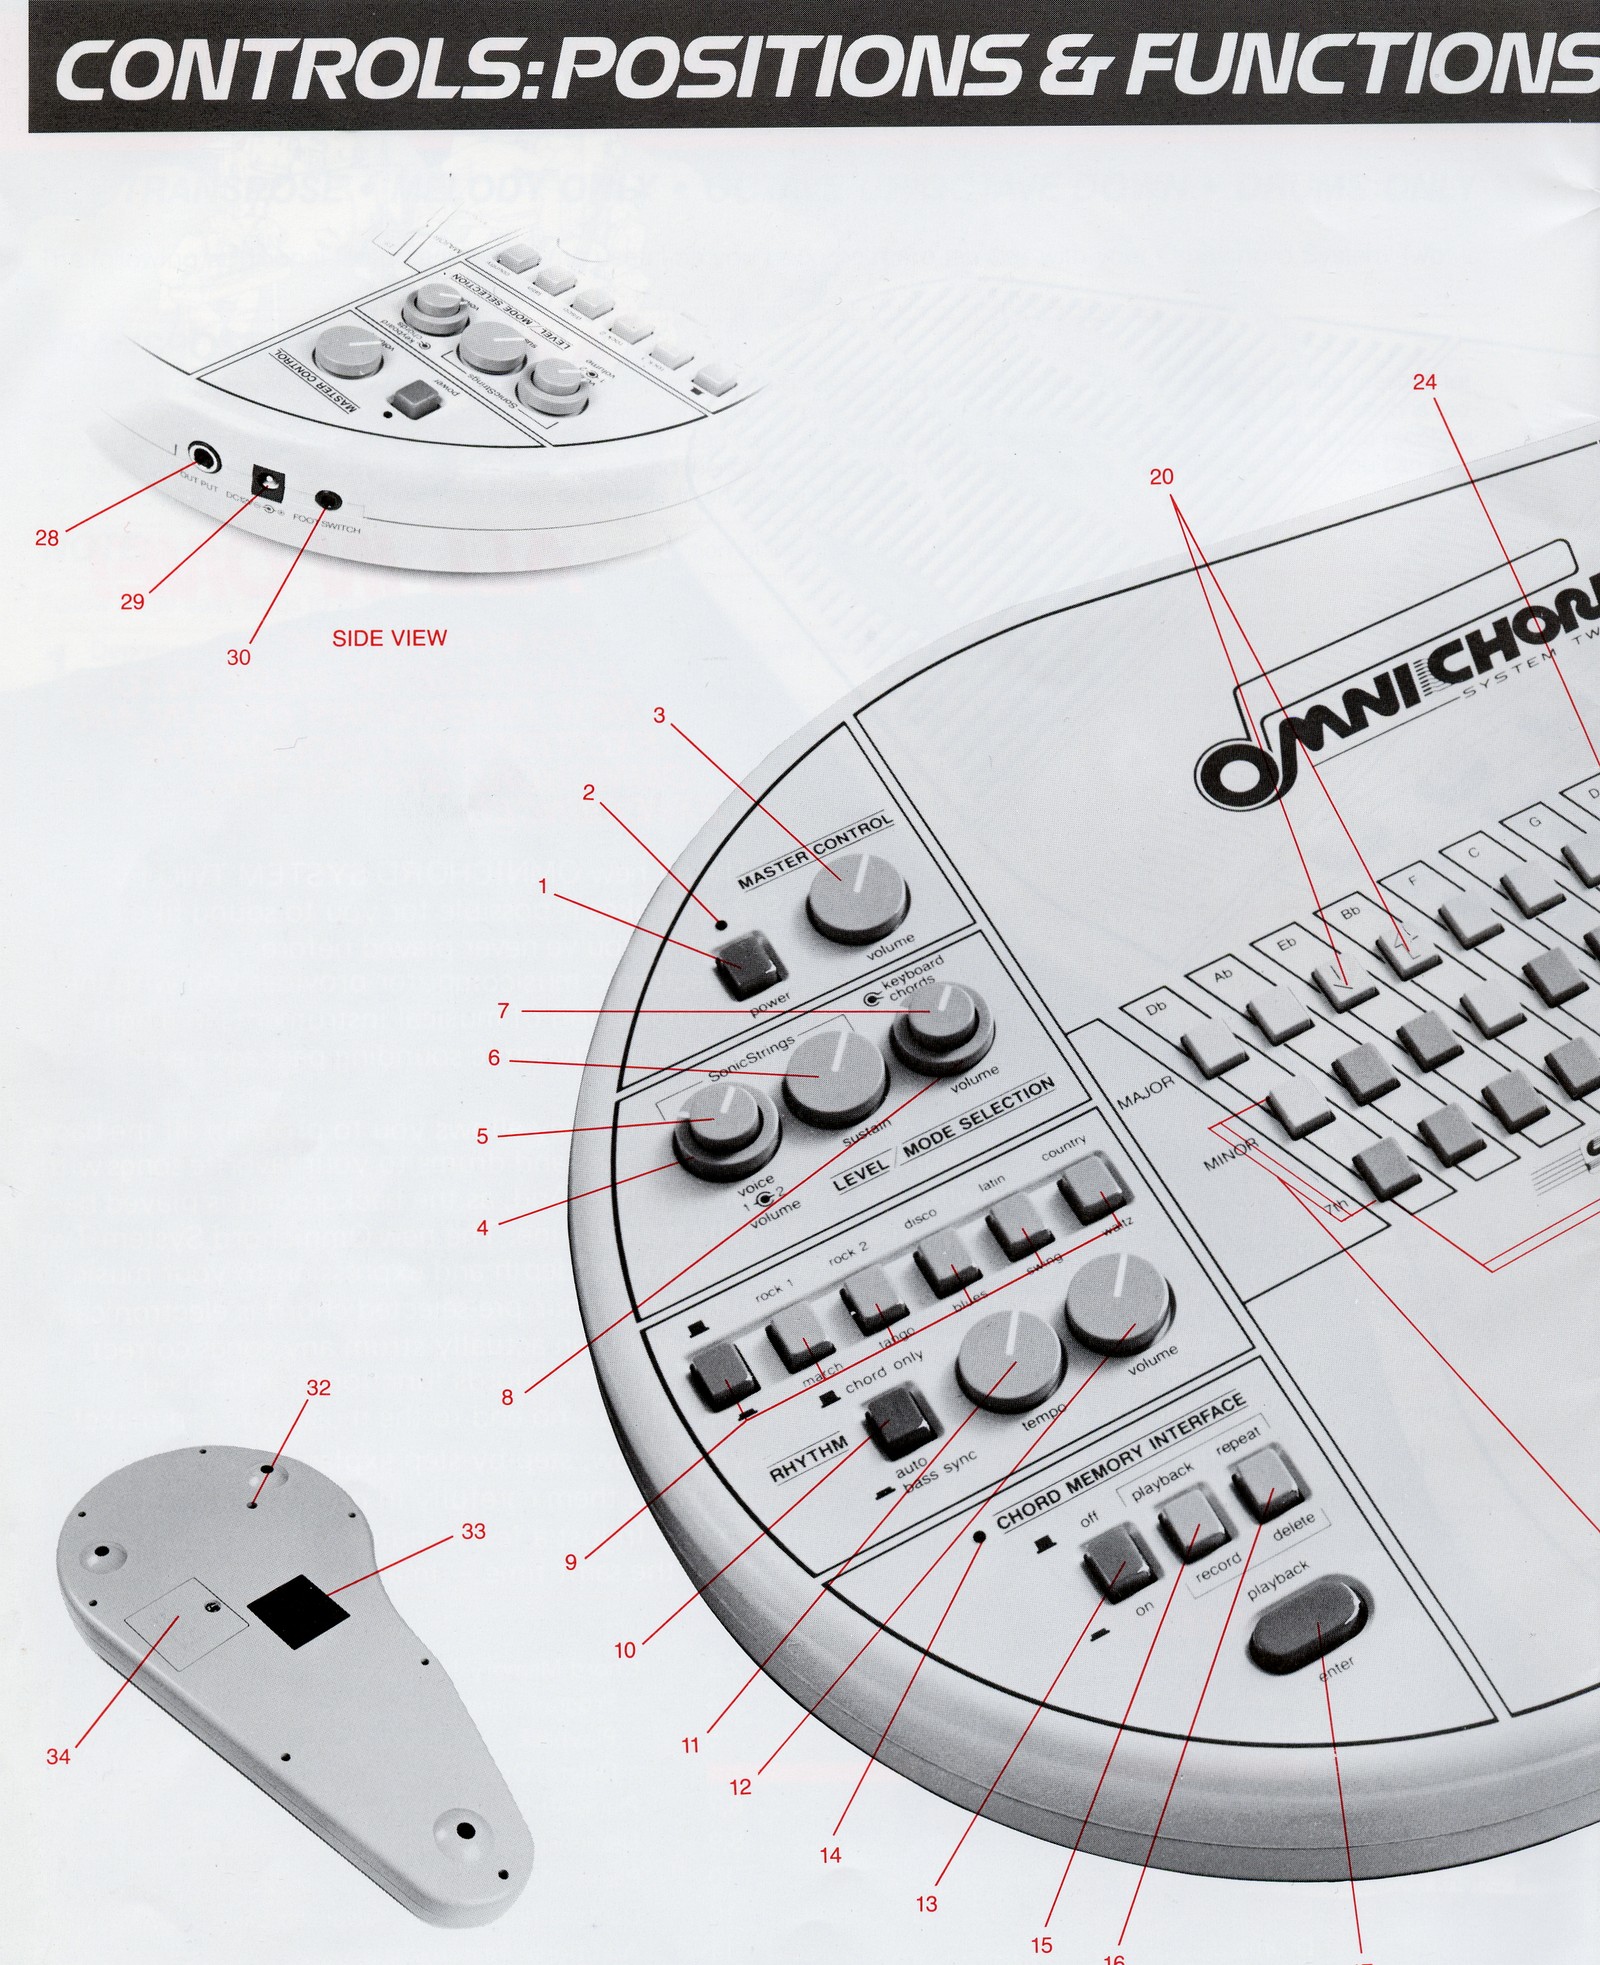
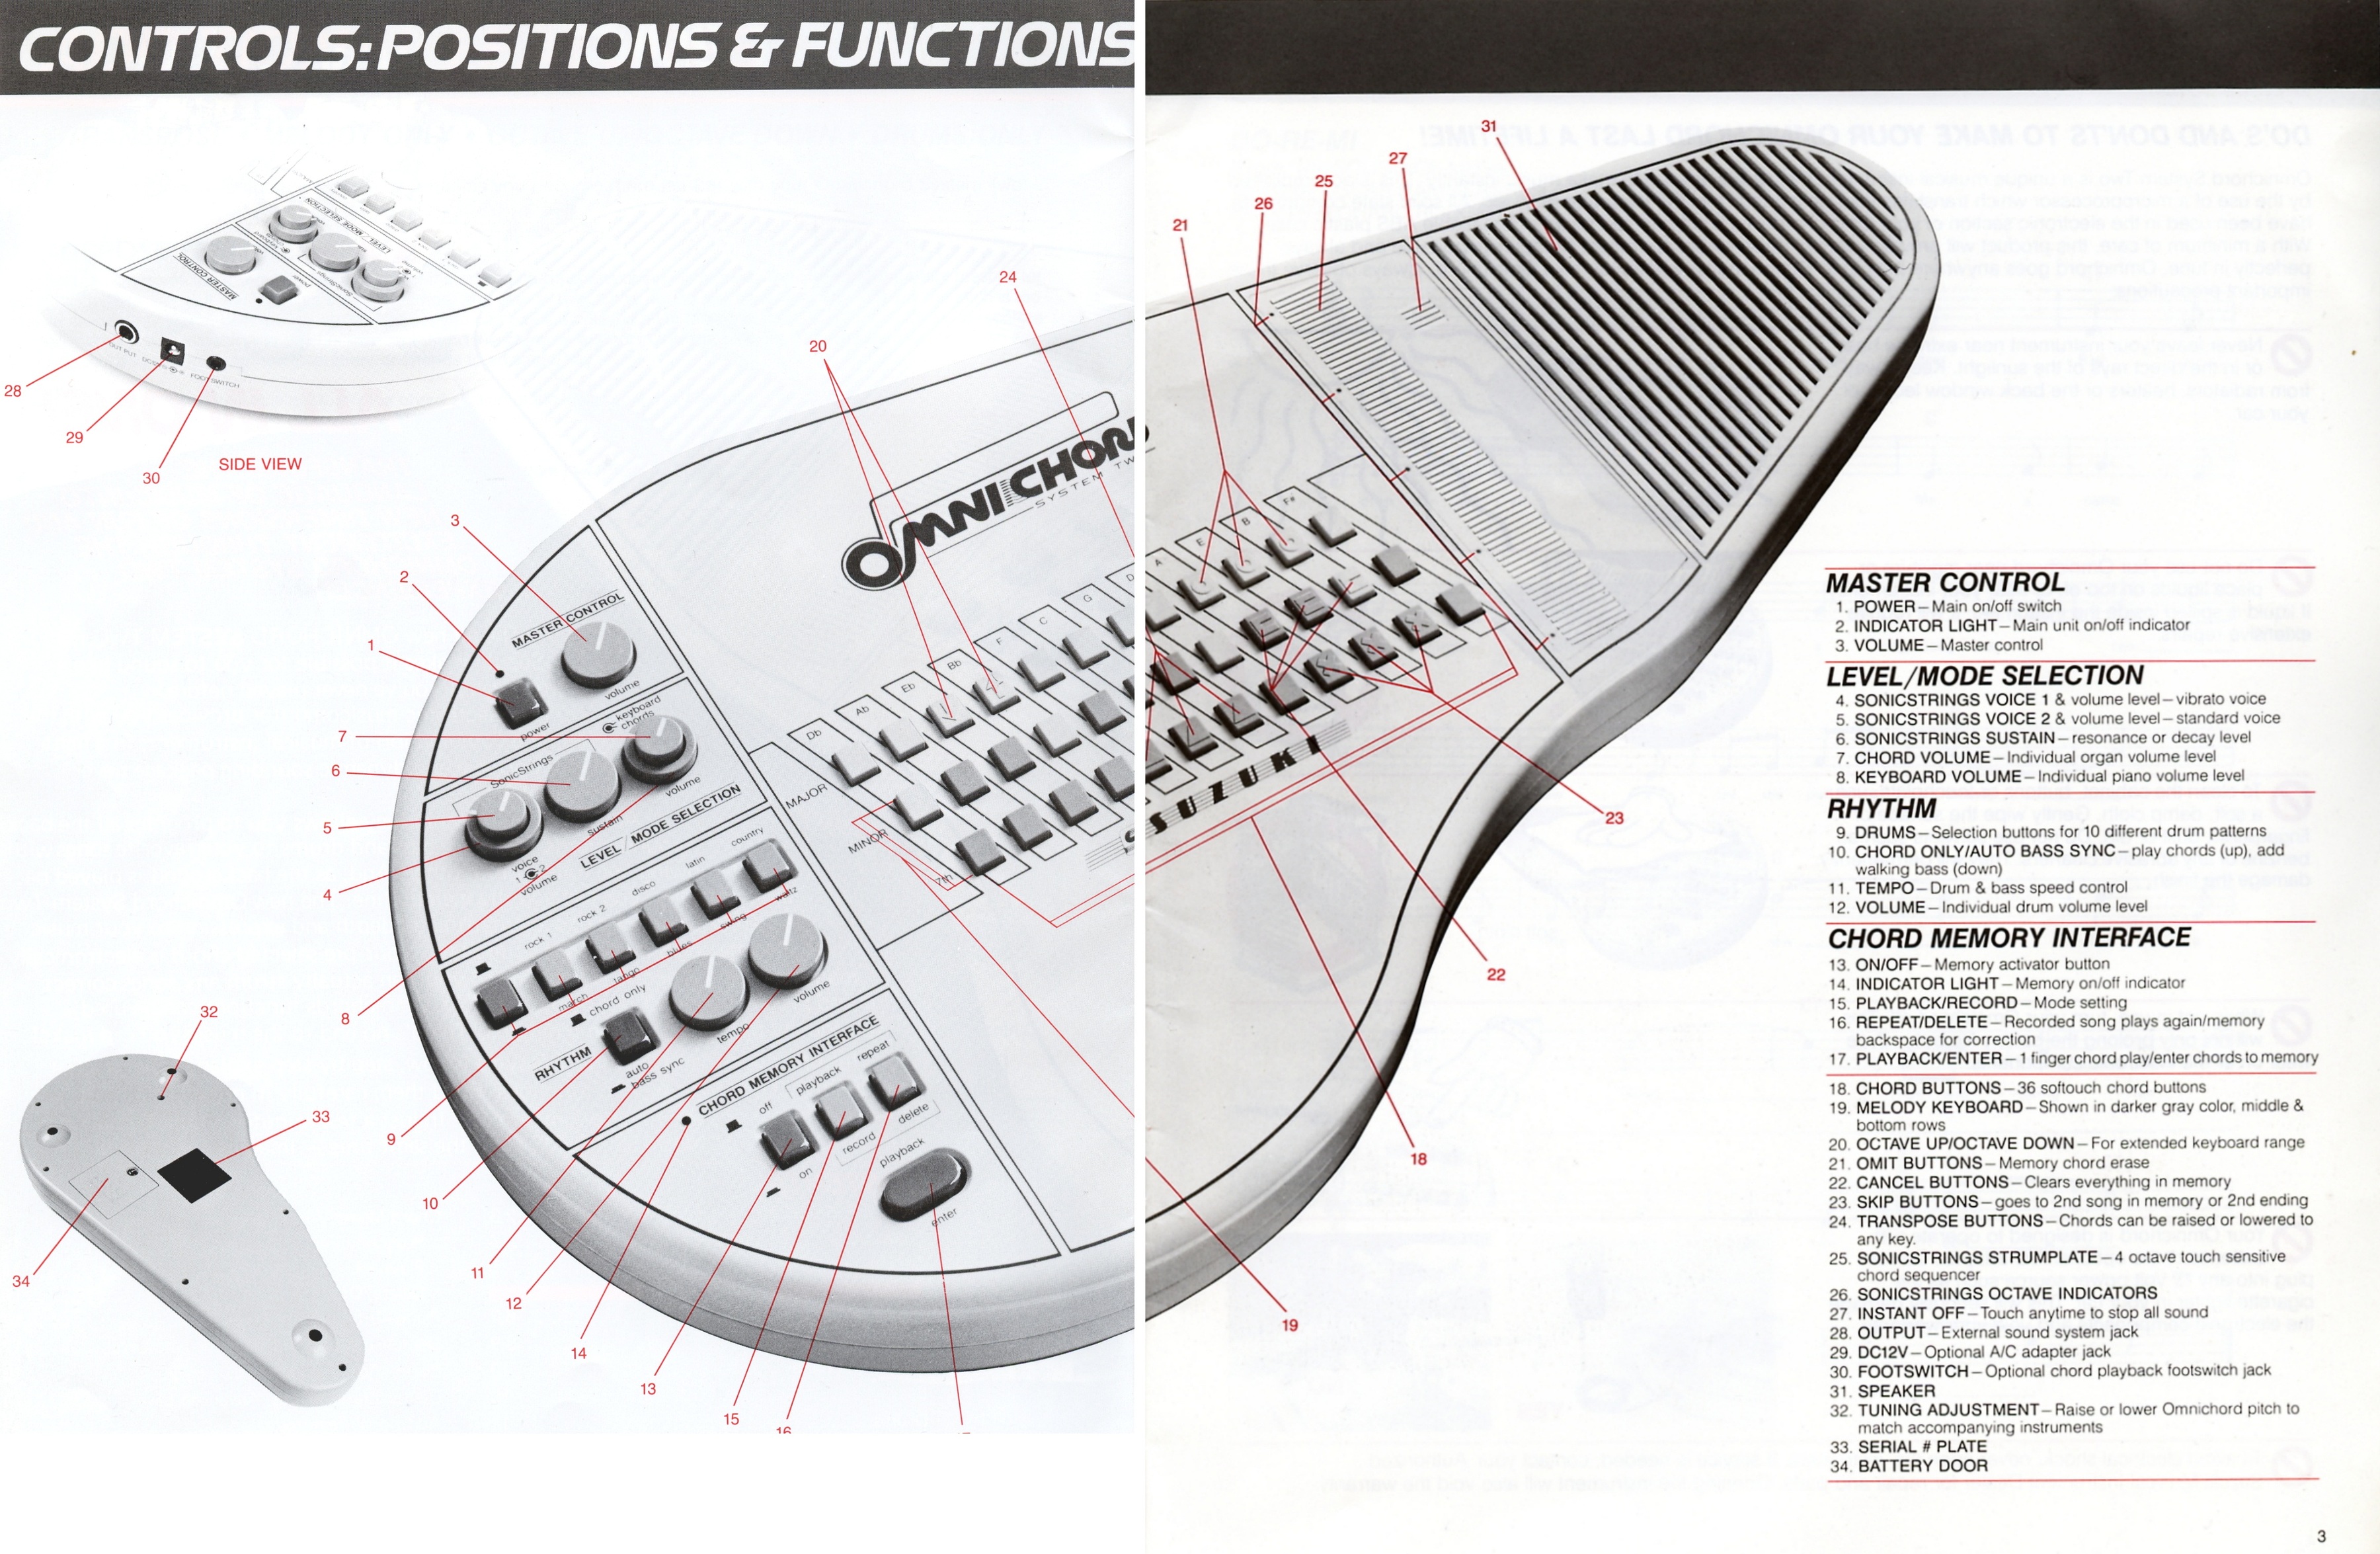
Controls: Positions and Functions
Controls 1-17
Master Control
POWER - Main on/off switch
INDICATOR LIGHT - Main unit on/off indicator
VOLUME - Master control
Level / Mode Selection
SONICSTRINGS VOICE 1 and volume level - vibrato voice
SONICSTRINGS VOICE 2 and volume level - standard voice
SONICSTRINGS SUSTAIN - resonance or decay level
CHORD VOLUME - individual organ volume level
KEYBOARD VOLUME - individual piano volume level
Rhythm
DRUMS - selection buttons for 10 different drum patterns
CHORD ONLY / AUTO BASS SYNC - play chords in the up position; add walking bass in the down position
TEMPO - drum and bass speed control
VOLUME - individual drum volume level
Chord Memory Interface
ON/OFF - memory activator button
INDICATOR LIGHT - memory on/off indicator
PLAYBACK/RECORD - mode setting
REPEAT/DELETE - replay the recorded song, or backspace in memory for correction
PLAYBACK/ENTER - one-finger chord play, or enter chords into memory
View original scanned page 2Original page 3
Printed pages 2-3 form one continuous spread
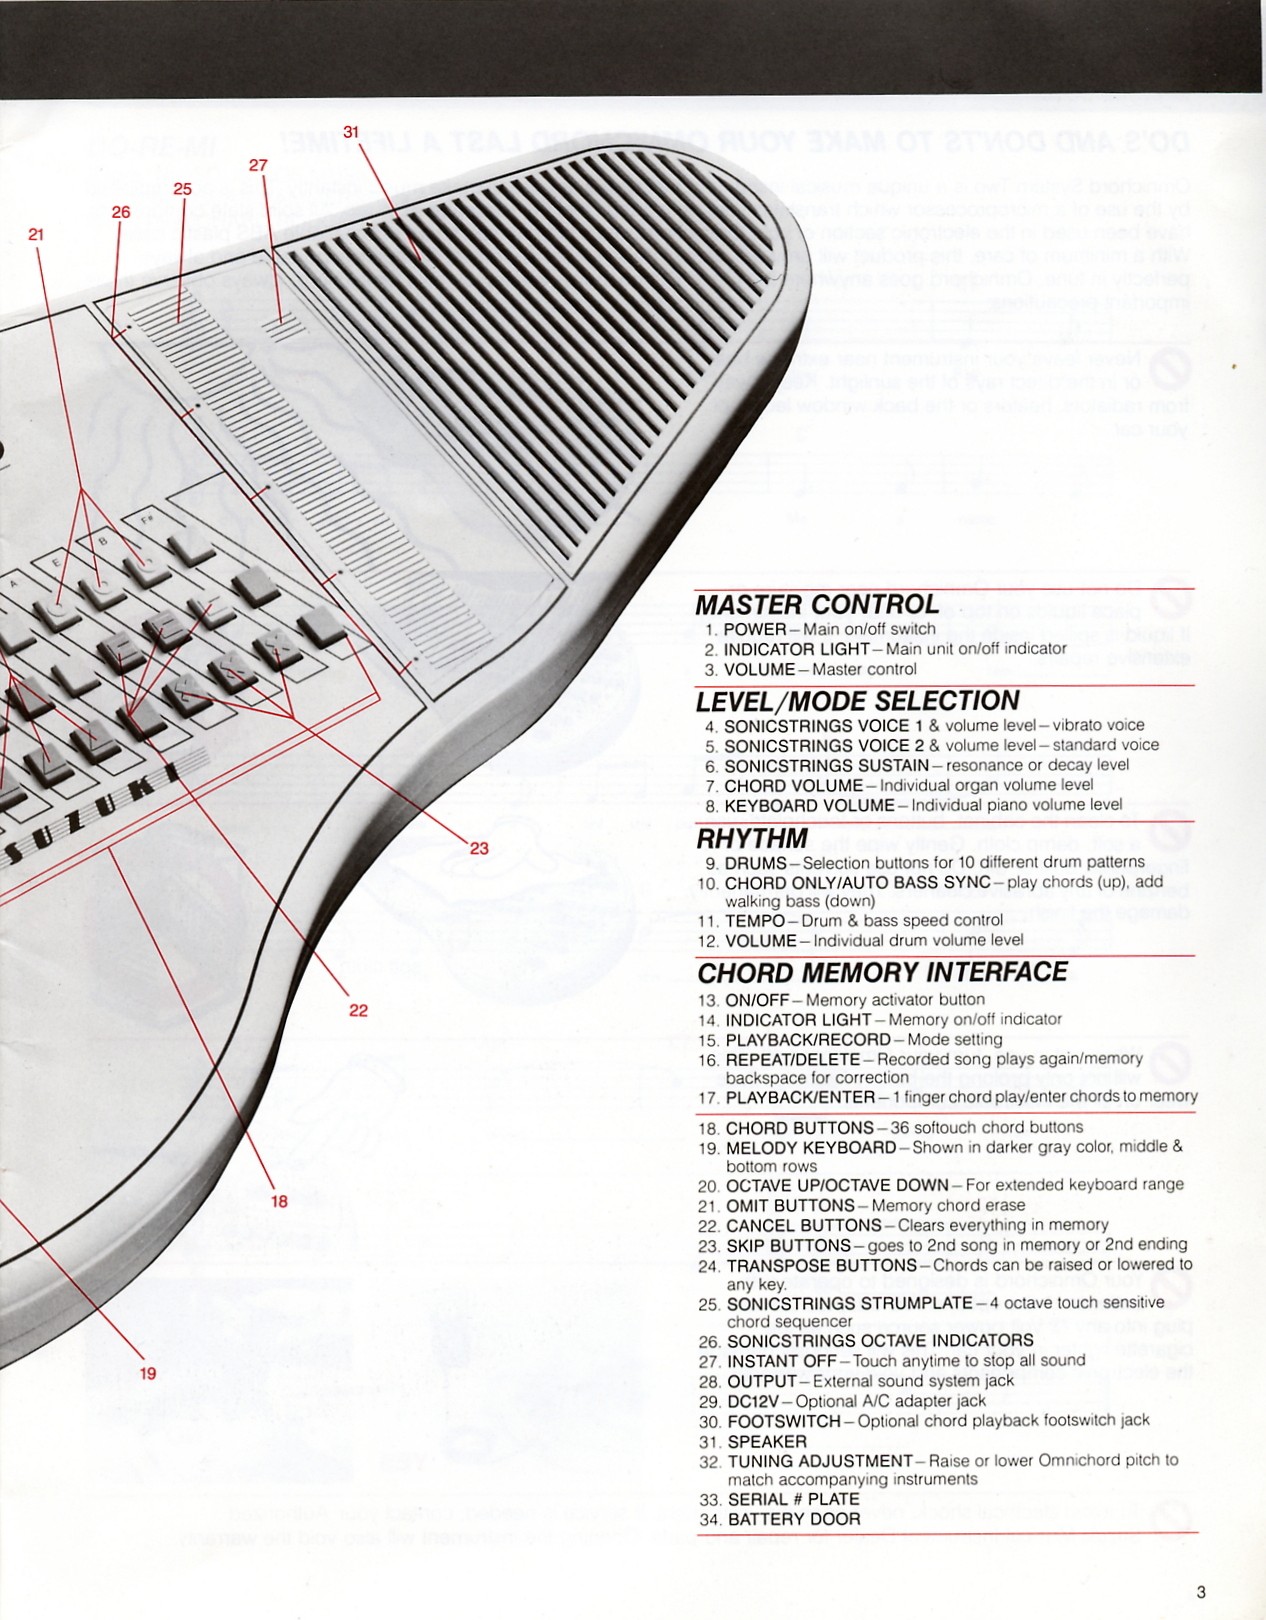
Controls: Positions and Functions
Controls 18-34
Chord and Melody Controls
CHORD BUTTONS - 36 softouch chord buttons
MELODY KEYBOARD - darker keys in the middle and bottom rows
OCTAVE UP / OCTAVE DOWN - extended melody-keyboard range
OMIT BUTTONS - memory chord erase
CANCEL BUTTONS - clear everything in memory
SKIP BUTTONS - go to a second song in memory or a second ending
TRANSPOSE BUTTONS - raise or lower chords to any key
FOOTSWITCH - optional chord-playback footswitch jack
SPEAKER
TUNING ADJUSTMENT - raise or lower Omnichord pitch to match accompanying instruments
SERIAL NUMBER PLATE
BATTERY DOOR
Original joined controls spread (printed pages 2-3). Select the image to open it full size.View original scanned page 3Original page 4
Care and electrical safety
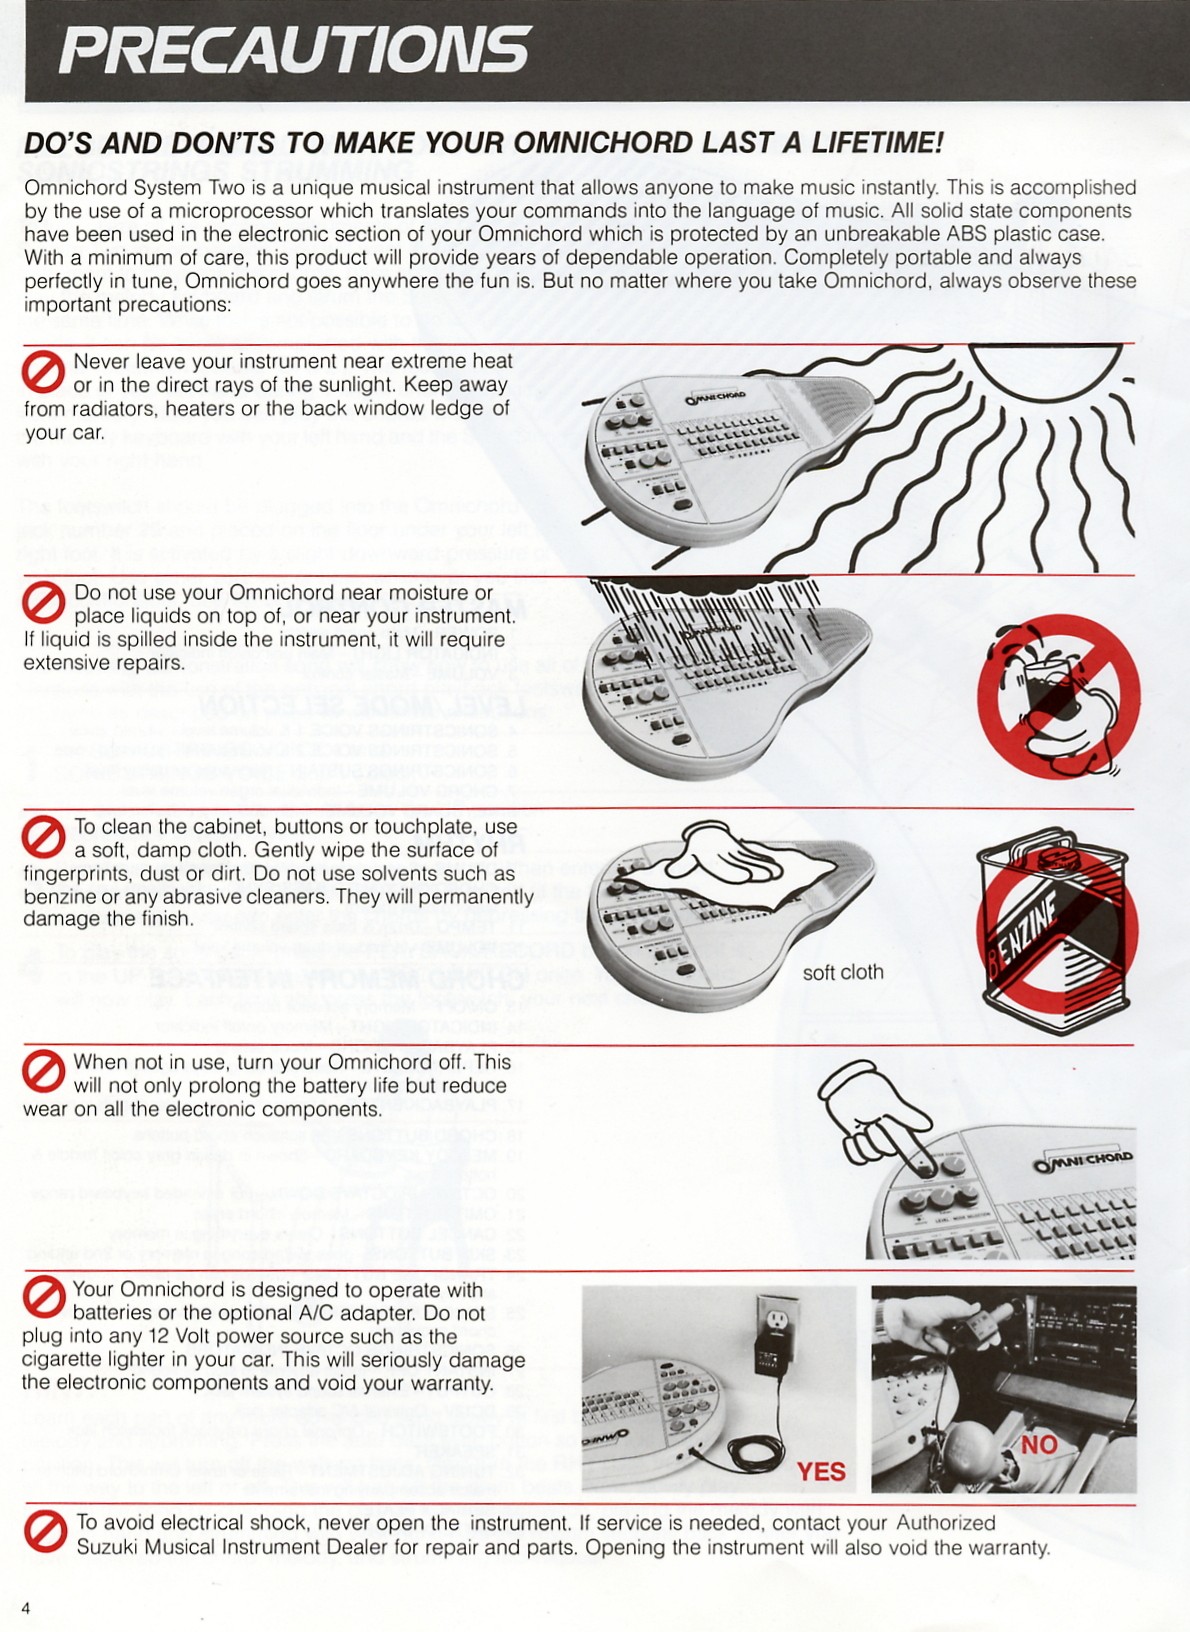
Precautions
Dos and don'ts to make your Omnichord last a lifetime
The Omnichord System Two uses a microprocessor to translate commands into music. Its solid-state electronic components are protected by an ABS plastic case. With a minimum of care, it should provide years of dependable operation. Always observe these precautions:
Avoid Extreme Heat
Never leave the instrument near extreme heat or in direct sunlight. Keep it away from radiators, heaters and the back-window ledge of a car.
Keep It Dry
Do not use the Omnichord near moisture or place liquids on or near it. Liquid spilled inside the instrument can require extensive repairs.
Clean With a Soft Cloth
Clean the cabinet, buttons and touchplate with a soft, damp cloth. Do not use benzine, solvents or abrasive cleaners; they can permanently damage the finish.
Turn It Off When Not in Use
Switching the Omnichord off when it is not in use prolongs battery life and reduces wear on the electronic components.
Use the Correct Power Source
Operate the Omnichord from batteries or the optional A/C adapter. Do not connect it directly to a 12-volt source such as a car cigarette lighter; this can damage the electronics and void the warranty.
Do Not Open the Instrument
To avoid electrical shock, never open the Omnichord. If service is needed, contact an authorized musical-instrument dealer. Opening the instrument also voids the warranty.
View original scanned page 4Original page 5
Eight size C / SUM-2 / R-14 batteries
Set-Up
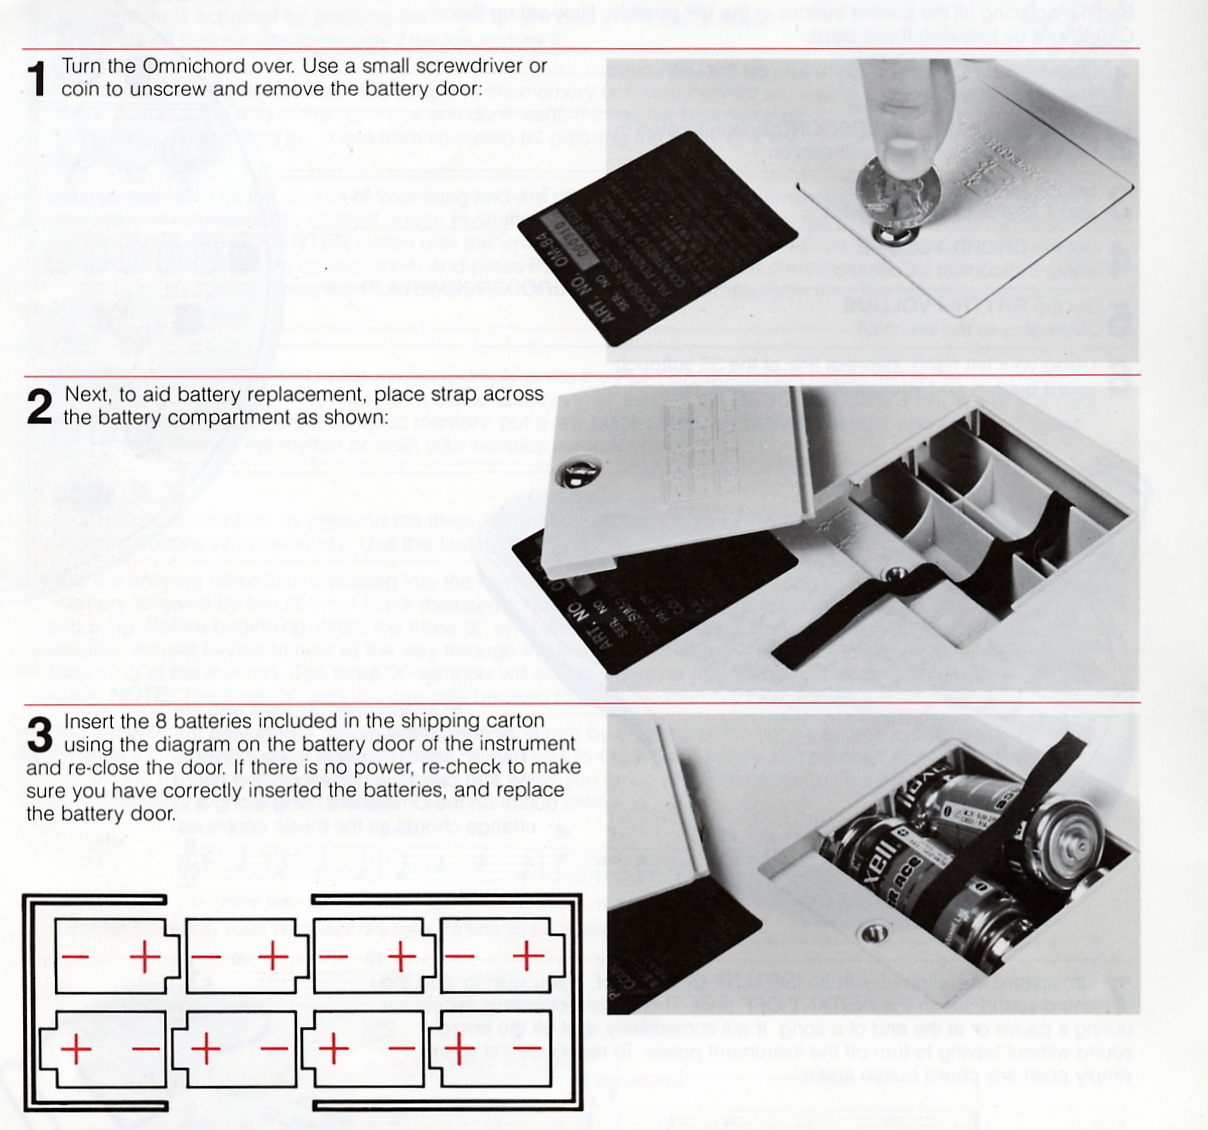
Battery installation
After removing the instrument, batteries and manual from the packing carton, retain the box and packing materials. They make a useful container if the instrument must be transported later.
The Omnichord is ready to use without preparation or assembly. Alkaline batteries are recommended to reduce the risk of leakage.
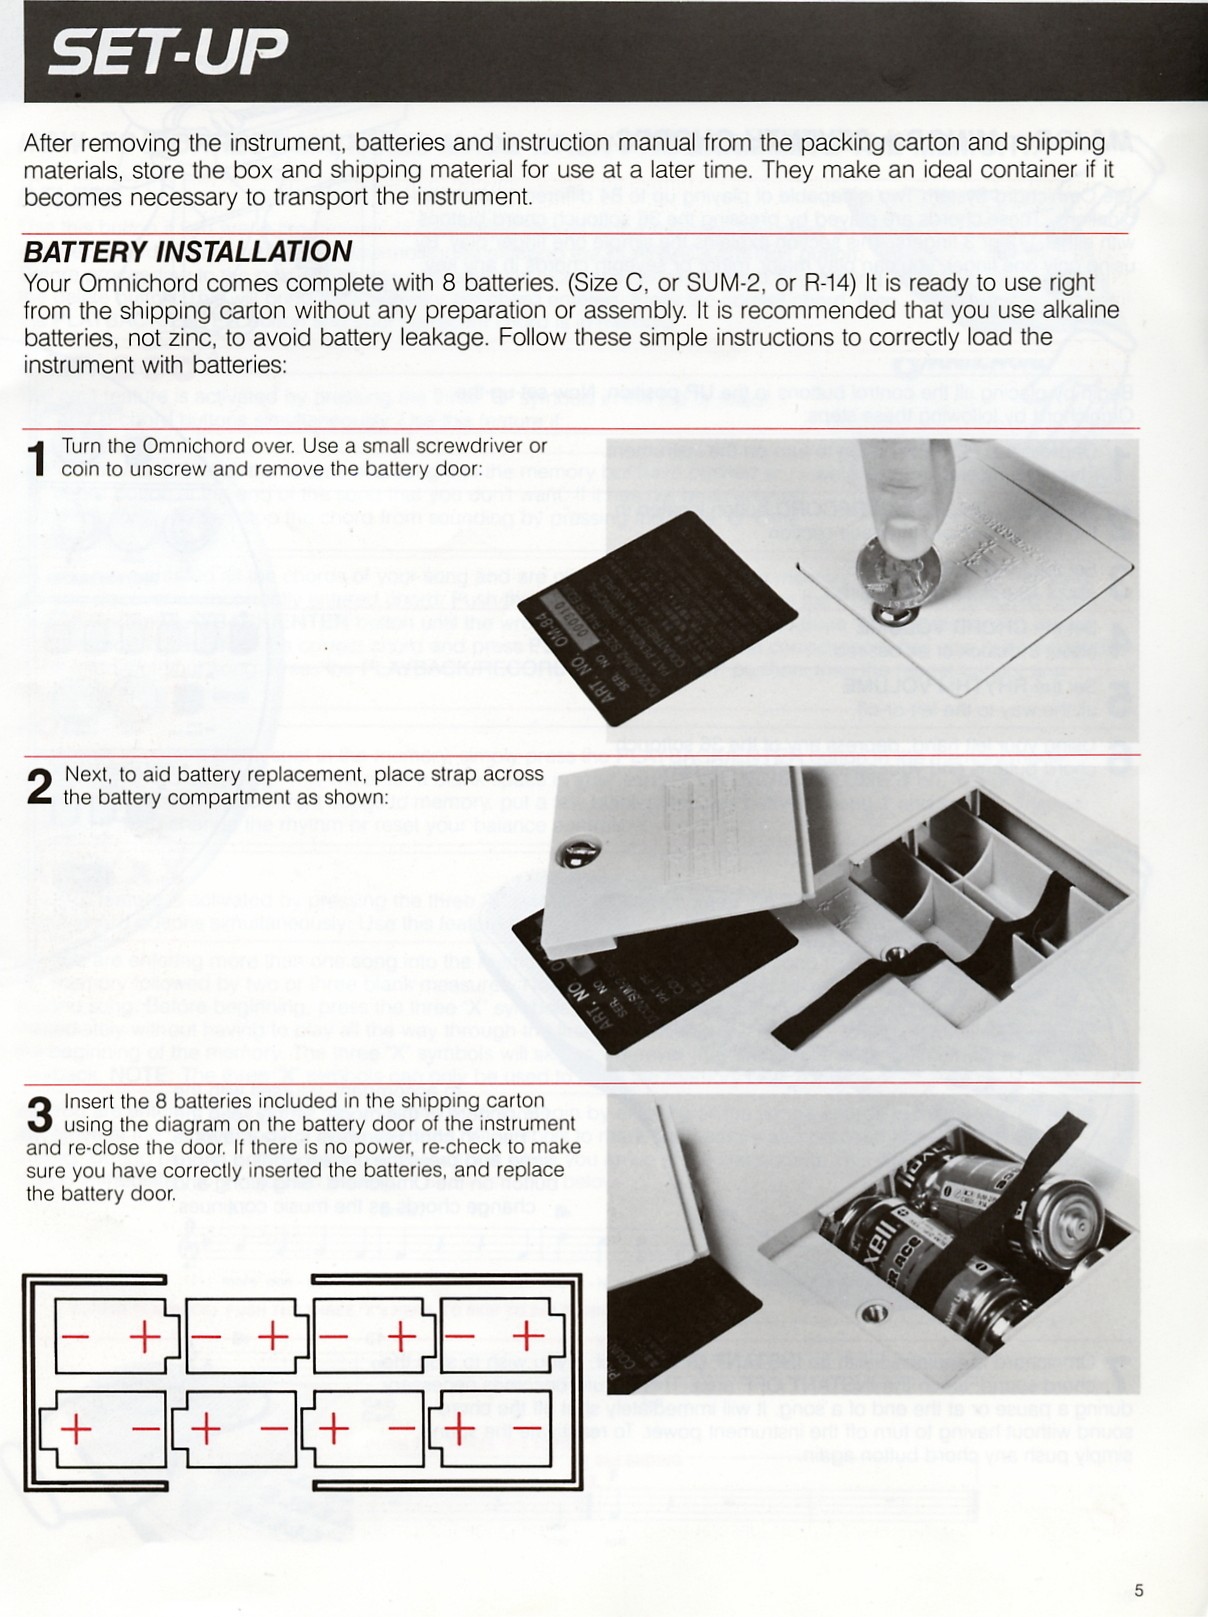
Turn the Omnichord over. Use a small screwdriver or coin to unscrew and remove the battery door.
Place the fabric strap across the battery compartment as shown. It will assist with later battery removal.
Insert eight batteries according to the polarity diagram on the battery door, then close the door. If the unit has no power, re-check the battery orientation and refit the door.
Battery-door removal, fabric strap placement, battery installation and polarity diagram.View original scanned page 5Original page 6
Simple one-finger accompaniment
Organ: One Finger Chord Play
Major, minor and seventh chords
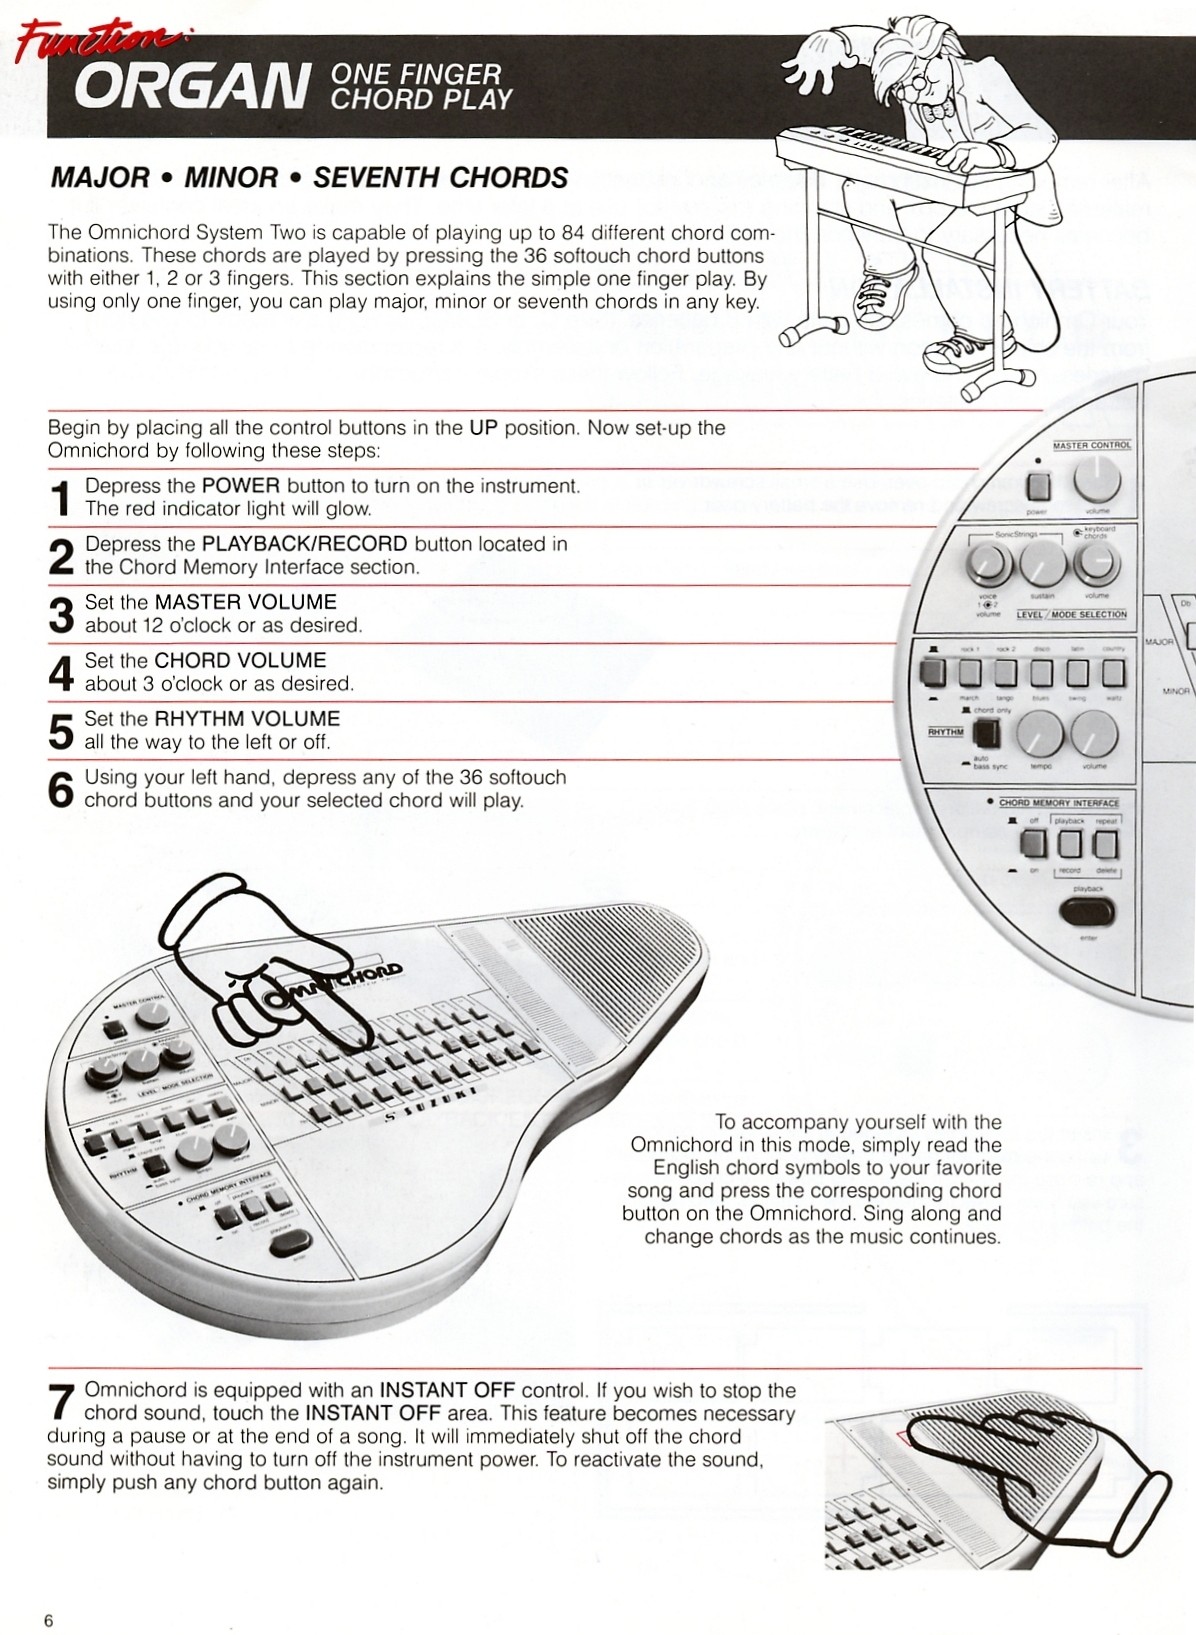
The Omnichord System Two can play up to 84 chord combinations from its 36 softouch buttons. Major, minor and seventh chords in any key can be played with one finger.
Begin with all control buttons in the up position, then follow these steps:
Press POWER to turn on the instrument. The red indicator light will glow.
Press PLAYBACK/RECORD in the Chord Memory Interface section.
Set MASTER VOLUME to about 12 o'clock, or as desired.
Set CHORD VOLUME to about 3 o'clock, or as desired.
Turn RHYTHM VOLUME fully to the left, or off.
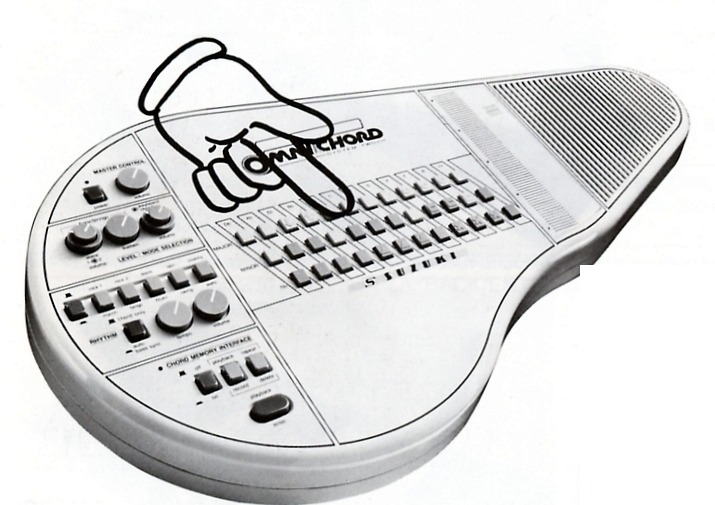
With your left hand, press any of the 36 softouch chord buttons. The selected chord will play.
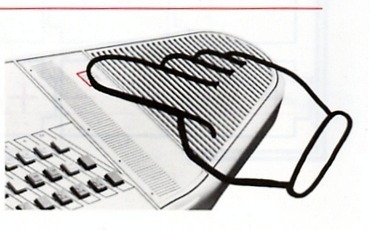
Touch the INSTANT OFF area to stop the chord during a pause or at the end of a song. Press any chord button to reactivate the sound.
To accompany a favourite song, read its chord symbols and press the corresponding Omnichord buttons. Sing along and change chords as the music continues.
Hand pressing a chord button for one-finger chord play.Hand touching the Instant Off area.View original scanned page 6Original page 7
Two- and three-button chord combinations
Organ: Multiple Finger Chord Play
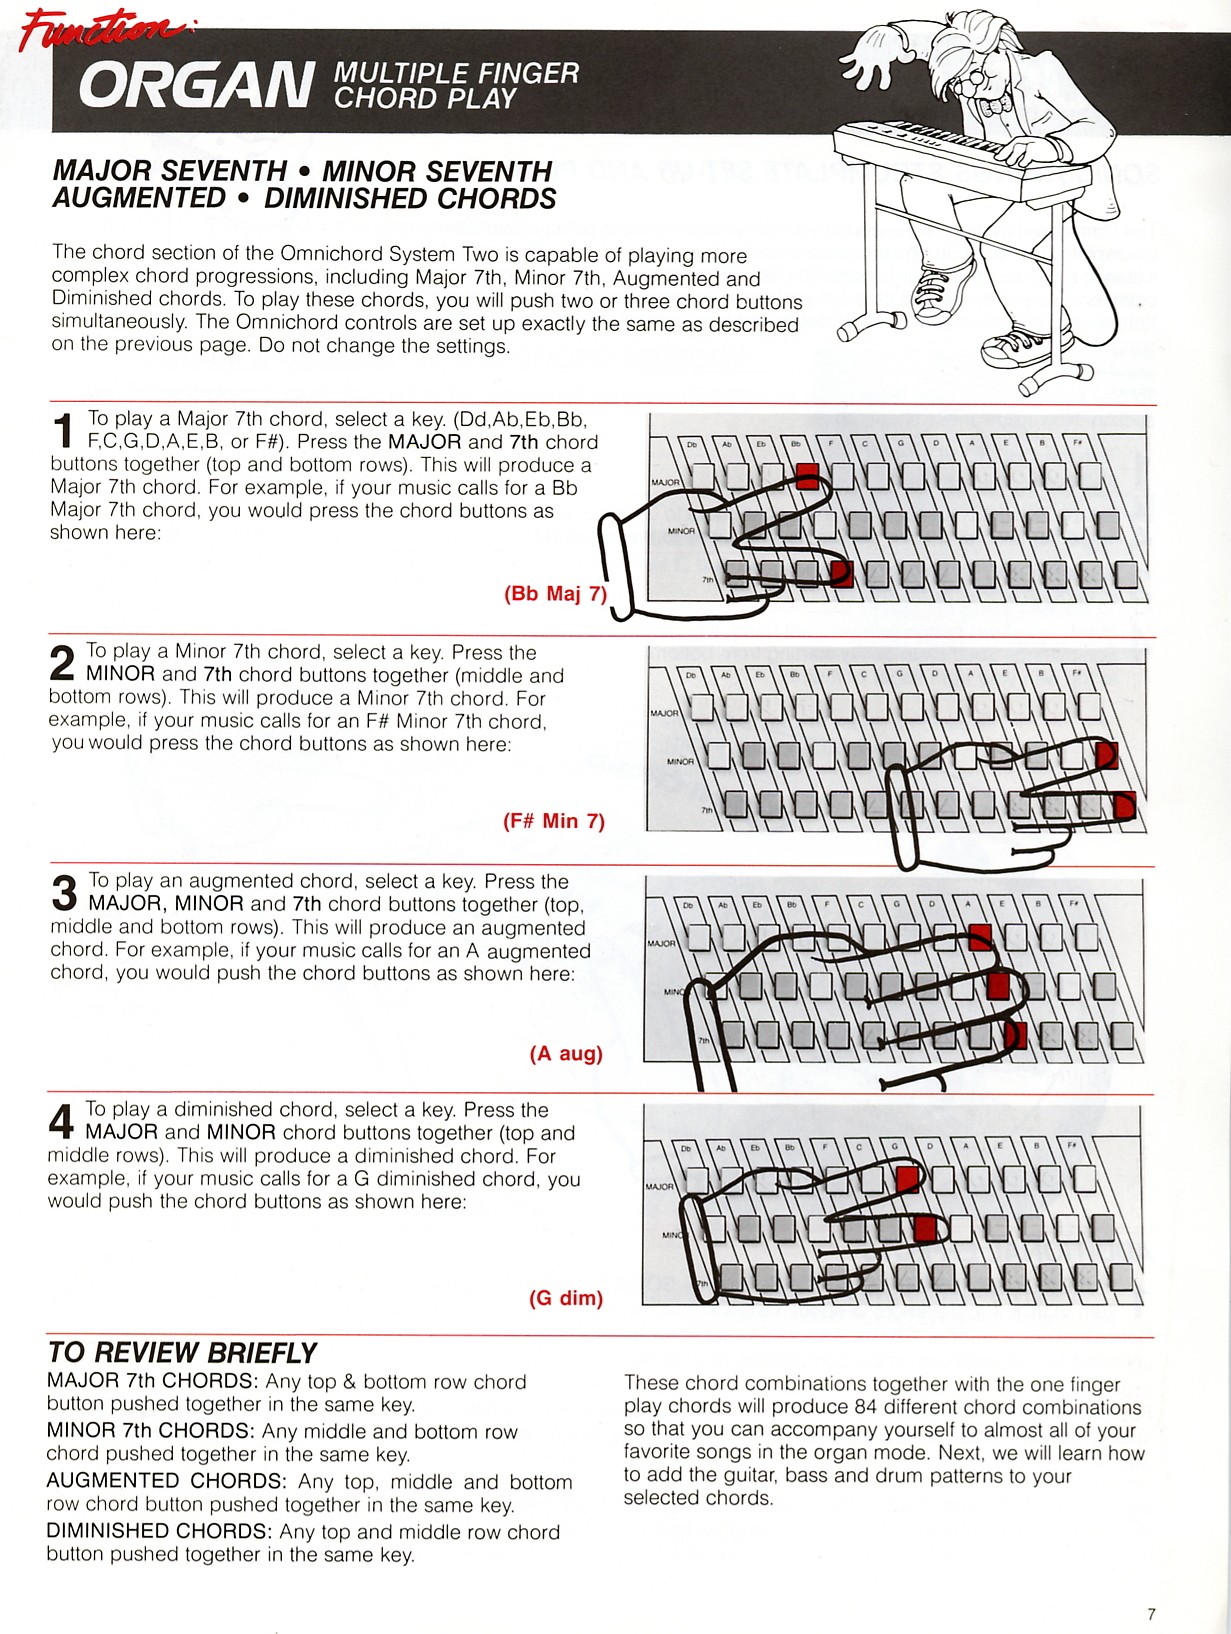
Major seventh, minor seventh, augmented and diminished chords
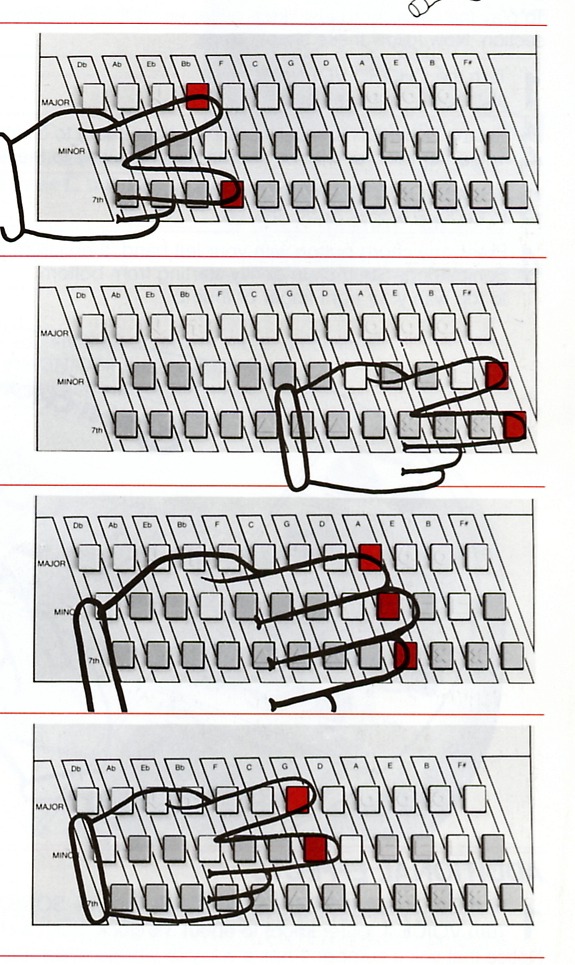
More complex chord progressions are produced by pressing two or three chord buttons simultaneously. Keep the controls set as described on the previous page.
Major Seventh
Select a key, then press the major and seventh buttons together in the same column - the top and bottom rows. The printed example is B-flat major seventh.
Minor Seventh
Select a key, then press the minor and seventh buttons together in the same column - the middle and bottom rows. The printed example is F-sharp minor seventh.
Augmented
Select a key, then press its major, minor and seventh buttons together. The printed example is A augmented.
Diminished
Select a key, then press its major and minor buttons together - the top and middle rows. The printed example is G diminished.
Review
Major seventh: top and bottom rows in the same key. Minor seventh: middle and bottom rows in the same key. Augmented: top, middle and bottom rows in the same key. Diminished: top and middle rows in the same key.
Together with one-finger chords, these combinations provide 84 chords for accompanying a wide range of songs.
Four chord-button diagrams for major seventh, minor seventh, augmented and diminished chords.View original scanned page 7Original page 8
Four-octave touch-sensitive strumming
Guitar: SonicStrings Strumplate
Set-up and play
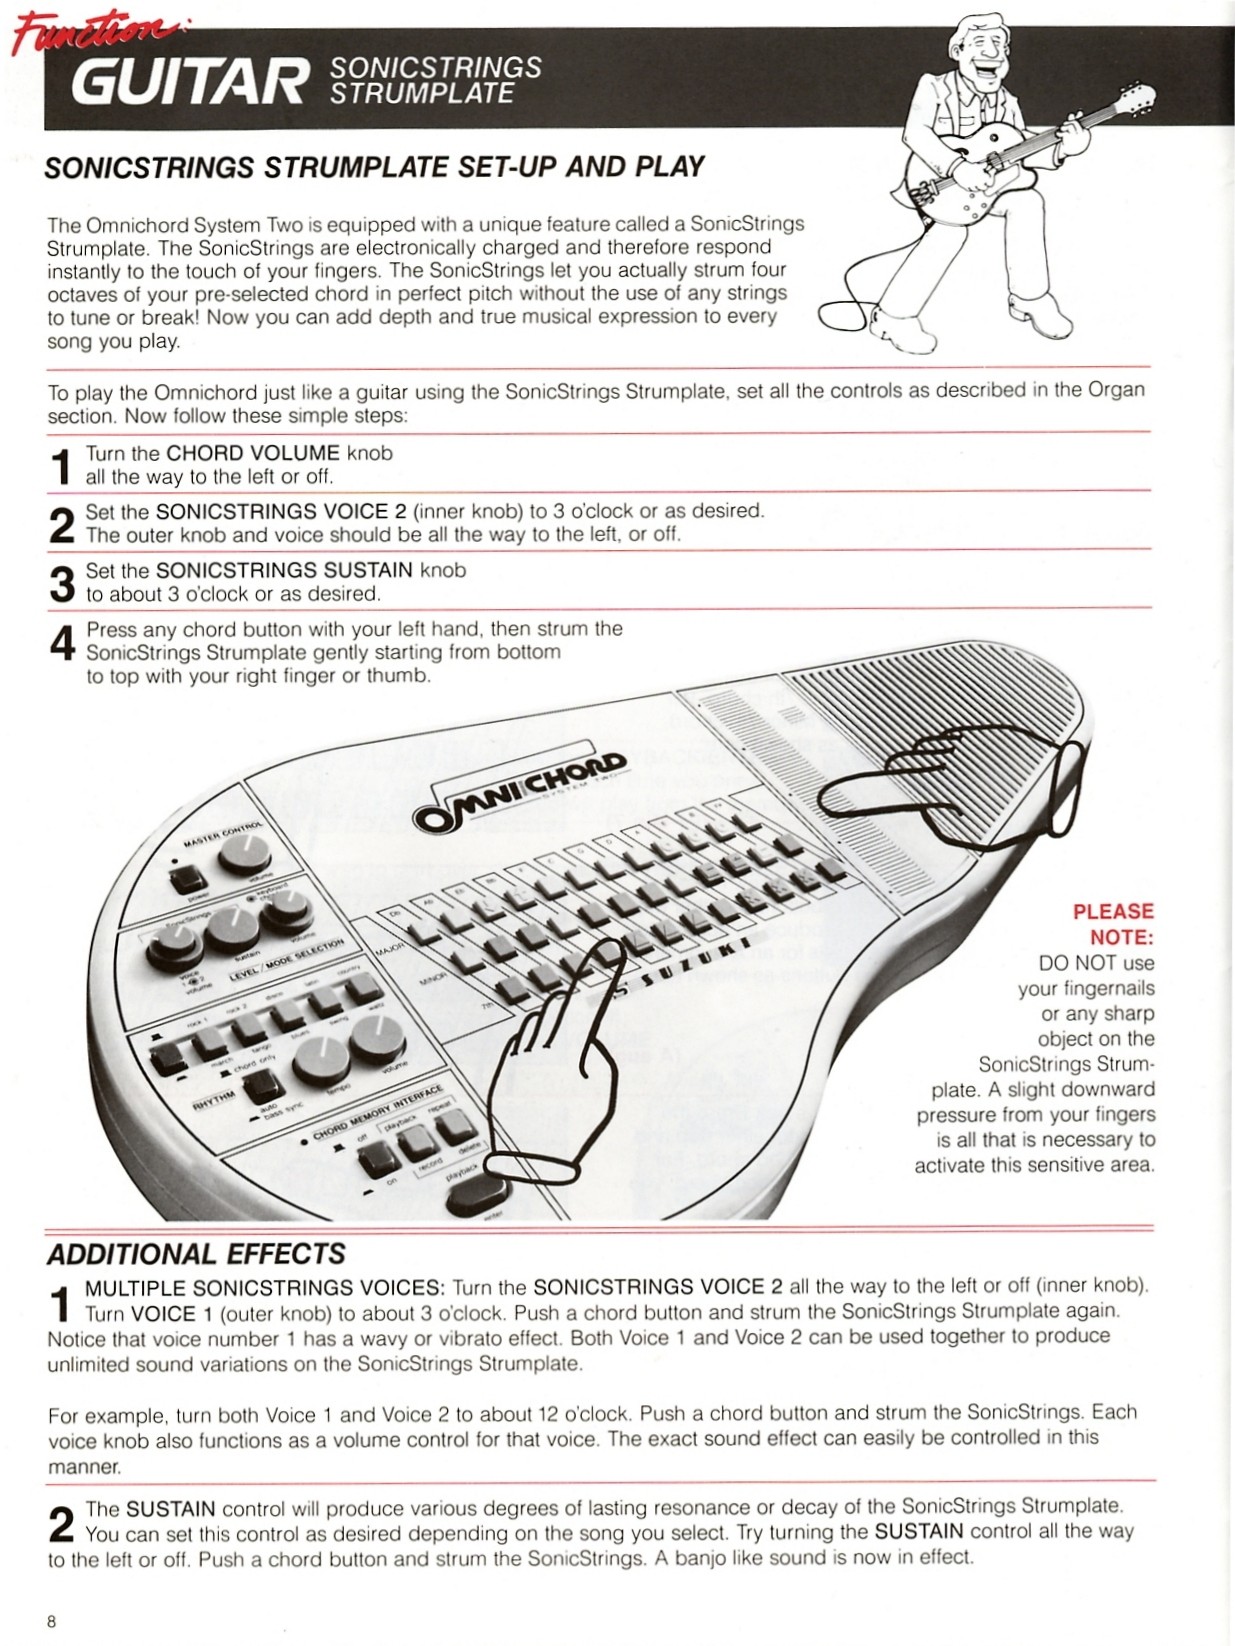
The SonicStrings are electronically charged and respond instantly to a fingertip. They let you strum four octaves of a selected chord in correct pitch without strings to tune or break.
Set the controls as described for organ play, then follow these steps:
Turn CHORD VOLUME fully to the left, or off.
Set SONICSTRINGS VOICE 2, the inner knob, to about 3 o'clock. Turn VOICE 1, the outer knob, fully left or off.
Set SONICSTRINGS SUSTAIN to about 3 o'clock, or as desired.
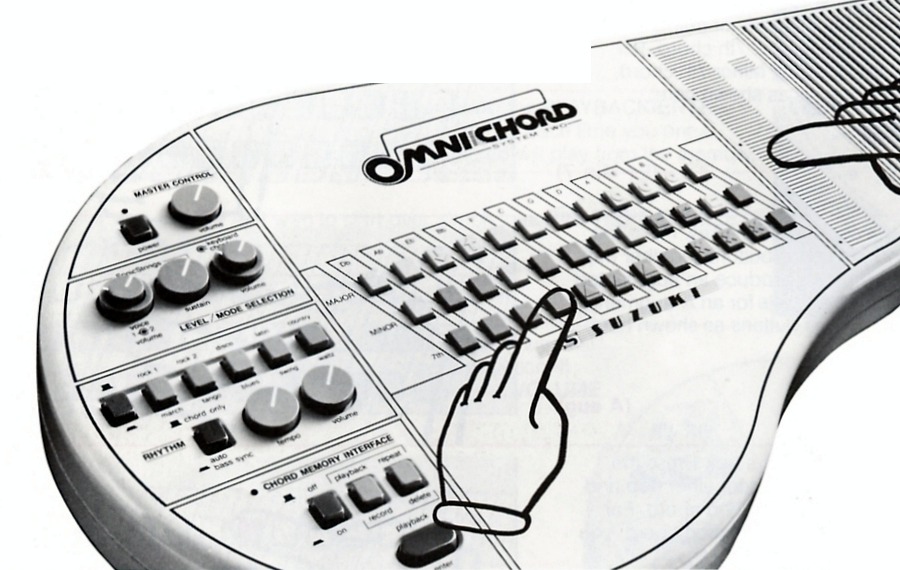
Press a chord button with your left hand, then gently strum the SonicStrings Strumplate from bottom to top with a right-hand finger or thumb.
Multiple SonicStrings Voices
Turn VOICE 2 off and set VOICE 1 to about 3 o'clock. Press a chord and strum again to hear the wavy or vibrato voice. The two voices can be combined in any proportion; each voice knob also controls its volume.
Sustain
SUSTAIN controls the lasting resonance or decay. Turn it fully left or off, press a chord and strum to obtain a banjo-like sound.
Hands selecting a chord and strumming the SonicStrings Strumplate.View original scanned page 8Original page 9
Experiment with different strumming methods
Guitar: Playing Techniques
Slide play and touch play
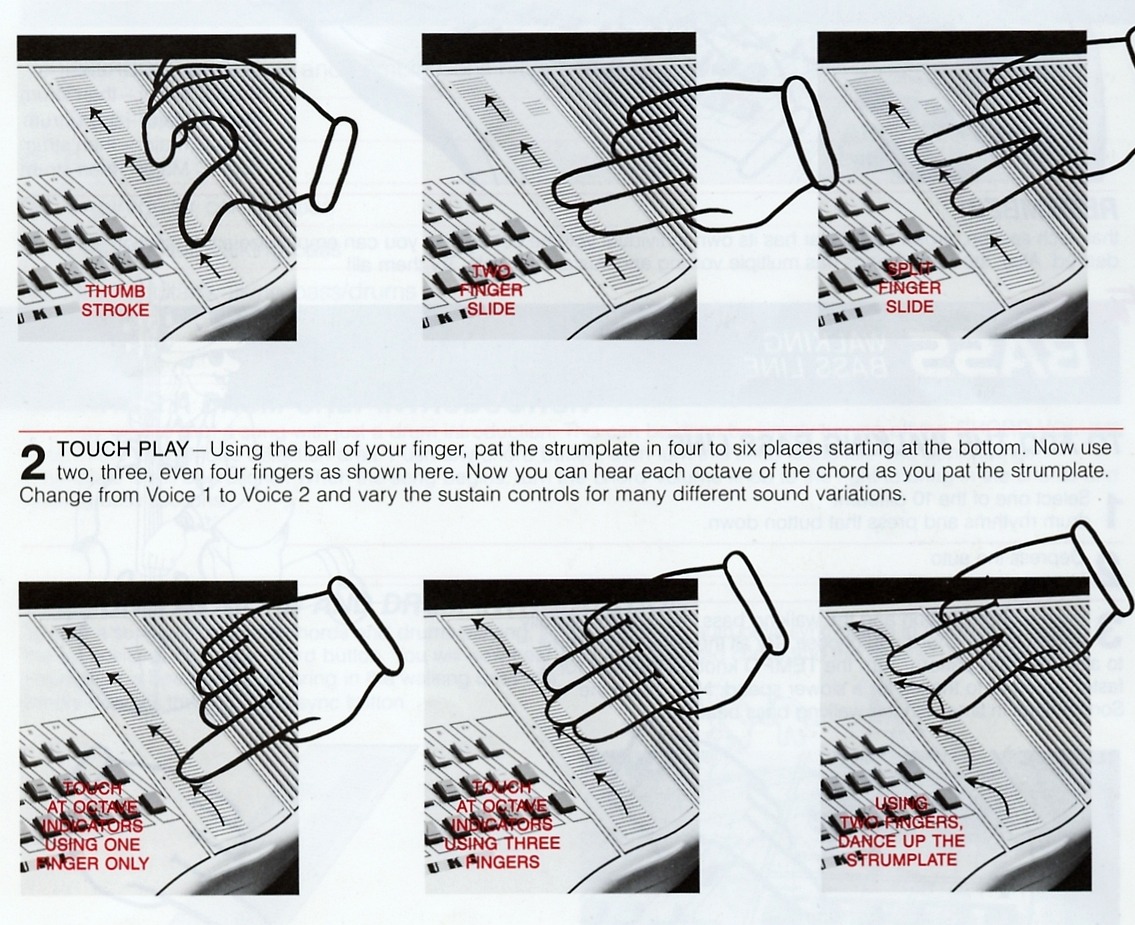
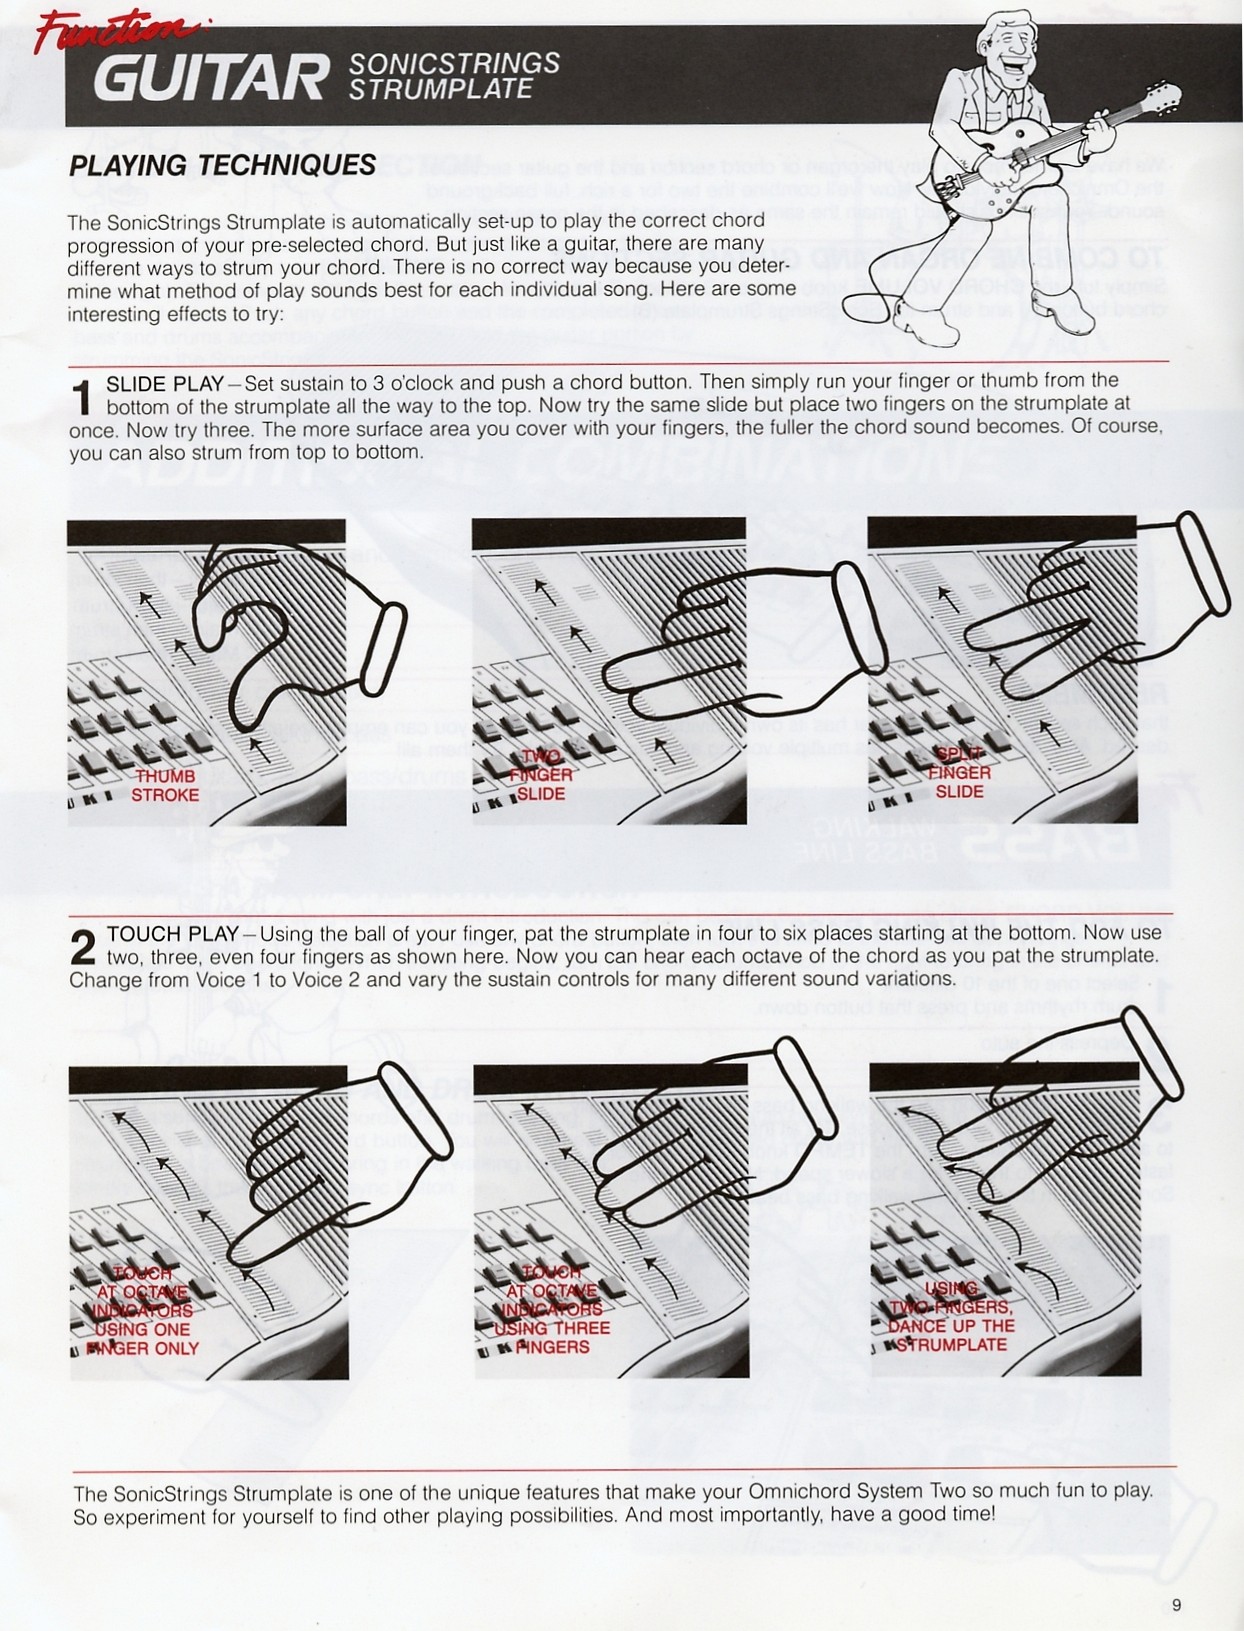
The Strumplate automatically follows the selected chord, but it can be played in many different ways. Choose the method that suits the song.
Slide Play
Set SUSTAIN to about 3 o'clock and press a chord. Run a finger or thumb from the bottom of the Strumplate to the top. Repeat with two fingers, then three. Covering more surface produces a fuller chord. You may also strum from top to bottom.
Touch Play
Using the ball of a finger, pat the Strumplate in four to six places from the bottom upward. Try two, three or four fingers. Each touch can reveal a different octave. Change the voice and sustain controls to explore further variations.
Experiment to find other playing possibilities - and most importantly, enjoy making music.
Six original illustrations demonstrating thumb, two-finger and split-finger slides plus one-, three- and two-finger touch play.View original scanned page 9Original page 10
Layering the OM-84 sound sections
Combination Play and Walking Bass
Combine organ, guitar and automatic bass
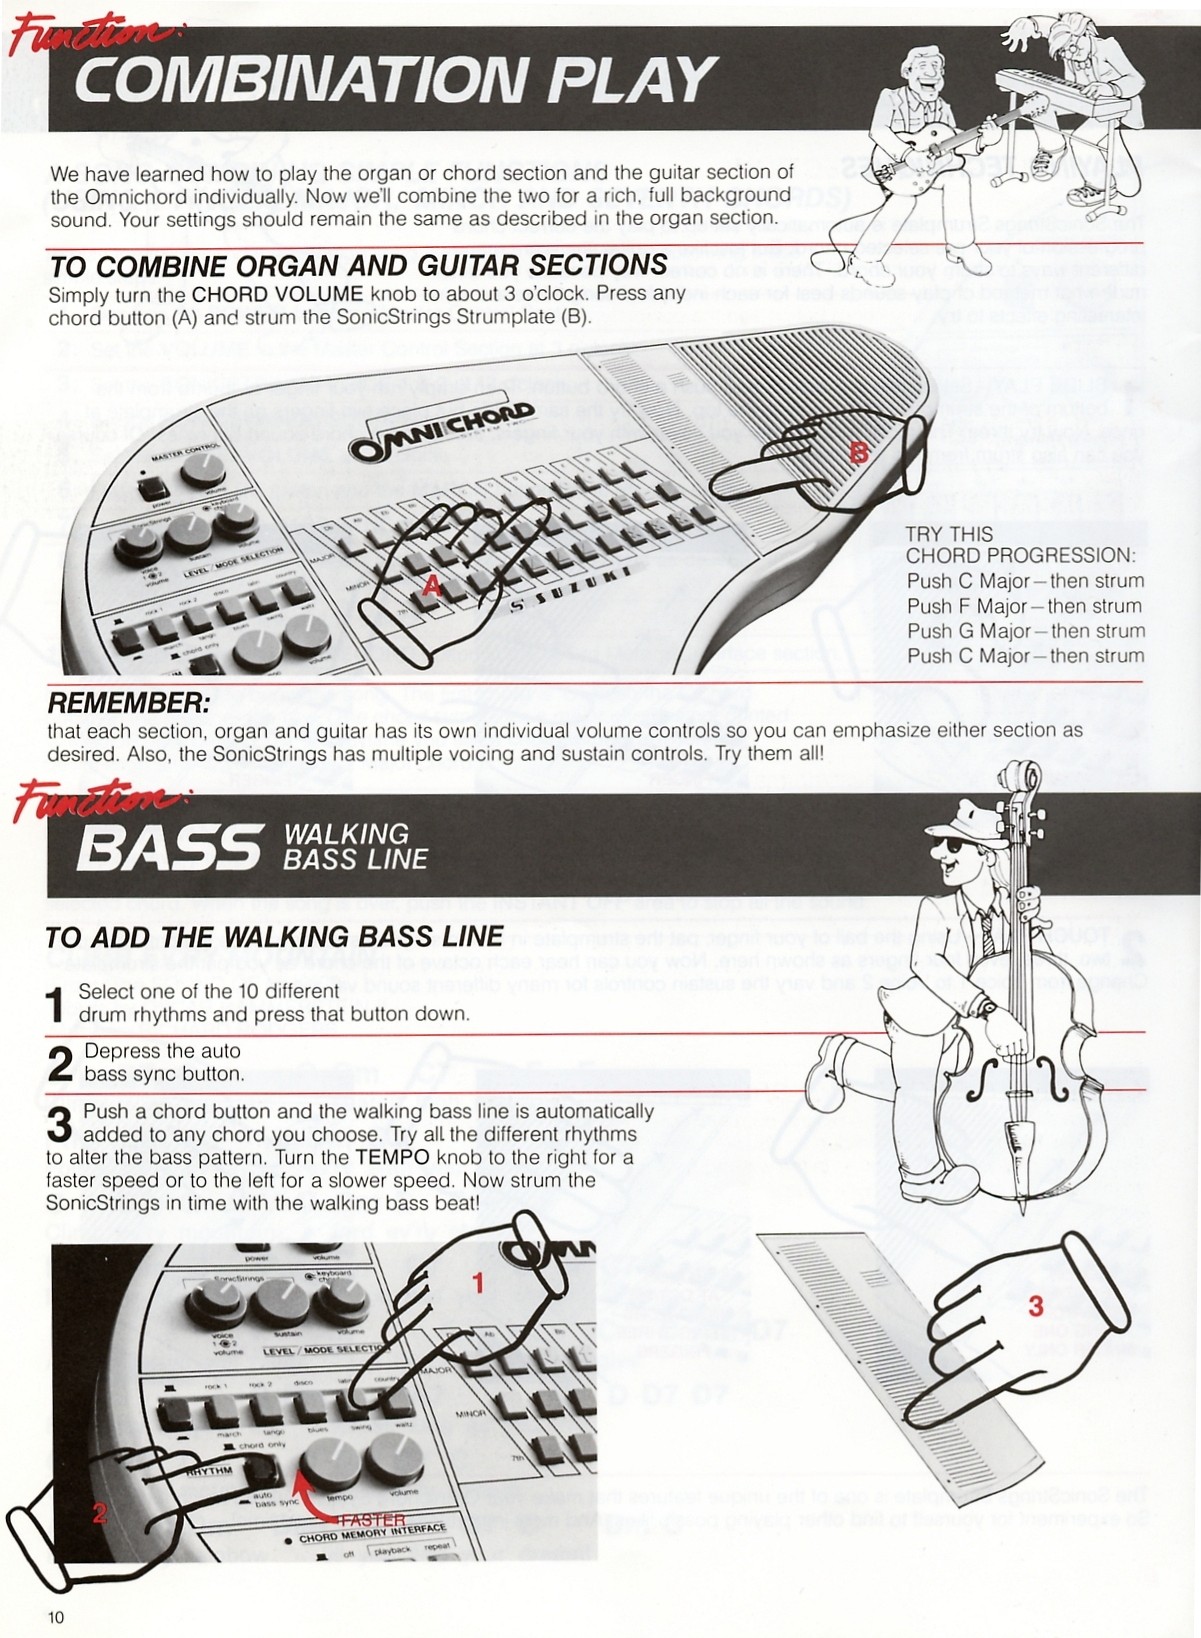
Combine Organ and Guitar
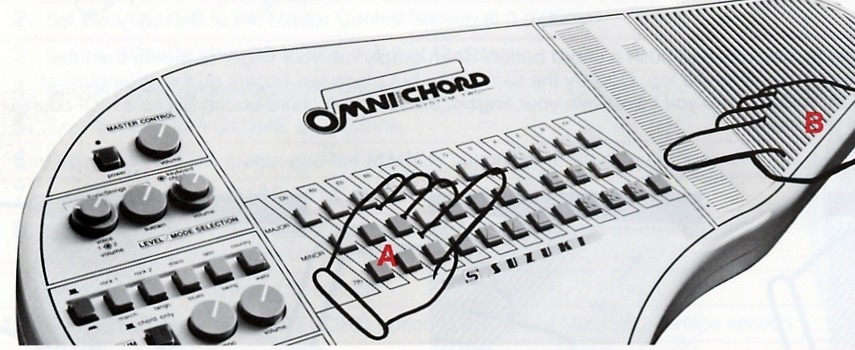
Keep the organ settings already described. Turn CHORD VOLUME to about 3 o'clock, press a chord button and strum the SonicStrings Strumplate. Each section has its own volume control, and the two SonicStrings voices and sustain can be adjusted independently.
Try this progression: C major, F major, G major, C major - strum after each chord.
Add the Walking Bass Line
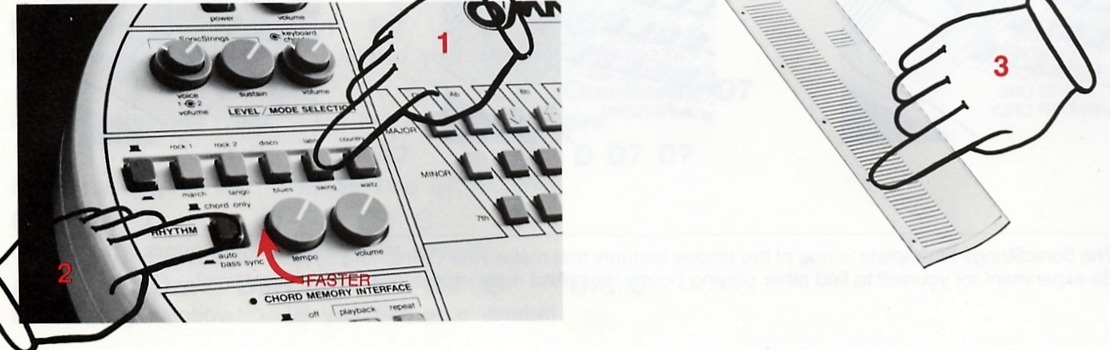
Select one of the 10 drum rhythms and press that button down.
Press the AUTO BASS SYNC button.
Press a chord button. A walking bass line is added automatically. Try different rhythms to alter the bass pattern, adjust TEMPO for a faster or slower speed, and strum the SonicStrings in time with the bass.
Hands selecting a chord and strumming for combined organ and guitar play.Rhythm selection, Auto Bass Sync, tempo adjustment and Strumplate timing for a walking bass line.View original scanned page 10Original page 11
Rhythm section and introductions
Drums and Additional Combinations
Complete the background accompaniment
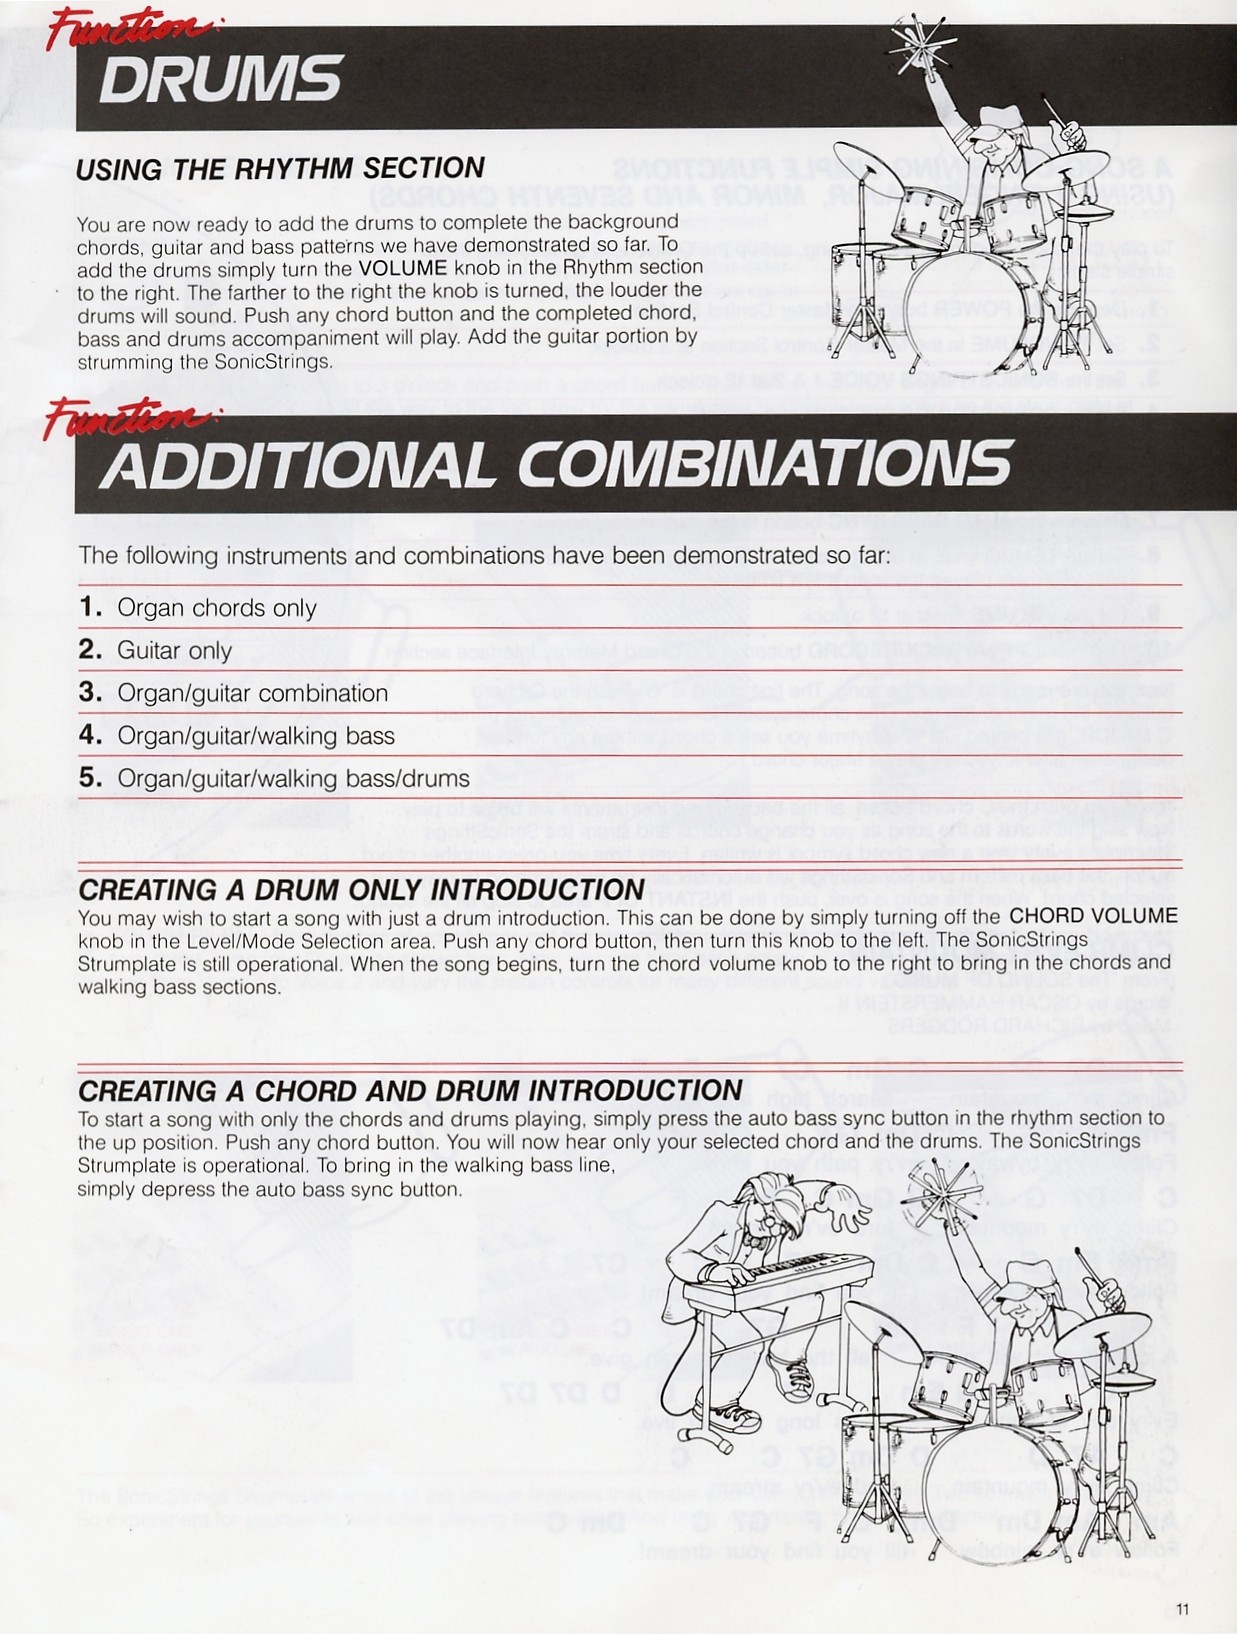
Using the Rhythm Section
Turn the Rhythm VOLUME knob clockwise to add drums; the farther it is turned, the louder they become. Press a chord button for chord, bass and drum accompaniment. Add guitar by strumming the SonicStrings.
Combinations Demonstrated
Organ chords only
Guitar only
Organ and guitar
Organ, guitar and walking bass
Organ, guitar, walking bass and drums
Create a Drum-Only Introduction
Turn CHORD VOLUME off, press a chord button and begin with the drums while the Strumplate remains available. When the song starts, turn CHORD VOLUME clockwise to bring in chords and walking bass.
Create a Chord-and-Drum Introduction
Put AUTO BASS SYNC in the up position, then press a chord. Chords and drums play without walking bass. Strum the SonicStrings if desired; press AUTO BASS SYNC later to add the walking bass line.
Original drummer illustration from the rhythm-section instructions.Original organ-and-drums illustration.View original scanned page 11Original page 12
One-finger major, minor and seventh chords
Demonstration Song: Beginning Level
A song combining simple functions
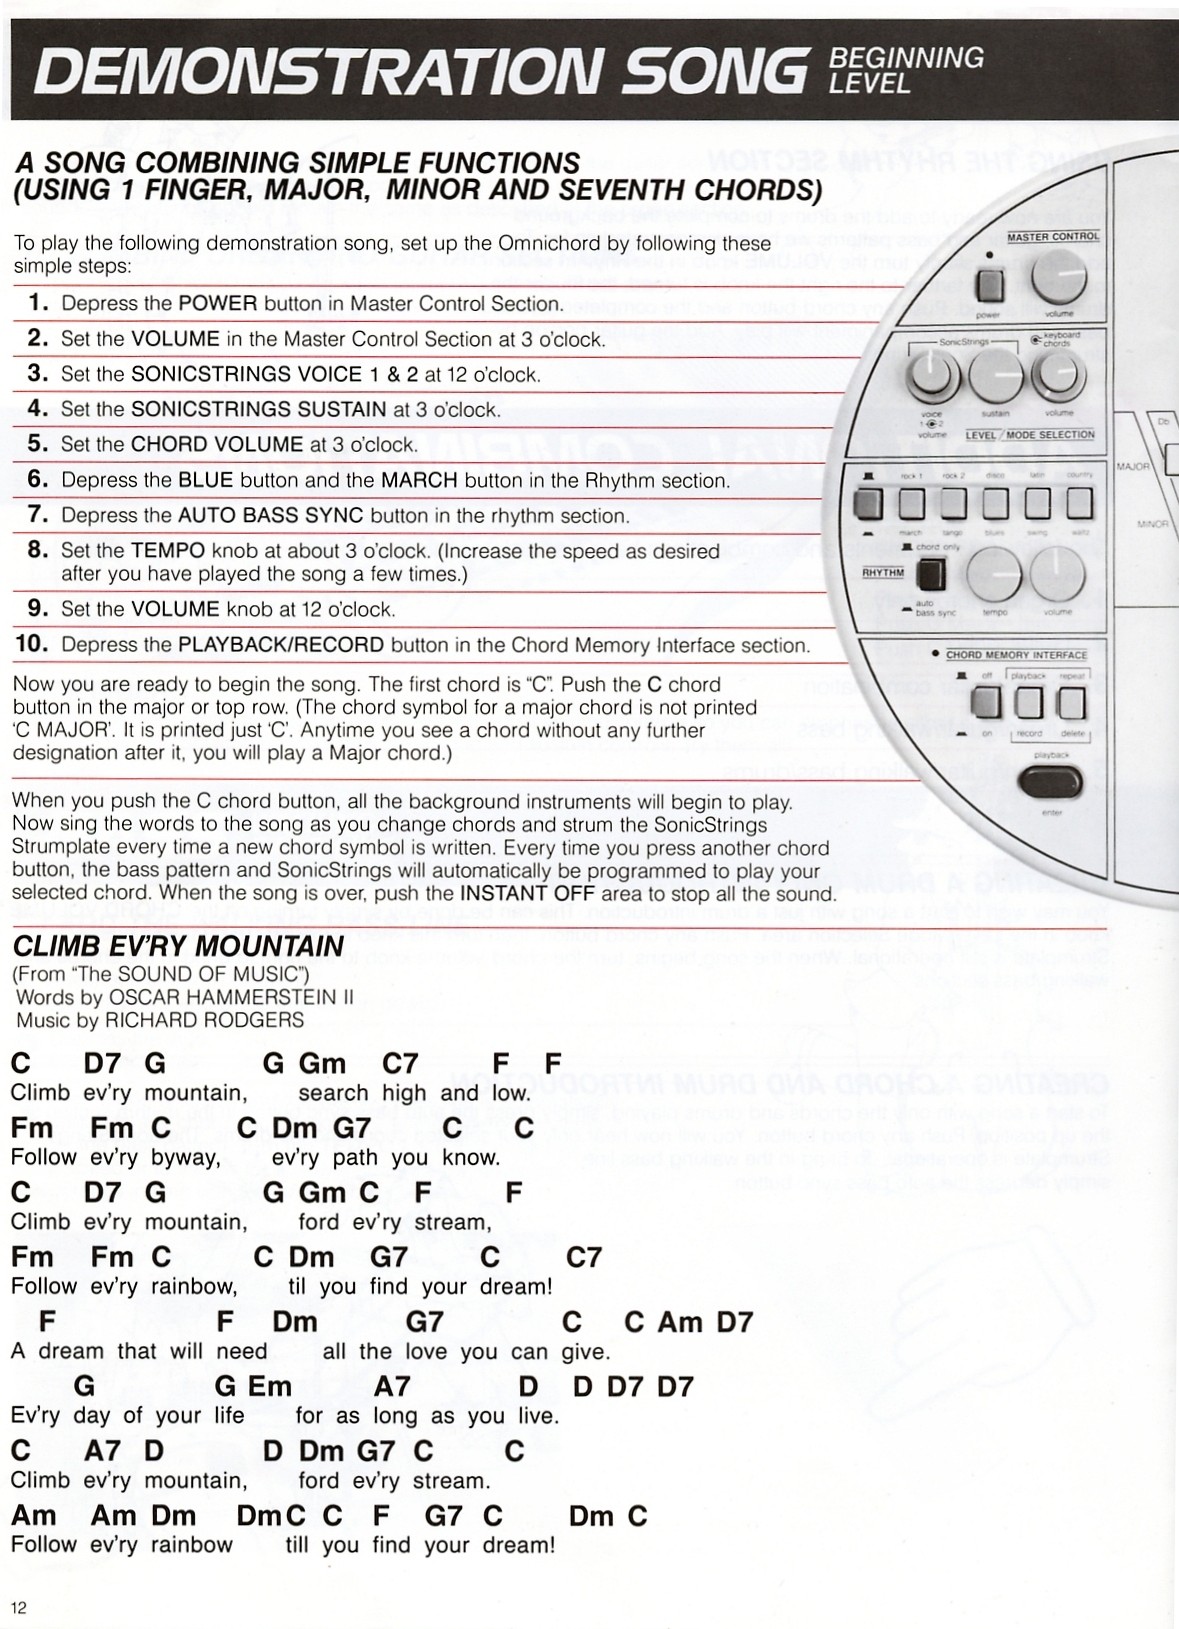
Set up the Omnichord as follows before playing the printed demonstration song:
Press POWER in the Master Control section.
Set MASTER VOLUME to 3 o'clock.
Set SONICSTRINGS VOICE 1 and VOICE 2 to 12 o'clock.
Set SONICSTRINGS SUSTAIN to 3 o'clock.
Set CHORD VOLUME to 3 o'clock.
Press the blue rhythm button and the MARCH rhythm button.
Press AUTO BASS SYNC.
Set TEMPO to about 3 o'clock, increasing it later if desired.
Set RHYTHM VOLUME to 12 o'clock.
Press PLAYBACK/RECORD in the Chord Memory Interface section.
The first chord is C major. Press the C button in the top row. A plain chord letter means major even when 'major' is not printed after it.
When a chord is pressed, the background instruments begin. Sing while changing chords and strum the SonicStrings whenever a new chord symbol appears. Press INSTANT OFF when the song ends.
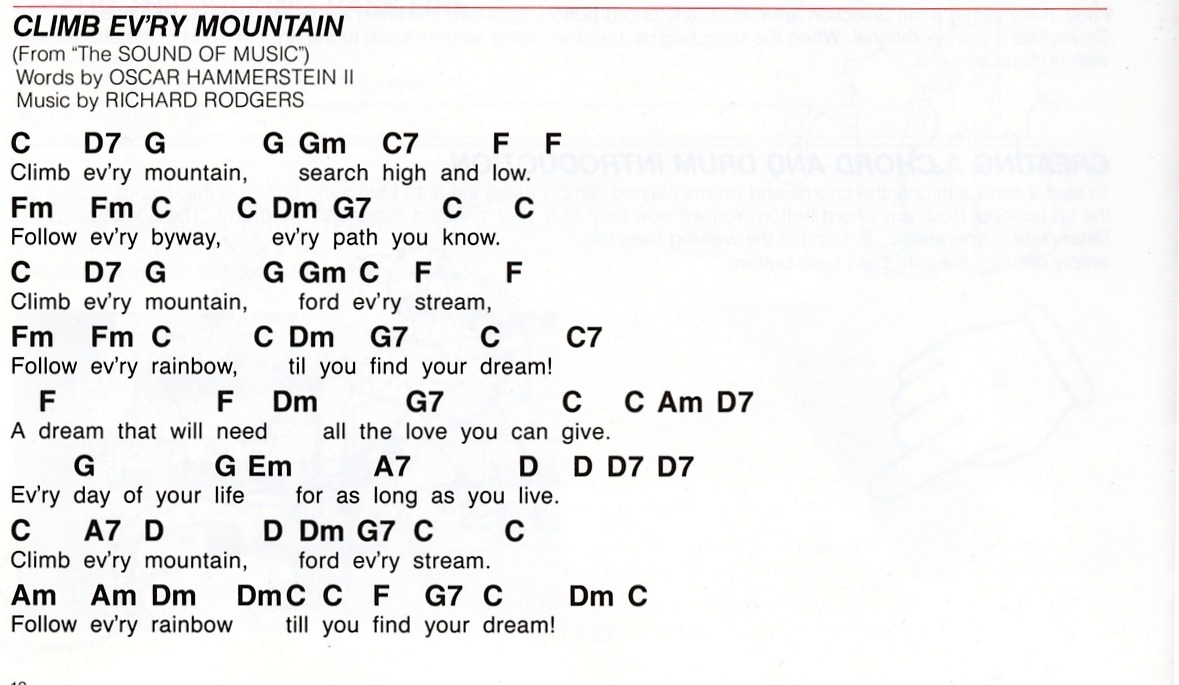
Beginning-level demonstration song retained as an image to preserve chord and lyric alignment.View original scanned page 12Original page 13
Memory capacity: 51 chords
Chord Memory Interface: Programming
Program a song for one-finger playback
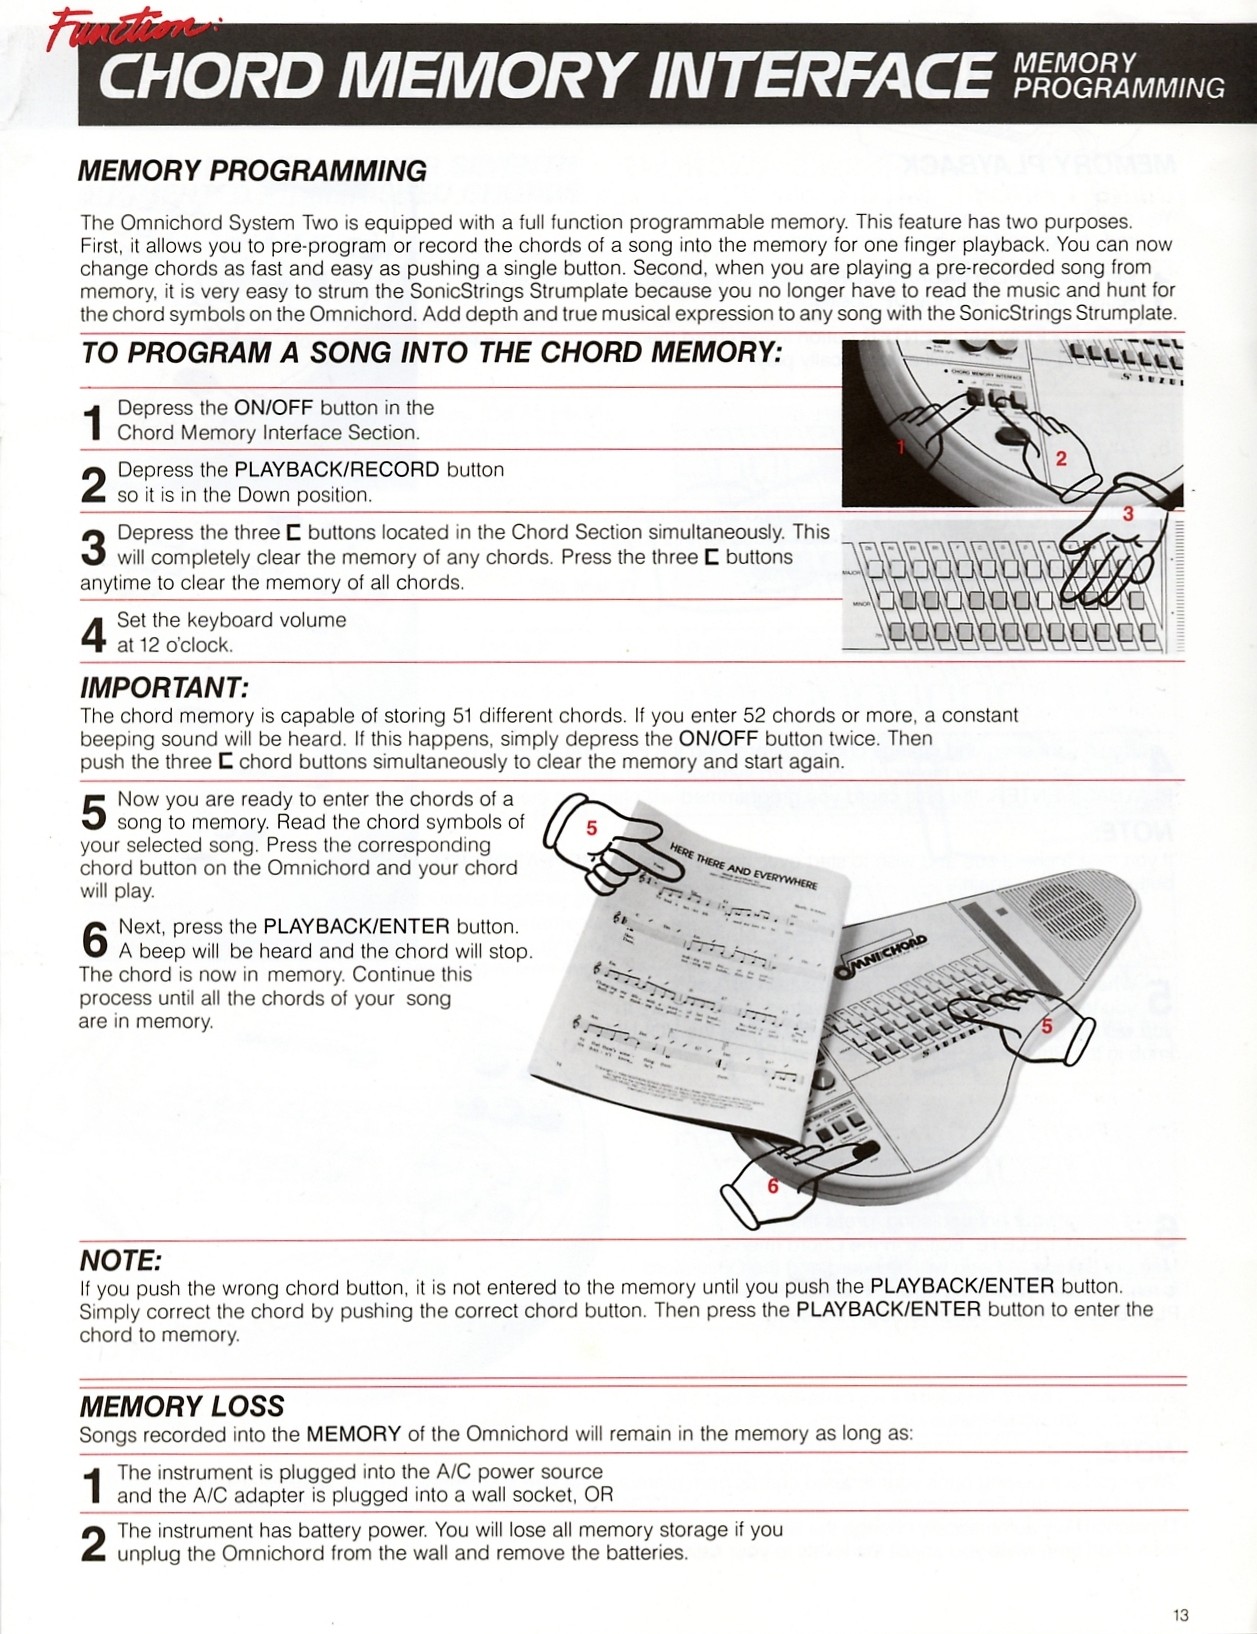
The programmable memory can store the chords of a song for one-finger playback. During playback you can concentrate on strumming the SonicStrings instead of searching for chord buttons.
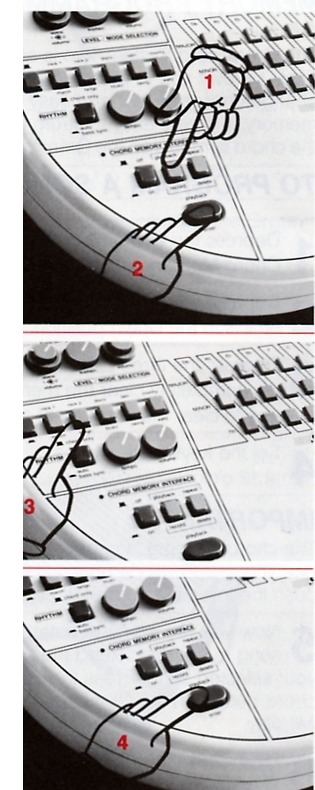
Press ON/OFF in the Chord Memory Interface section.
Press PLAYBACK/RECORD so it is in the down position.
Press the three E buttons together to clear all chords from memory. The same three buttons clear the memory at any time.
Set KEYBOARD VOLUME to 12 o'clock.
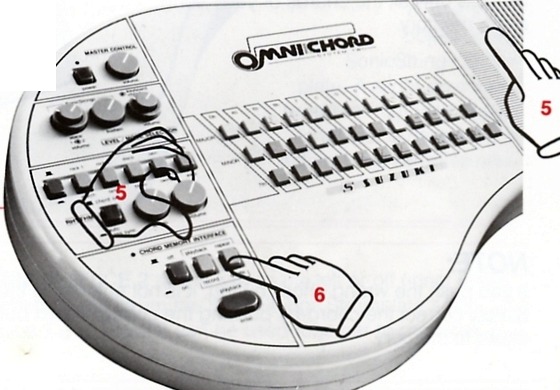
Read each chord symbol in the song and press the corresponding Omnichord chord button.
Press PLAYBACK/ENTER. A beep sounds and the chord stops, confirming that it is stored. Continue until all chords are in memory.
Correct a Chord Before Entering It
A pressed chord is not stored until PLAYBACK/ENTER is pressed. If the wrong button is selected, simply press the correct chord and then press PLAYBACK/ENTER.
Memory Loss
Stored songs remain in memory while the instrument is connected to an A/C power source and the adapter remains plugged into the wall, or while the instrument has battery power. Memory is lost if the Omnichord is unplugged and the batteries are removed.
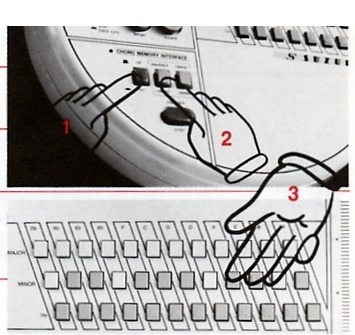
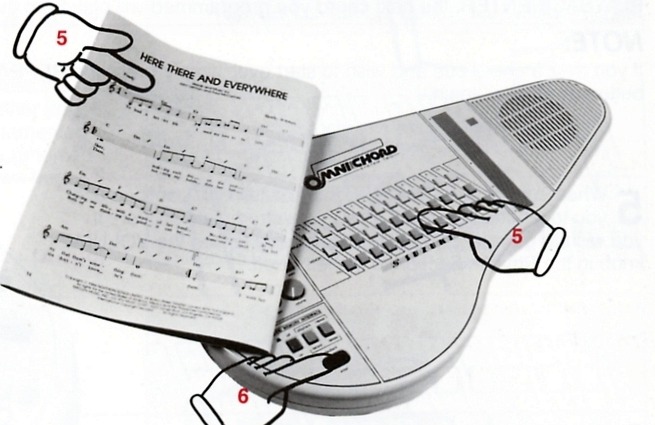
Original memory-programming illustrations showing the memory controls and chord buttons.Original illustration showing chords being entered from printed music.View original scanned page 13Original page 14
One-finger chord changes from memory
Chord Memory Interface: Playback
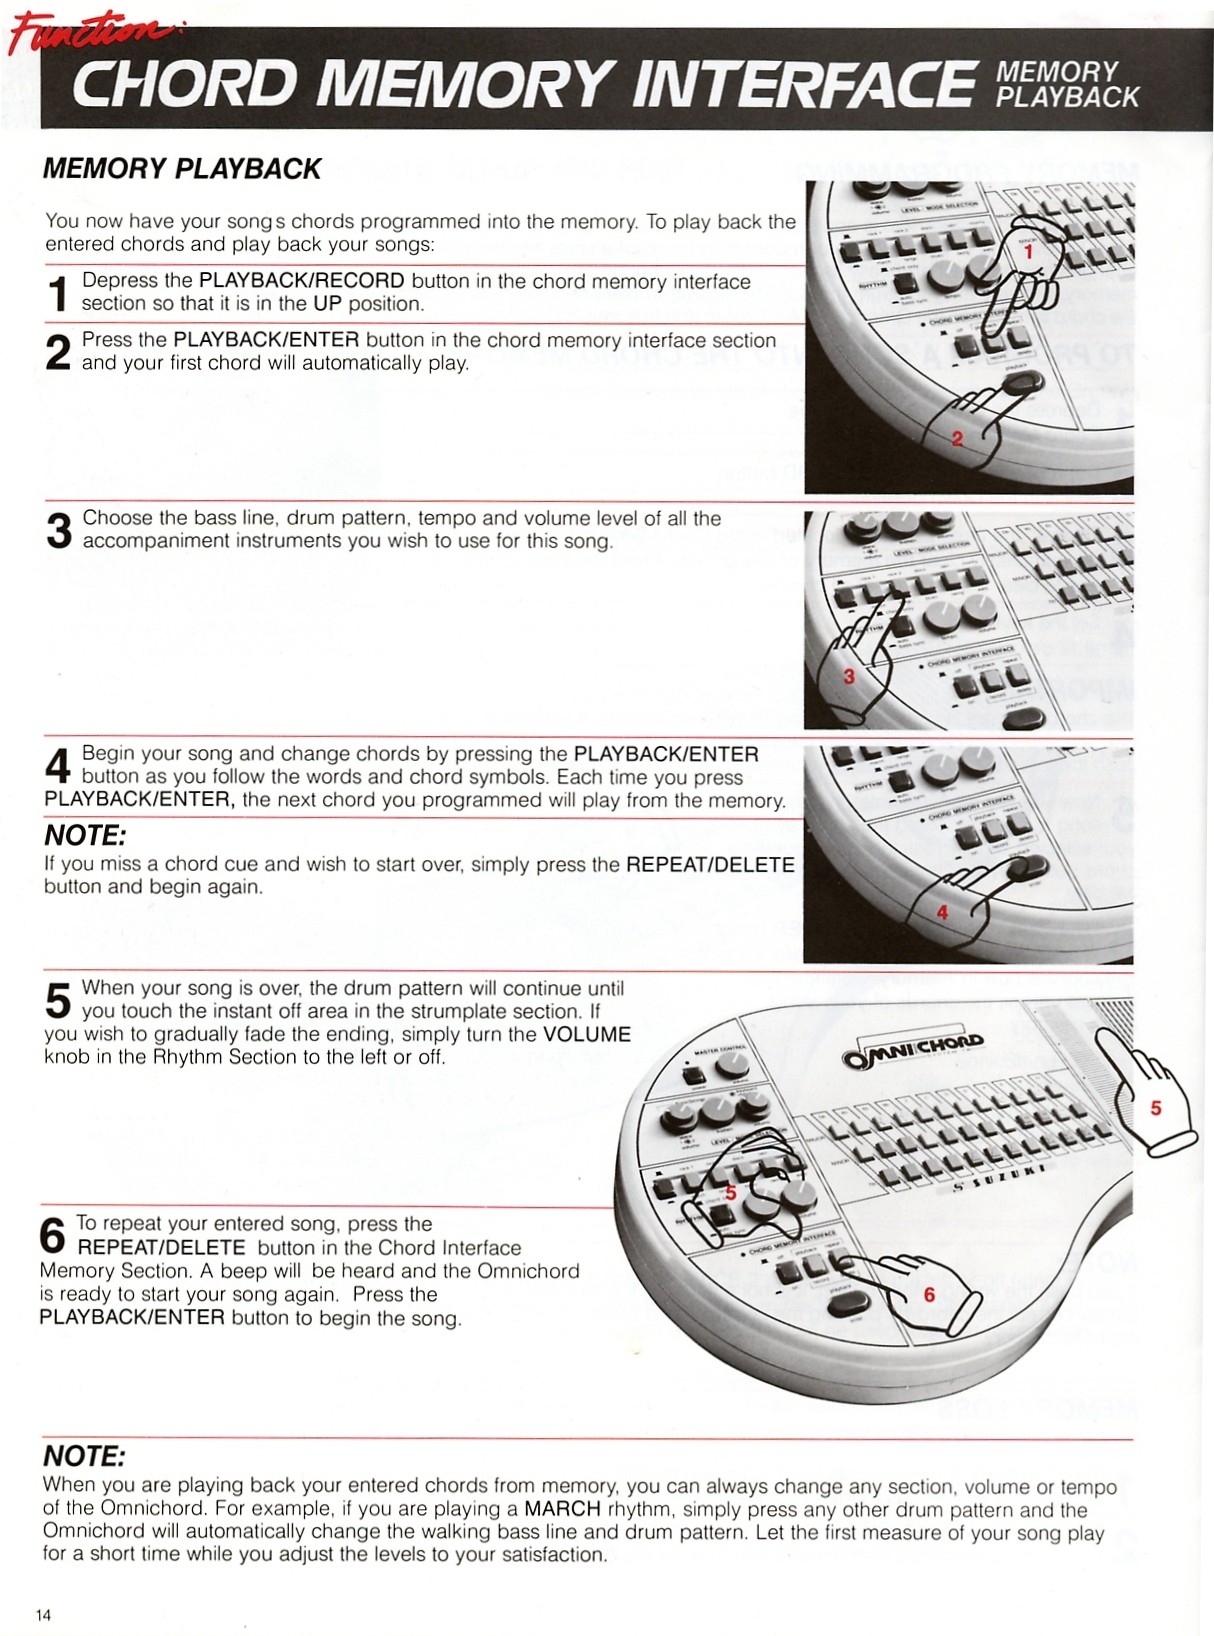
Play back the stored chord sequence
Set PLAYBACK/RECORD to the up position.
Press PLAYBACK/ENTER. The first stored chord plays automatically.
Choose the bass line, drum pattern, tempo and accompaniment levels for the song.
Begin the song. Press PLAYBACK/ENTER at each chord cue; every press advances to the next stored chord.
At the end, touch INSTANT OFF to stop the continuing drum pattern, or turn Rhythm VOLUME left for a gradual fade.
To repeat the song, press REPEAT/DELETE. A beep confirms readiness; press PLAYBACK/ENTER to begin again.
Original sequence of controls used to begin and advance memory playback.Original illustration showing memory-playback ending and repeat controls.View original scanned page 14Original page 15
Memory editing and second endings
Delete, Omit and Skip
Correct mistakes made while programming memory
Delete
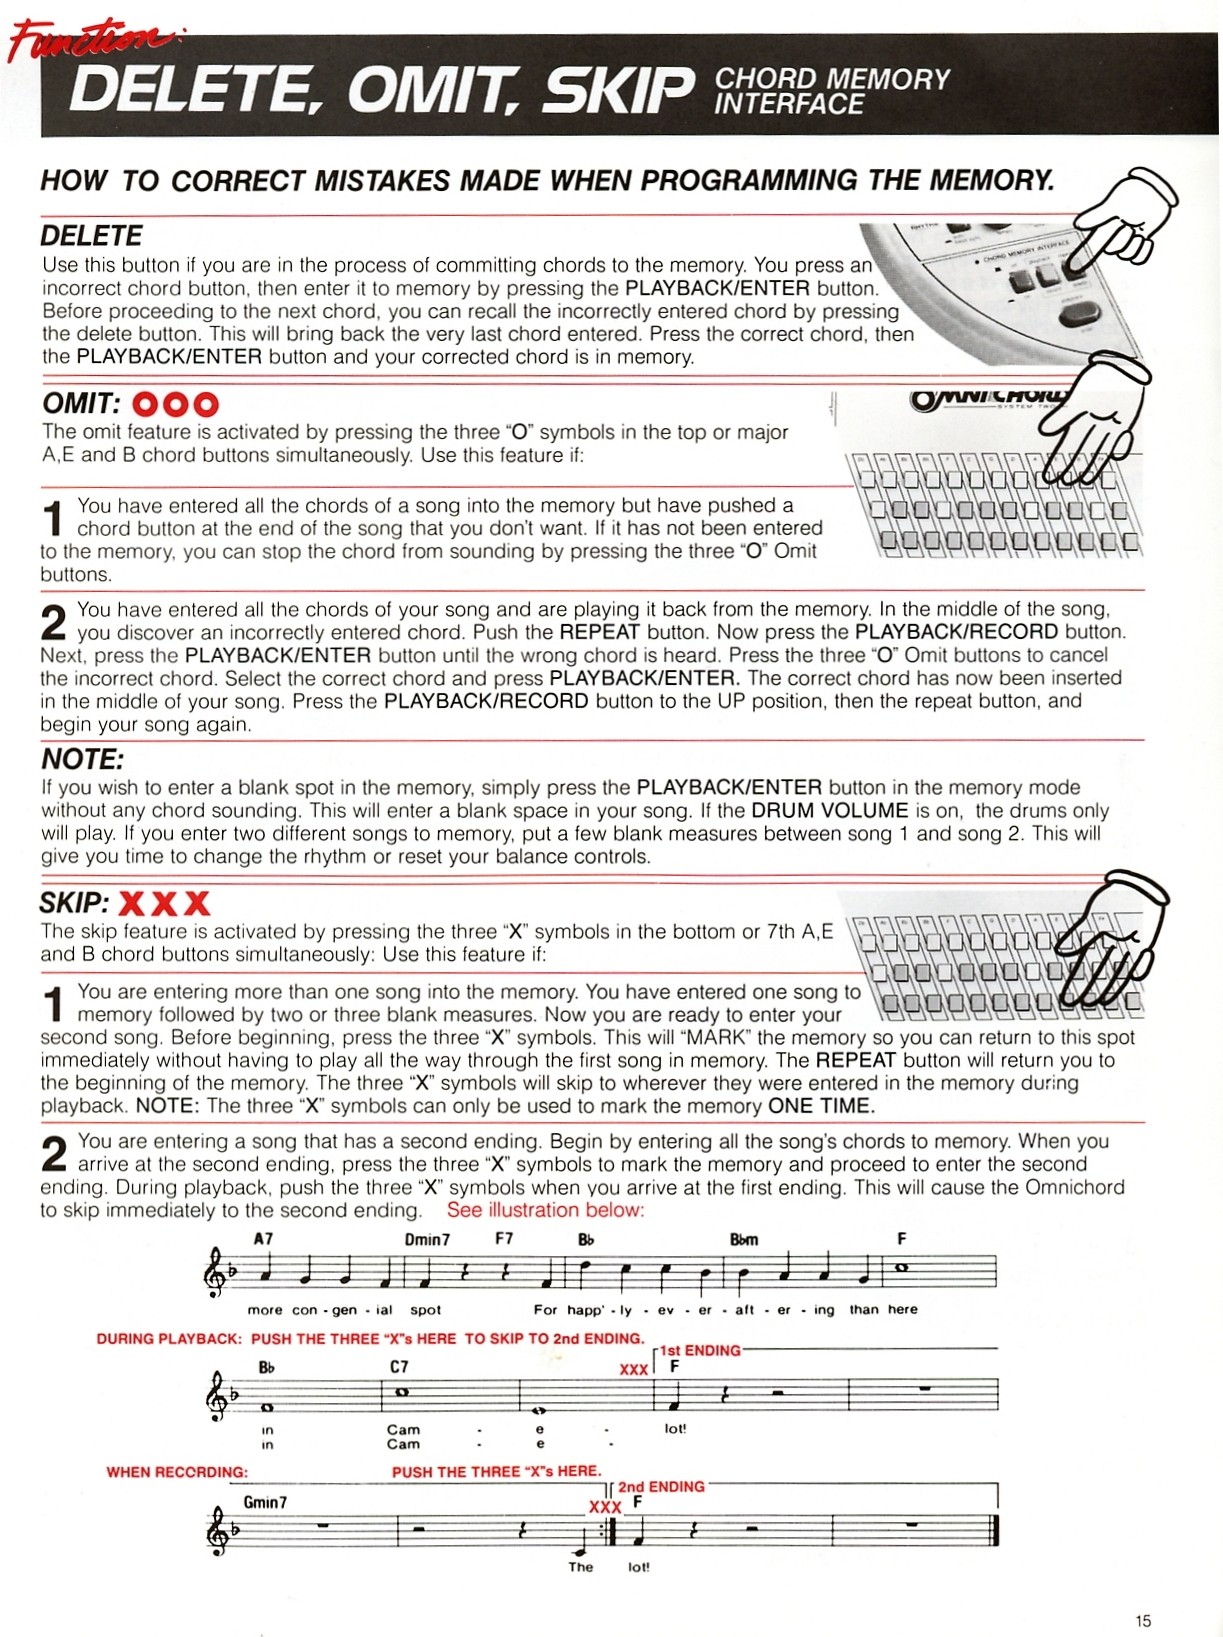
If a wrong chord has already been entered, press DELETE before moving to the next chord. The last stored chord returns. Select the correct chord and press PLAYBACK/ENTER to store the correction.
Omit
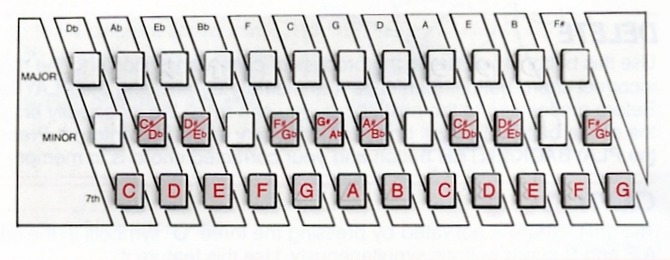
OMIT is activated by pressing the three O-marked major-row buttons - A, E and B - together.
Use OMIT to silence an unwanted selected chord at the end of programming before it has been entered.
To replace a wrong chord already stored in the middle of a song, press REPEAT, switch PLAYBACK/RECORD to record, advance with PLAYBACK/ENTER until the wrong chord sounds, press the three OMIT buttons, select the correct chord and press PLAYBACK/ENTER. Return PLAYBACK/RECORD to the up position, press REPEAT and begin again.
Blank Measures
Press PLAYBACK/ENTER in memory mode while no chord is sounding to store a blank measure. If drums are on, only the drums play. Place several blank measures between two stored songs to allow time for changing rhythm or balance controls.
Skip
SKIP is activated by pressing the three X-marked seventh-row buttons - A, E and B - together.
After storing one song, leave two or three blank measures and press the three X buttons before entering a second song. This marks the point so it can be reached without playing the first song. The mark can be used only once in memory.
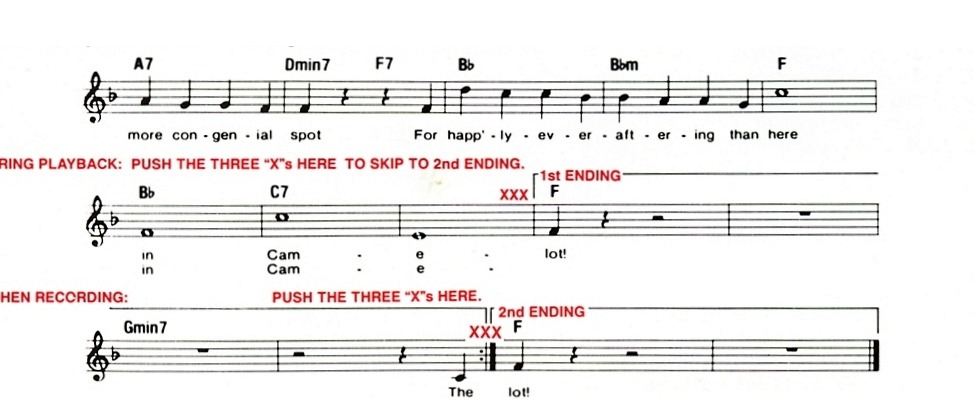
For a song with a second ending, enter the full song. Mark the second-ending position with the three X buttons before entering that ending. During playback, press the three X buttons at the first ending to jump to the stored second ending.
Printed musical example showing how the Skip marker is used with first and second endings.View original scanned page 15Original page 16
Chromatic melody keyboard
Piano: Intermediate Level
Melody keyboard with one-finger chord-memory playback
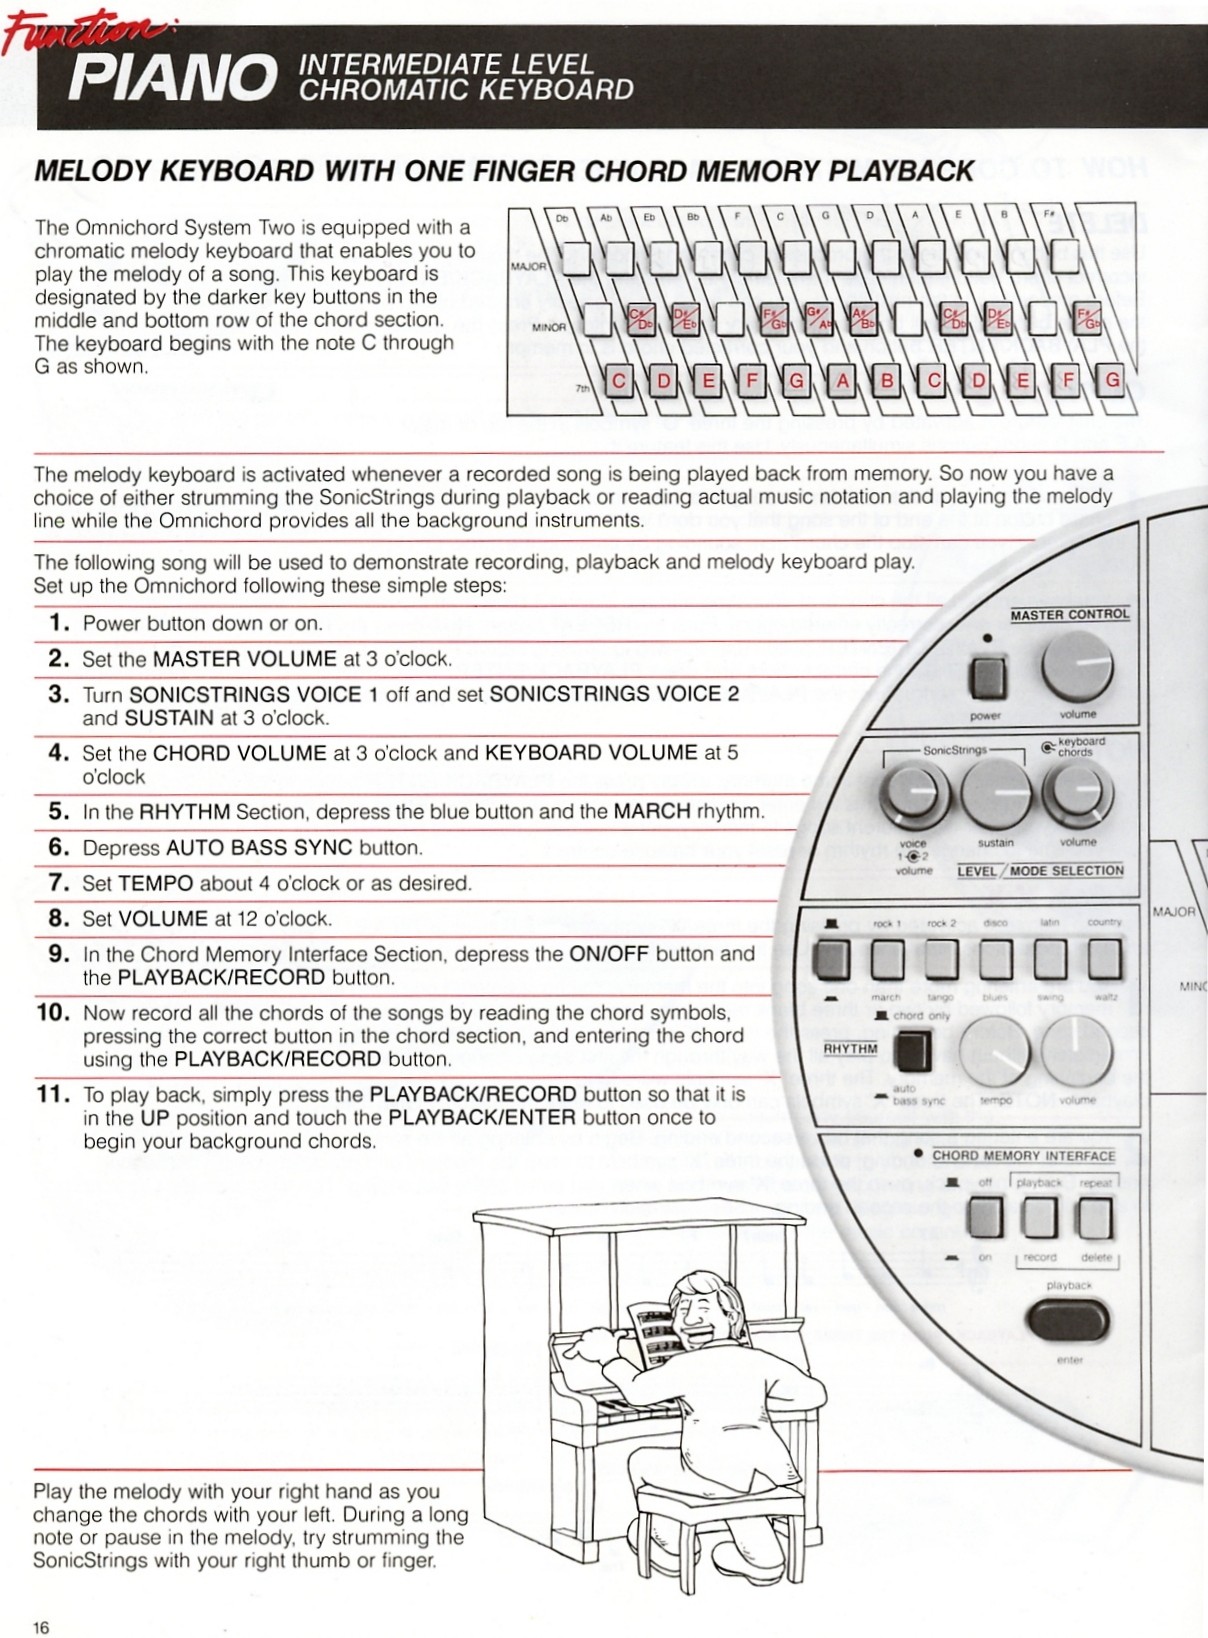
The chromatic melody keyboard uses the darker buttons in the middle and bottom chord rows. It begins with C and continues through G. It is active whenever a recorded song is played from memory, allowing the melody line to be played while the Omnichord supplies the background.
Use the demonstration song on the next page after setting the instrument as follows:
Turn POWER on.
Set MASTER VOLUME to 3 o'clock.
Turn SONICSTRINGS VOICE 1 off; set VOICE 2 and SUSTAIN to 3 o'clock.
Set CHORD VOLUME to 3 o'clock and KEYBOARD VOLUME to 5 o'clock.
Press the blue rhythm button and MARCH.
Press AUTO BASS SYNC.
Set TEMPO to about 4 o'clock, or as desired.
Set RHYTHM VOLUME to 12 o'clock.
Press memory ON/OFF and then PLAYBACK/RECORD.
Record all song chords by selecting each chord and entering it with PLAYBACK/ENTER.
For playback, put PLAYBACK/RECORD in the up position and press PLAYBACK/ENTER once.
Play the melody with the right hand while changing chords with the left. During a long note or pause, try strumming the SonicStrings with the right thumb or a finger.
Chromatic melody-keyboard layout from C through G.Original illustration of melody play with chord-memory accompaniment.View original scanned page 16Original page 17
Music retained as an image
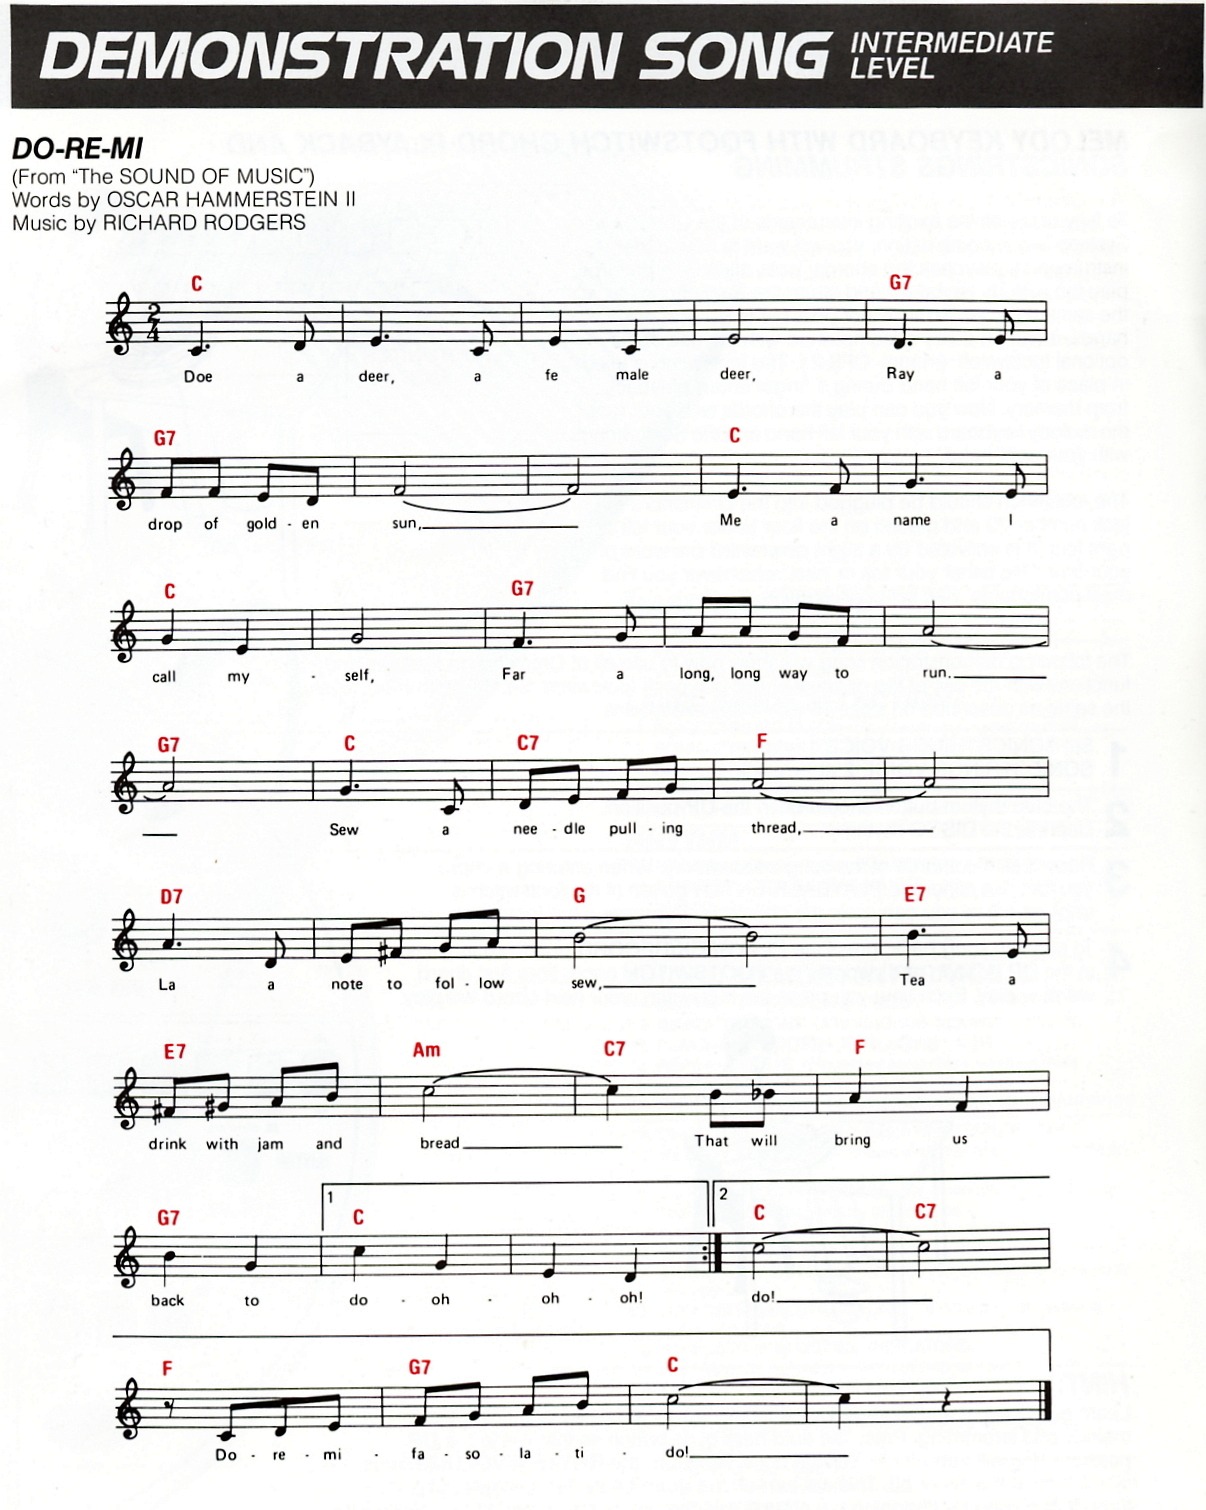
Demonstration Song: Intermediate Level
Melody, chords and first/second endings
Use the chromatic melody keyboard and memory-playback instructions from page 16. The complete printed score is retained below so notes, chords, lyrics and ending brackets remain aligned.
Intermediate-level demonstration score retained as an image.View original scanned page 17Original page 18
Optional OFS-2 footswitch
Piano: Advanced Level
Melody keyboard, footswitch playback and SonicStrings strumming
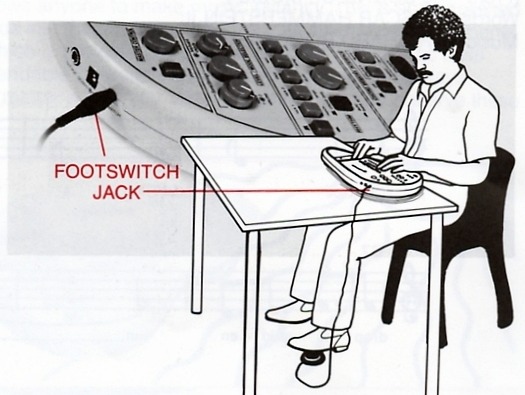
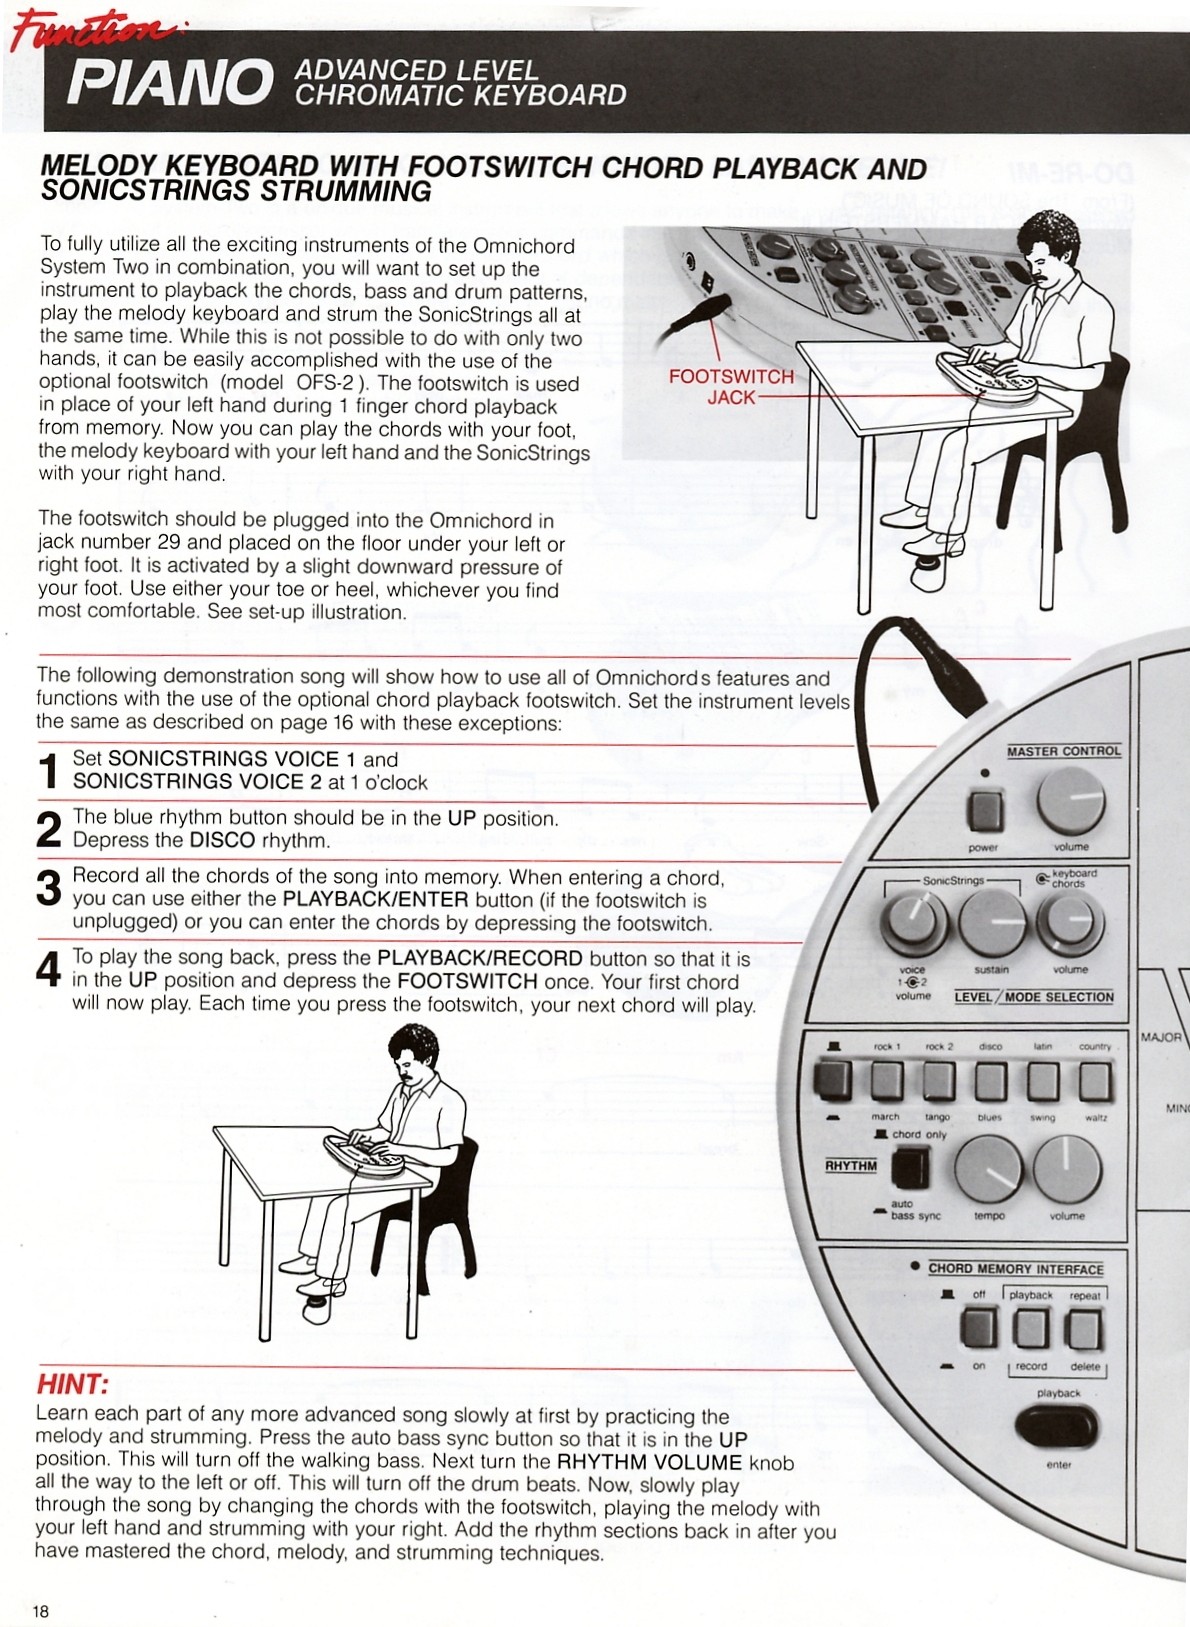
For simultaneous memory playback, melody and Strumplate playing, connect the optional OFS-2 footswitch. It takes the place of the left hand for advancing stored chords: the foot changes chords, the left hand plays the melody keyboard and the right hand strums.
Connect the footswitch to jack 30 and place it beneath either foot. Activate it with light pressure from a toe or heel.
Use the page 16 settings with these exceptions:
Set SONICSTRINGS VOICE 1 and VOICE 2 to 1 o'clock.
Leave the blue rhythm button up and press DISCO.
Record the song's chords. Enter each chord with PLAYBACK/ENTER or, if connected, the footswitch.
For playback, put PLAYBACK/RECORD in the up position and press the footswitch once. Each further press advances to the next stored chord.
Footswitch connection and playing position for advanced three-part performance.View original scanned page 18Original page 19
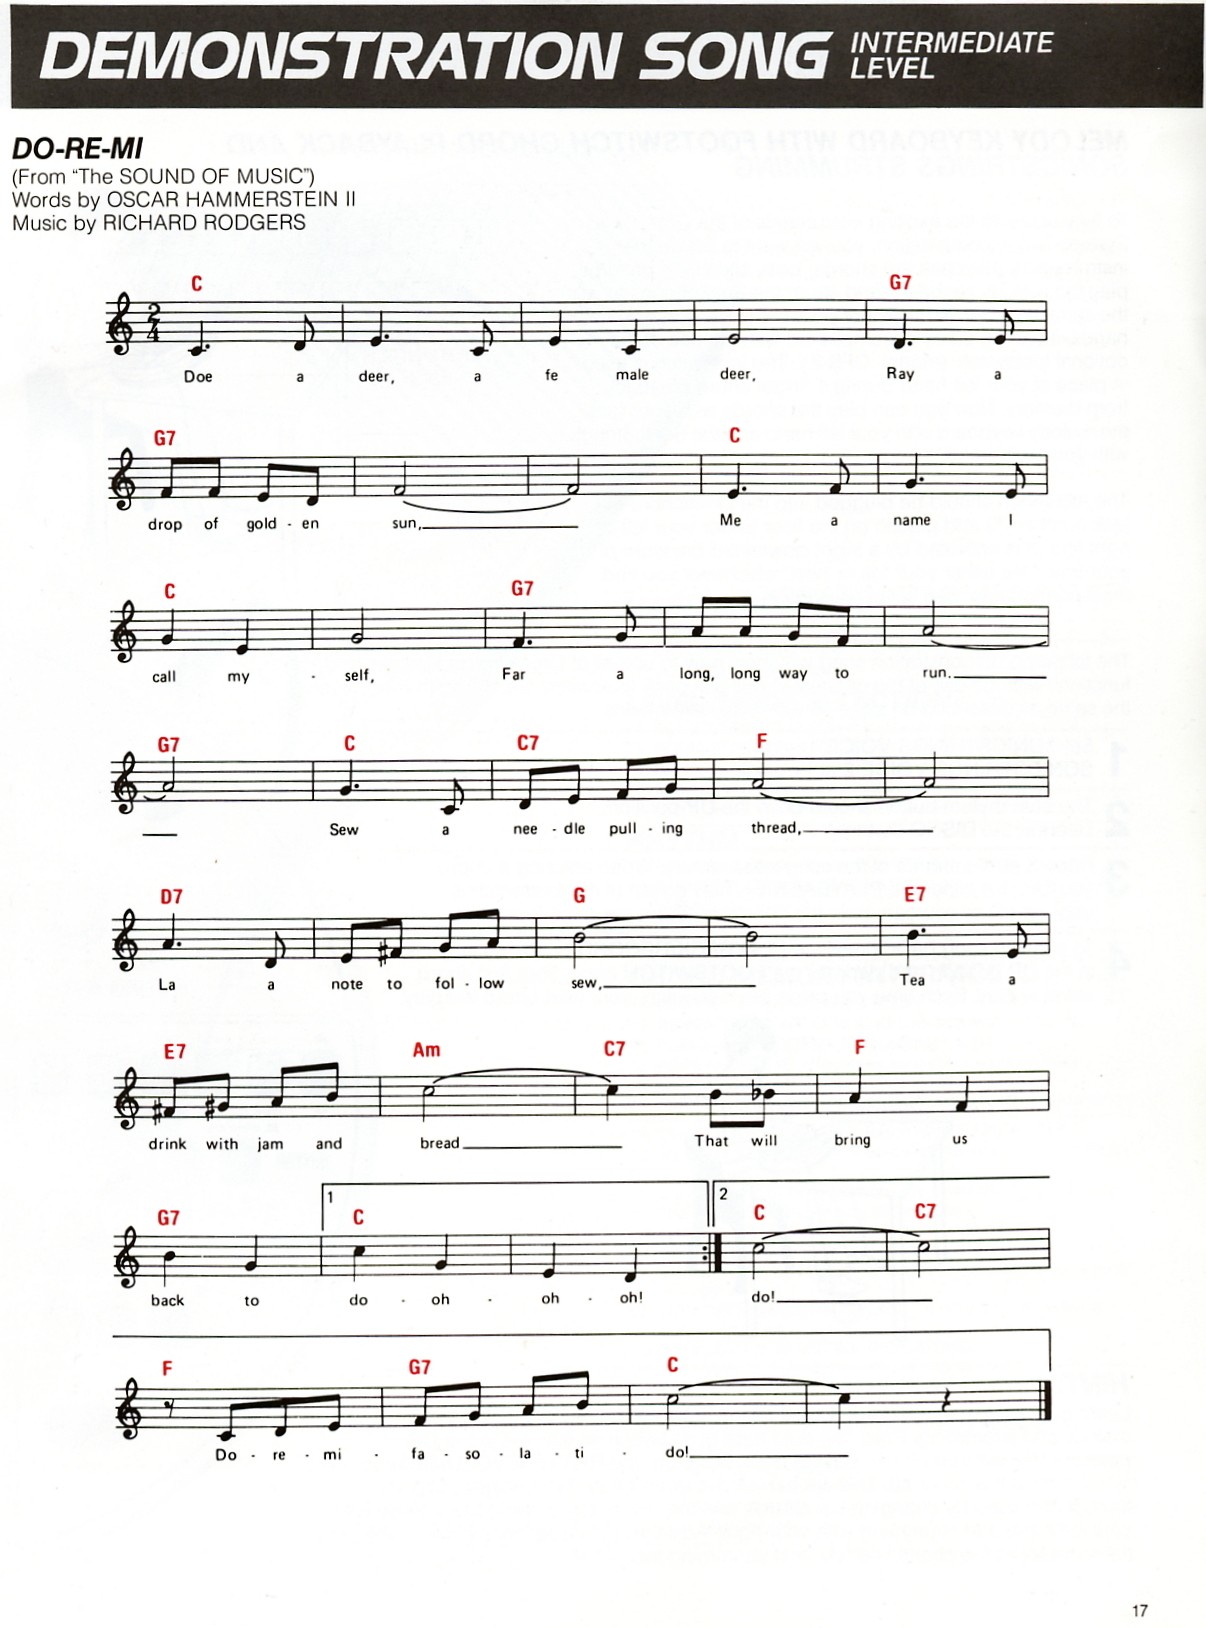
Music retained as an image
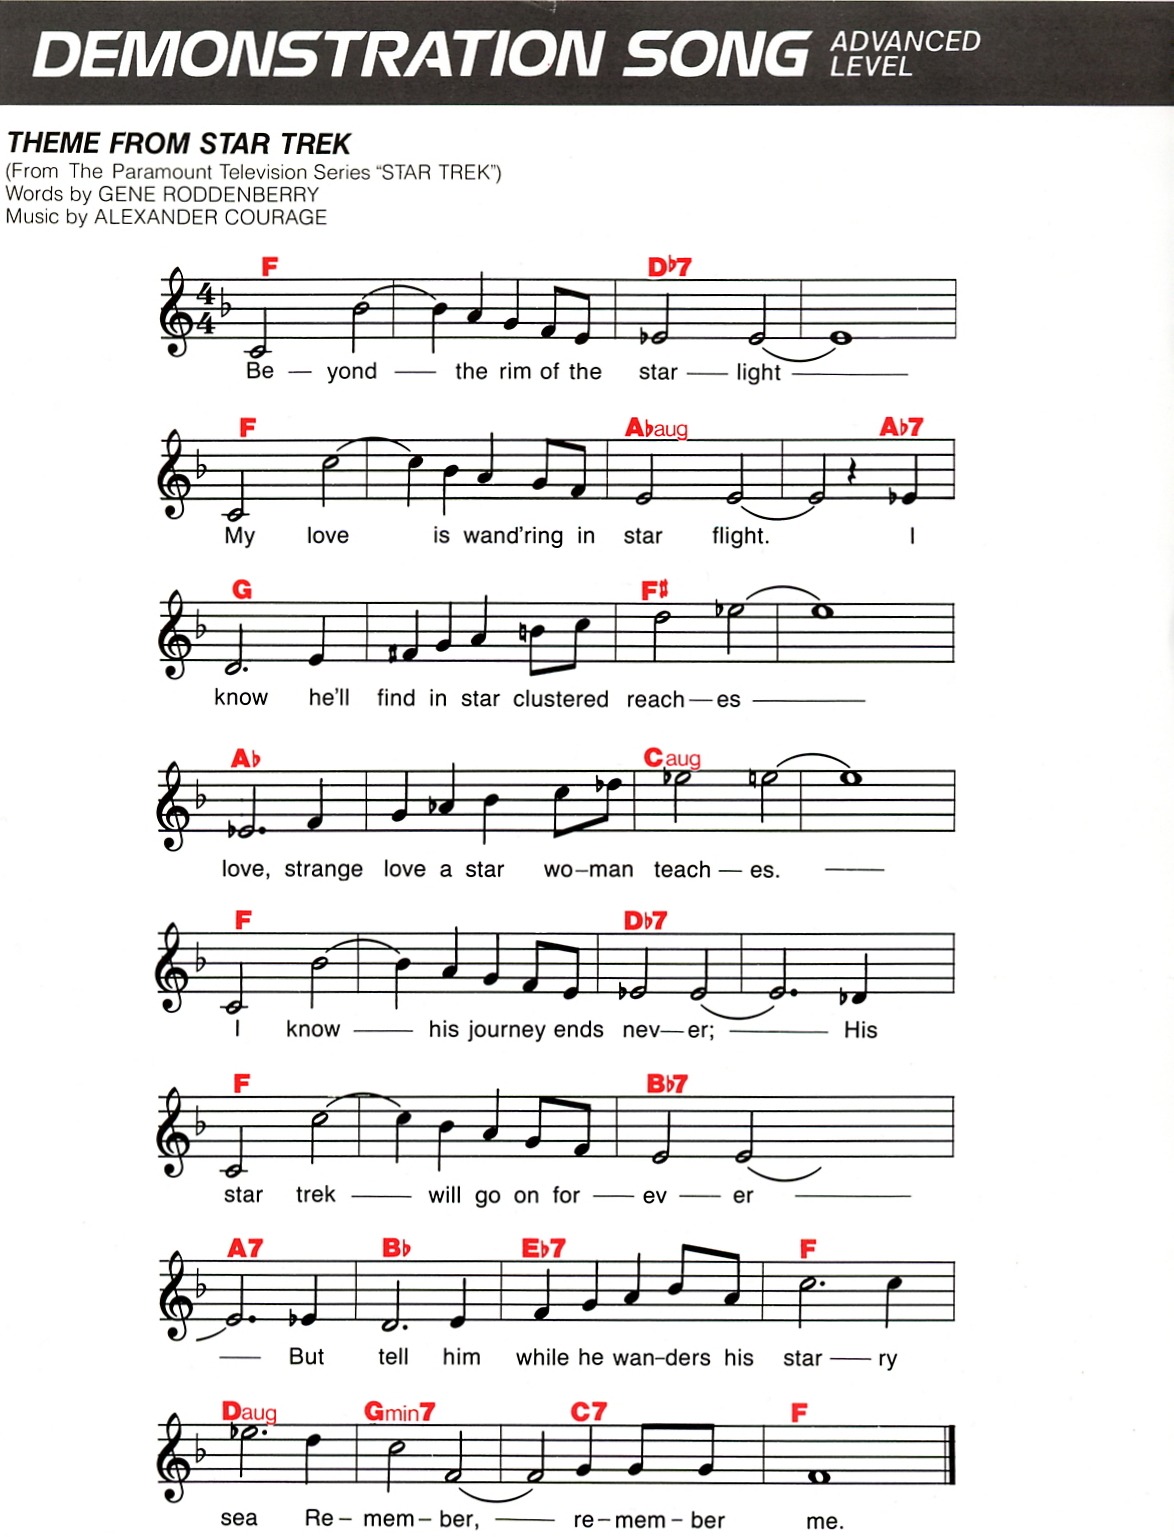
Demonstration Song: Advanced Level
Advanced melody and chord combinations
Use the advanced footswitch, melody-keyboard and Strumplate method from page 18. The complete printed score remains an image to preserve the original notation and alignment.
Advanced-level demonstration score retained as an image.View original scanned page 19Original page 20
Extended OM-84 controls
Additional Features
Transpose, melody only, octave shift and drums only
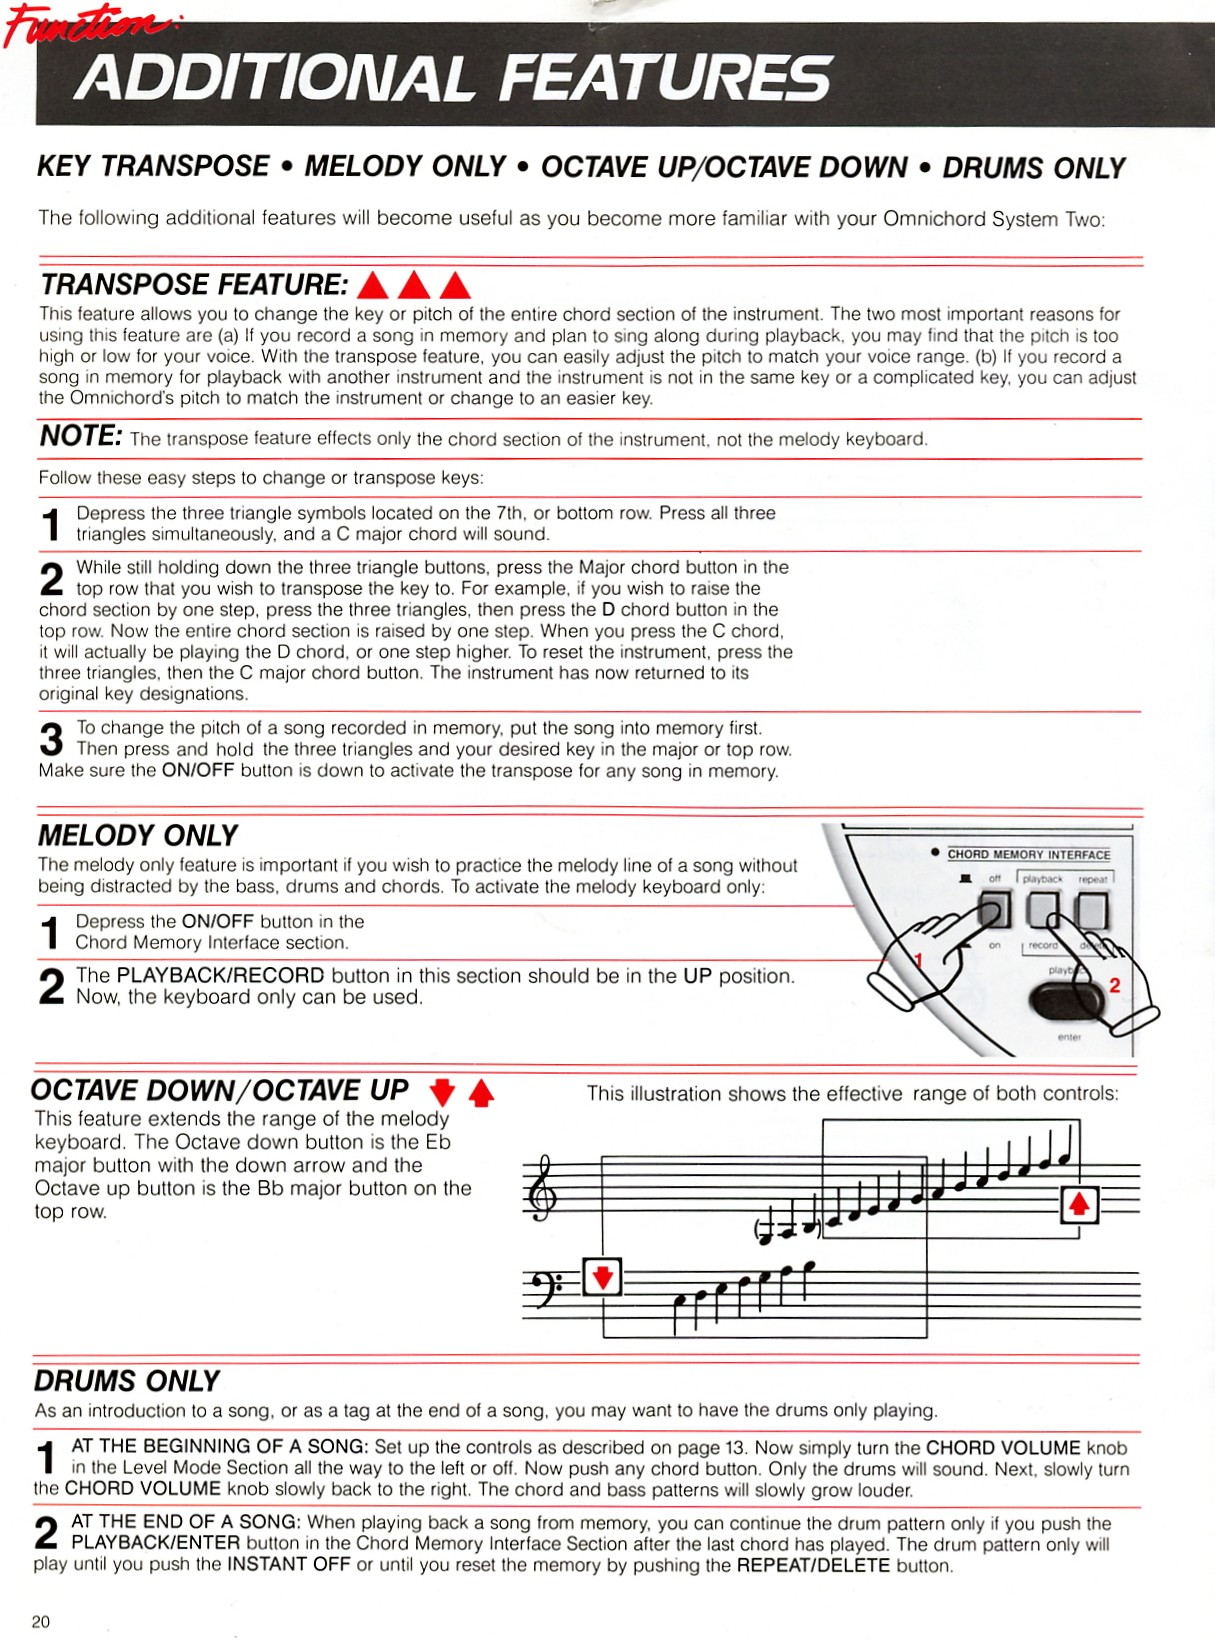
Transpose
Transpose changes the key or pitch of the entire chord section. It can bring a song into a singer's range, match another instrument, or simplify a difficult key. It does not affect the melody keyboard.
Press and hold the three triangle-marked buttons in the seventh row; a C major chord sounds.
While holding the triangles, press the major-row key to which the chord section should be transposed. For example, select D to raise the section by one whole step. Select C to return to the original key.
To transpose a stored song, program it first, then hold the three triangles and press the desired major-row key. Memory ON/OFF must be down.
Melody Only
Use this mode to practise the melody without bass, drums or chords.
Press memory ON/OFF.
Put PLAYBACK/RECORD in the up position. The melody keyboard can now be played by itself.
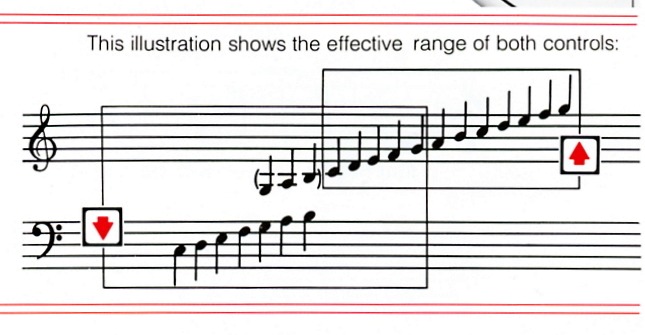
Octave Down / Octave Up
These controls extend the range of the melody keyboard. Octave down is the E-flat major button marked with a downward arrow; octave up is the B-flat major button marked with an upward arrow.
Drums Only
At the beginning of a song, set the controls as for memory play, turn CHORD VOLUME off and press a chord. Only the drums sound. Turn CHORD VOLUME up slowly to bring in chords and bass.
At the end of a stored song, press PLAYBACK/ENTER after the final chord. The drums continue until INSTANT OFF is touched or REPEAT/DELETE resets the memory.
Musical-staff diagram showing the effective ranges of Octave Down and Octave Up.View original scanned page 20Original page 21
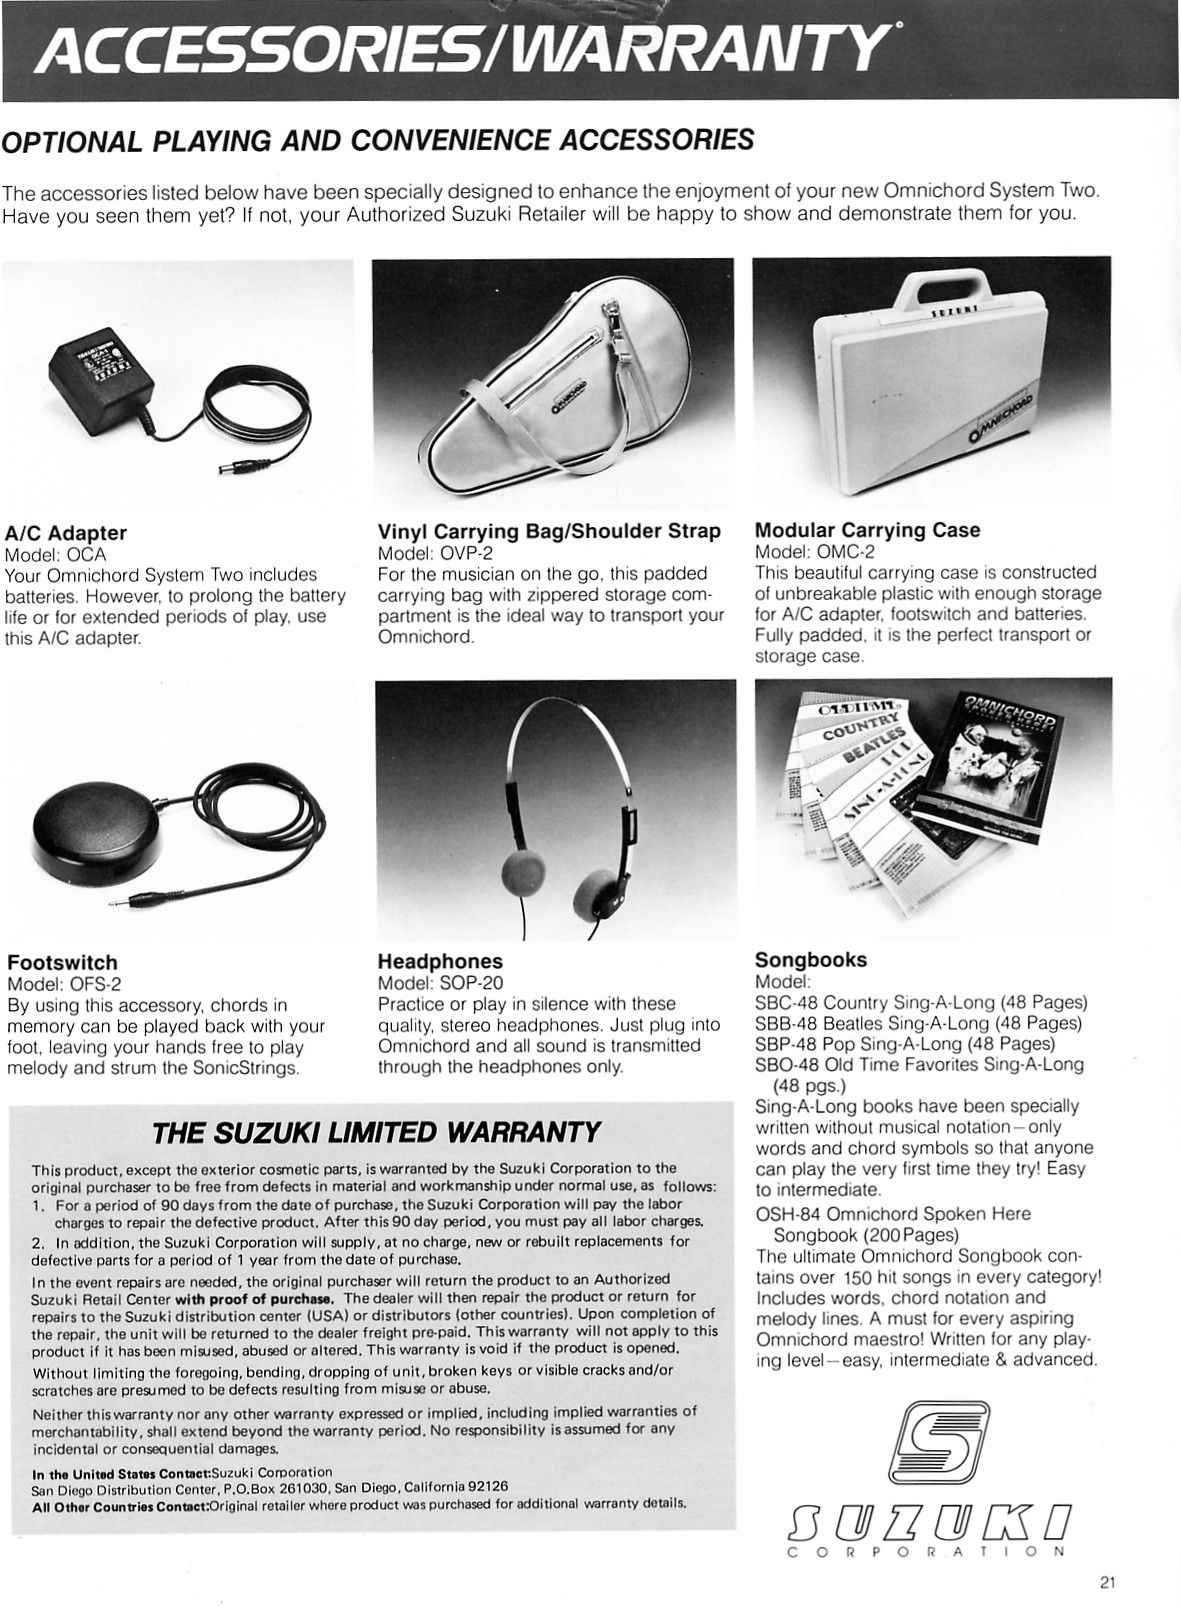
Original accessories and warranty terms
Accessories and Warranty
Historical product information
The accessories listed in the original manual were designed for the Omnichord System Two. Model numbers and availability are reproduced for historical reference.
Suzuki Limited Warranty
The original warranty covered defects in material and workmanship under normal use, excluding exterior cosmetic parts. For 90 days from purchase, Suzuki paid labour charges for repair; for one year, Suzuki supplied new or rebuilt replacement parts without charge.
The original purchaser was instructed to return the product to an authorized retail centre with proof of purchase. Misuse, abuse, alteration or opening the product voided the warranty. Bending, dropping, visible cracks or scratches were presumed to result from misuse or abuse.
The warranty stated that no expressed or implied warranty, including merchantability, extended beyond the warranty period, and disclaimed responsibility for incidental or consequential damages. Original contact details were Suzuki Corporation, San Diego Distribution Center, P.O. Box 261030, San Diego, California 92126; owners in other countries were directed to the original retailer.
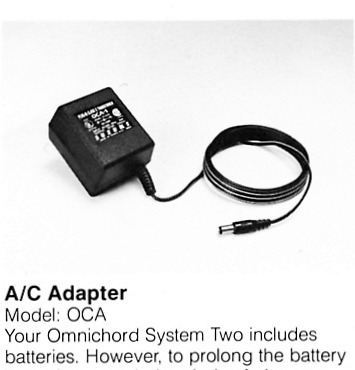
A/C Adapter
OCA
For extended playing while conserving batteries.
Vinyl Carrying Bag and Shoulder Strap
OVP-2
Padded zippered bag with a storage compartment.
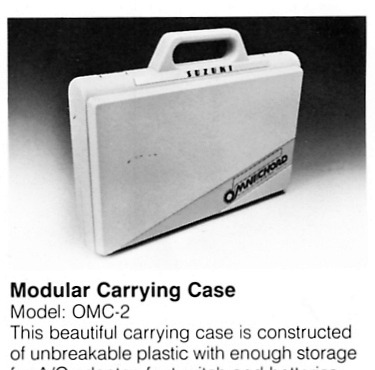
Modular Carrying Case
OMC-2
Padded hard case with storage for an adapter, footswitch and batteries.
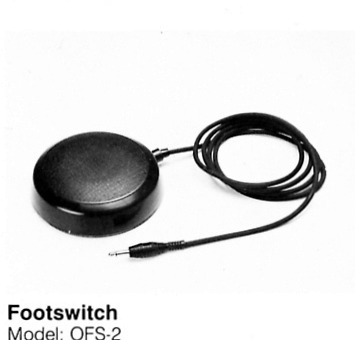
Footswitch
OFS-2
Advances memory-playback chords by foot, leaving both hands free for melody and Strumplate playing.
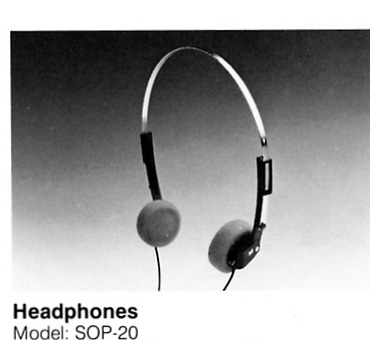
Headphones
SOP-20
Stereo headphones for private practice; connecting them silences the internal speaker.
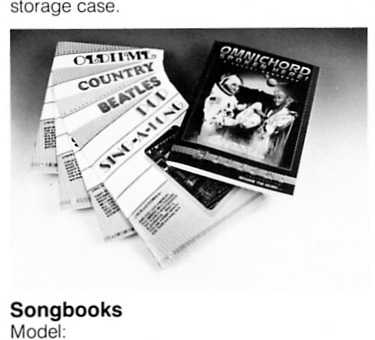
Songbooks
SBC-48, SBB-48, SBP-48, SBO-48 and OSH-84
Country, Beatles, pop, old-time and Omnichord Spoken Here songbooks were listed for easy through advanced playing.